
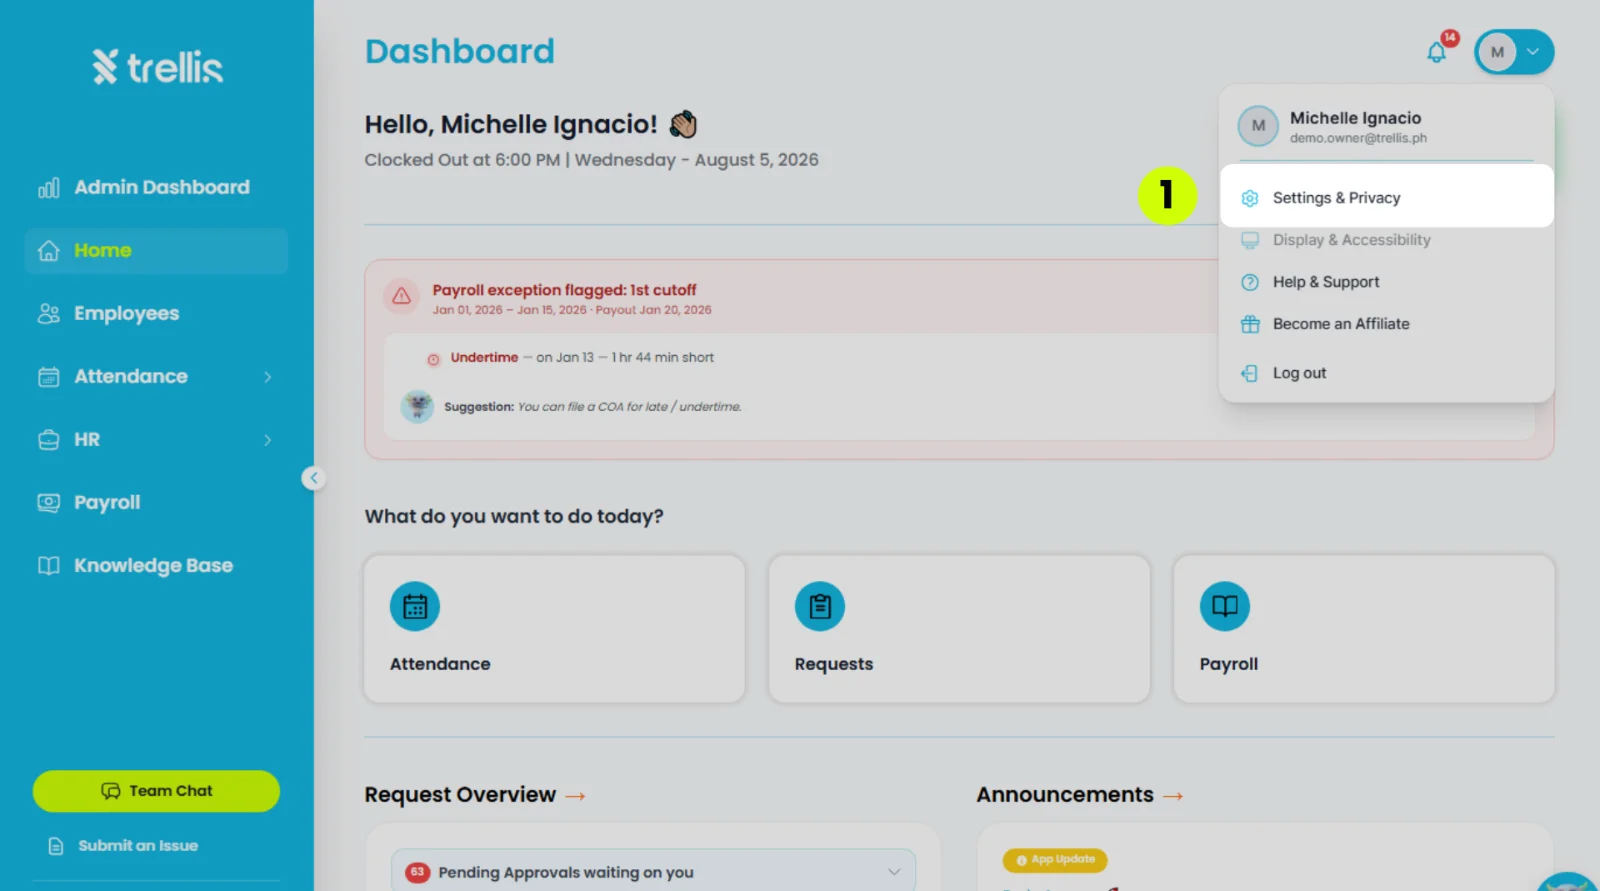
Click your profile icon at the top right corner of the dashboard, then select "Settings & Privacy."
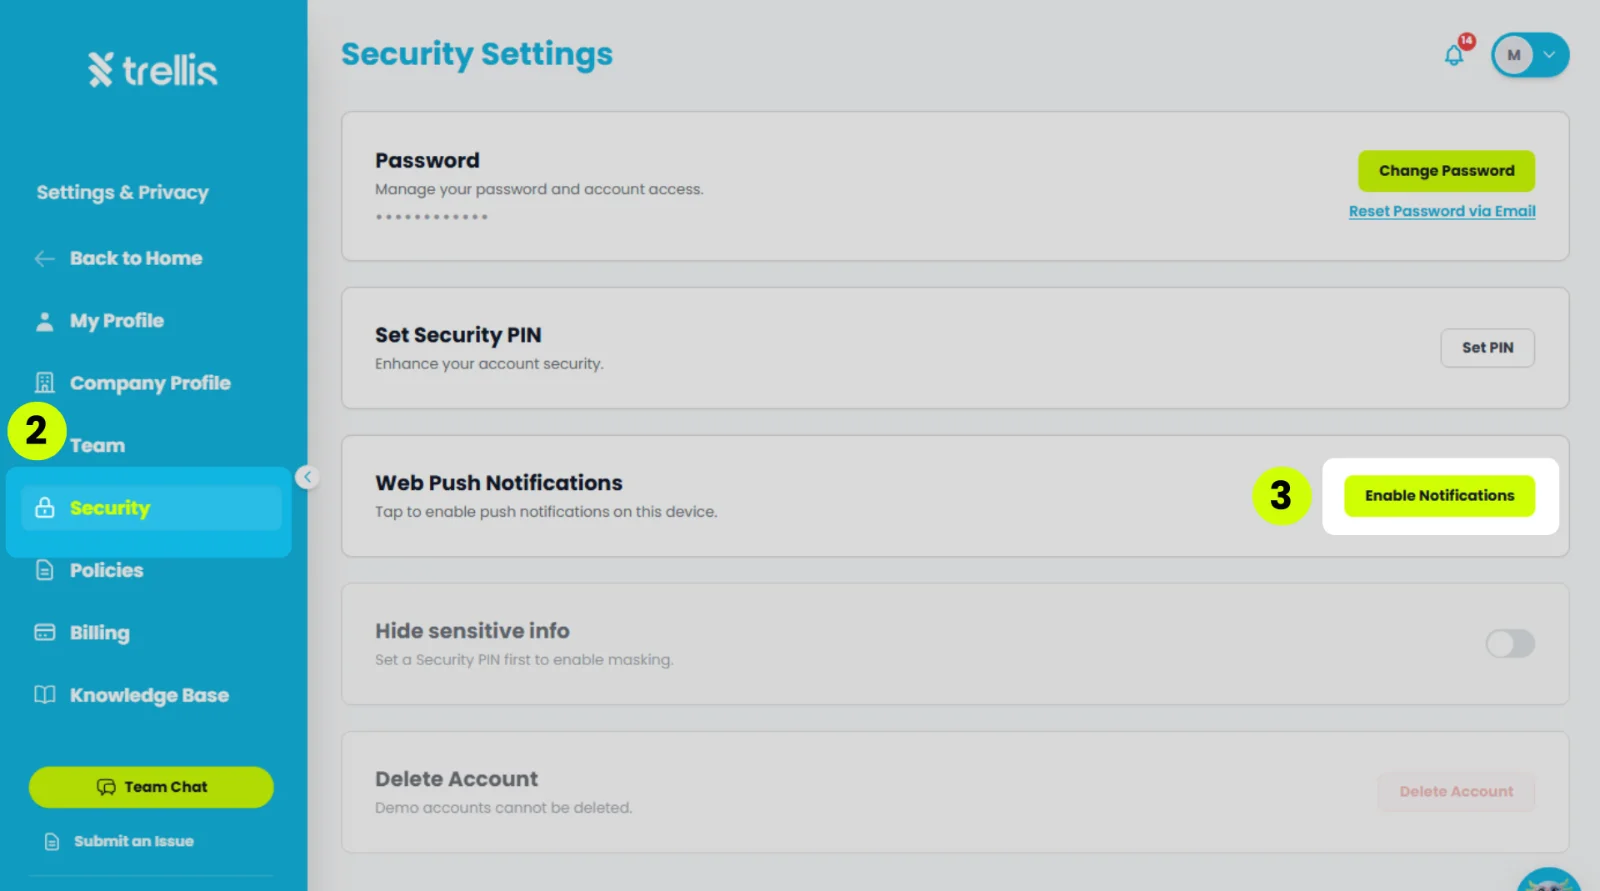
On the sidebar, click “Security” to expand the menu.
Press the "Enable Notifications" button next to “Web Push Notifications”.
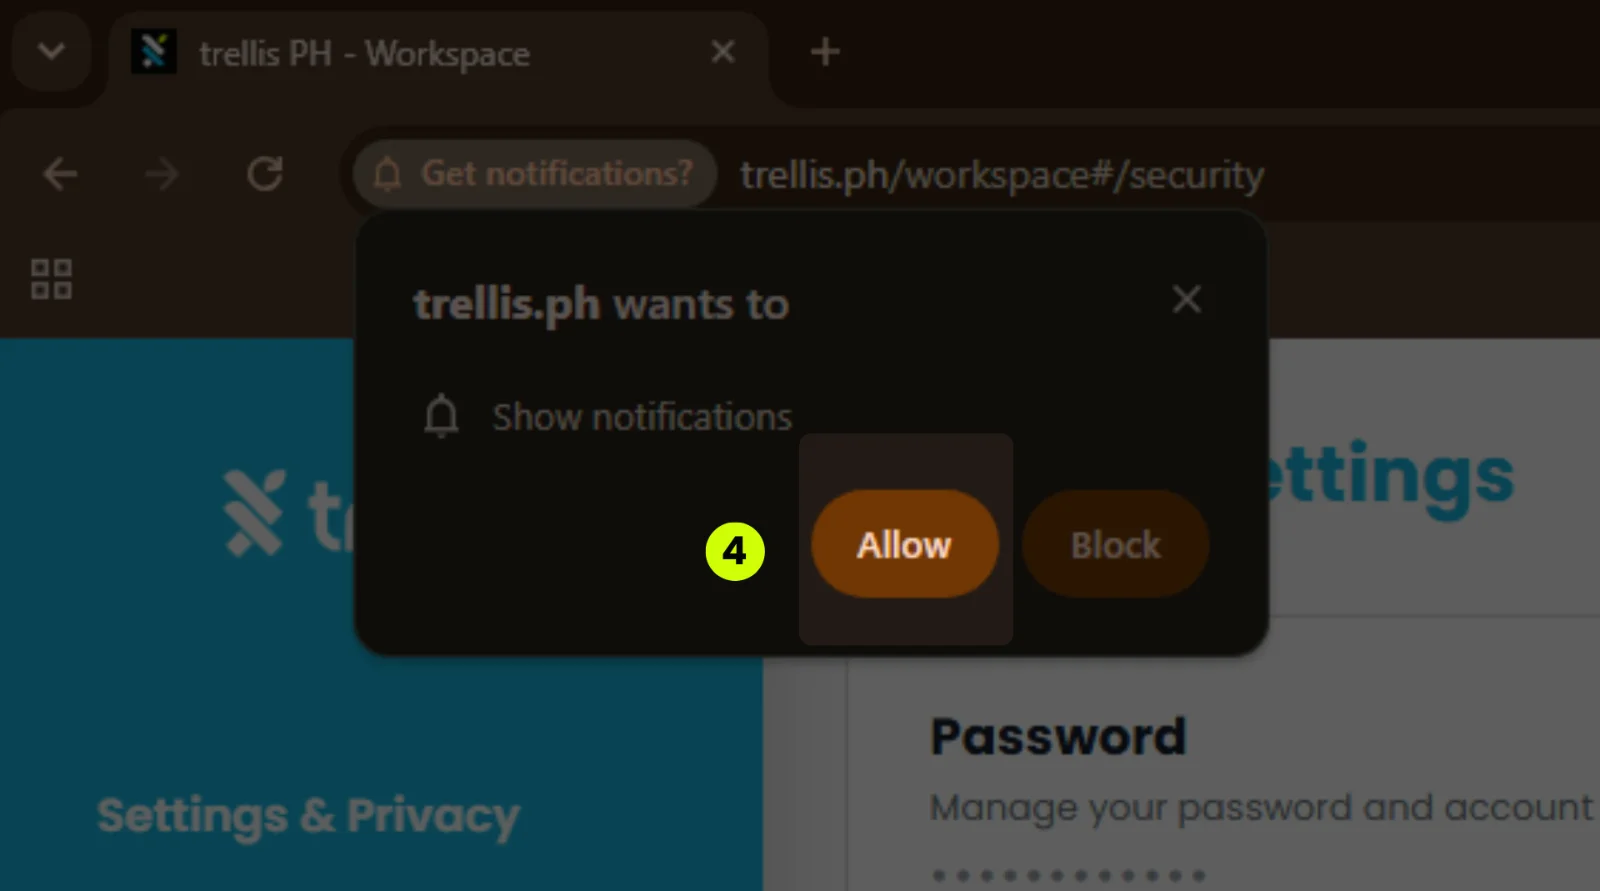
A browser prompt will appear asking if you want to allow trellis.ph to show notifications. Click "Allow" to enable push notifications on your device.
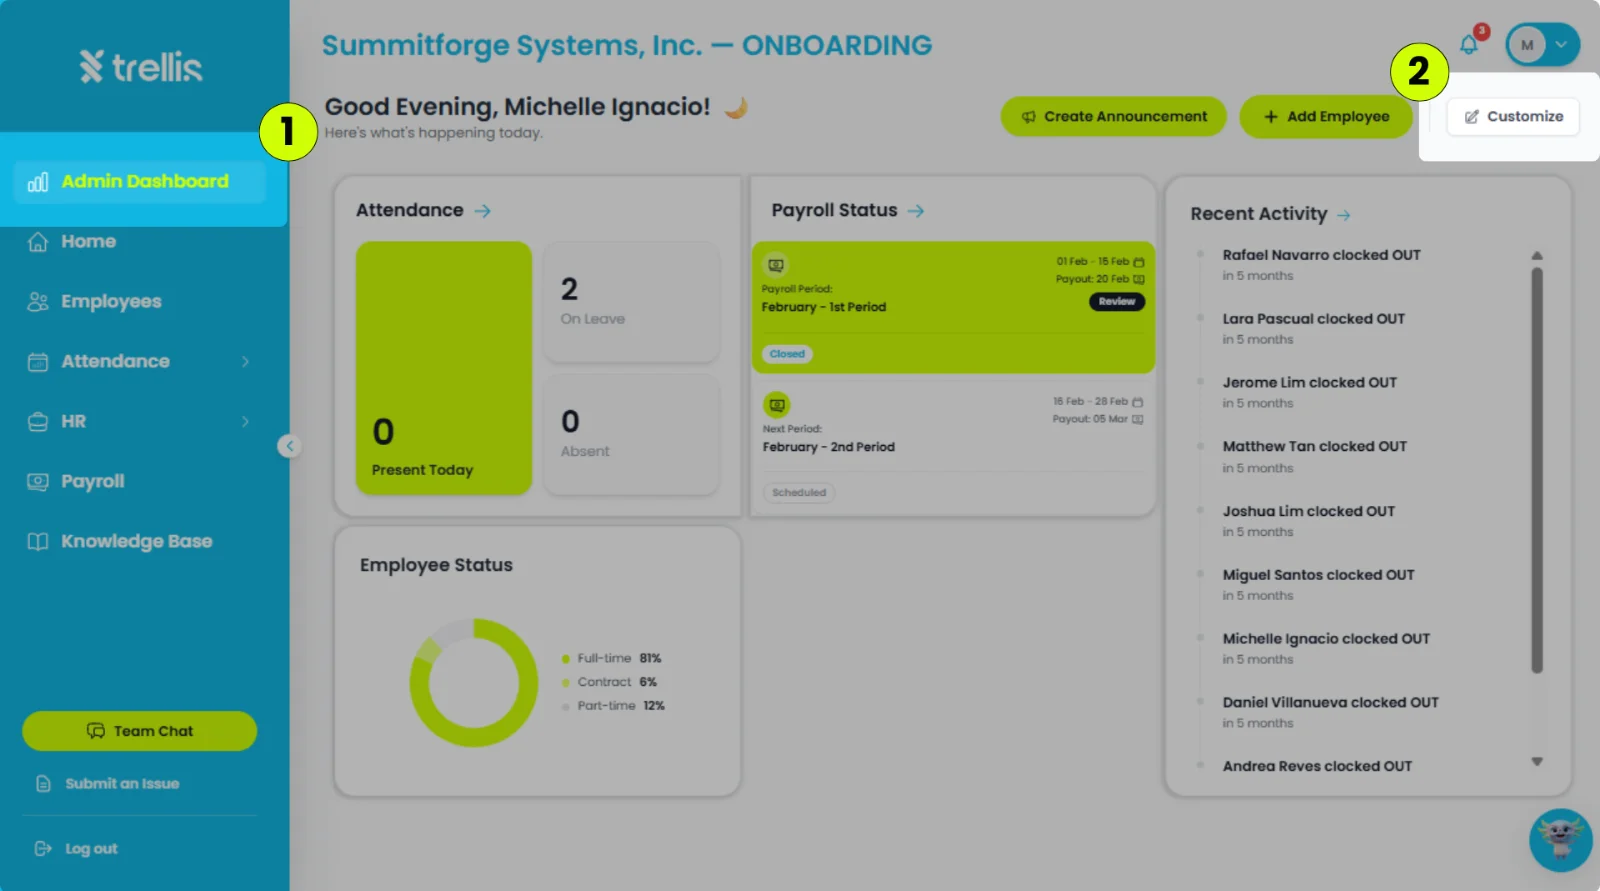
From the sidebar, click "Admin Dashboard."
On the Admin Dashboard, click "Customize" at the top right.
Rearrange, resize, remove, or adjust the size of the widgets.
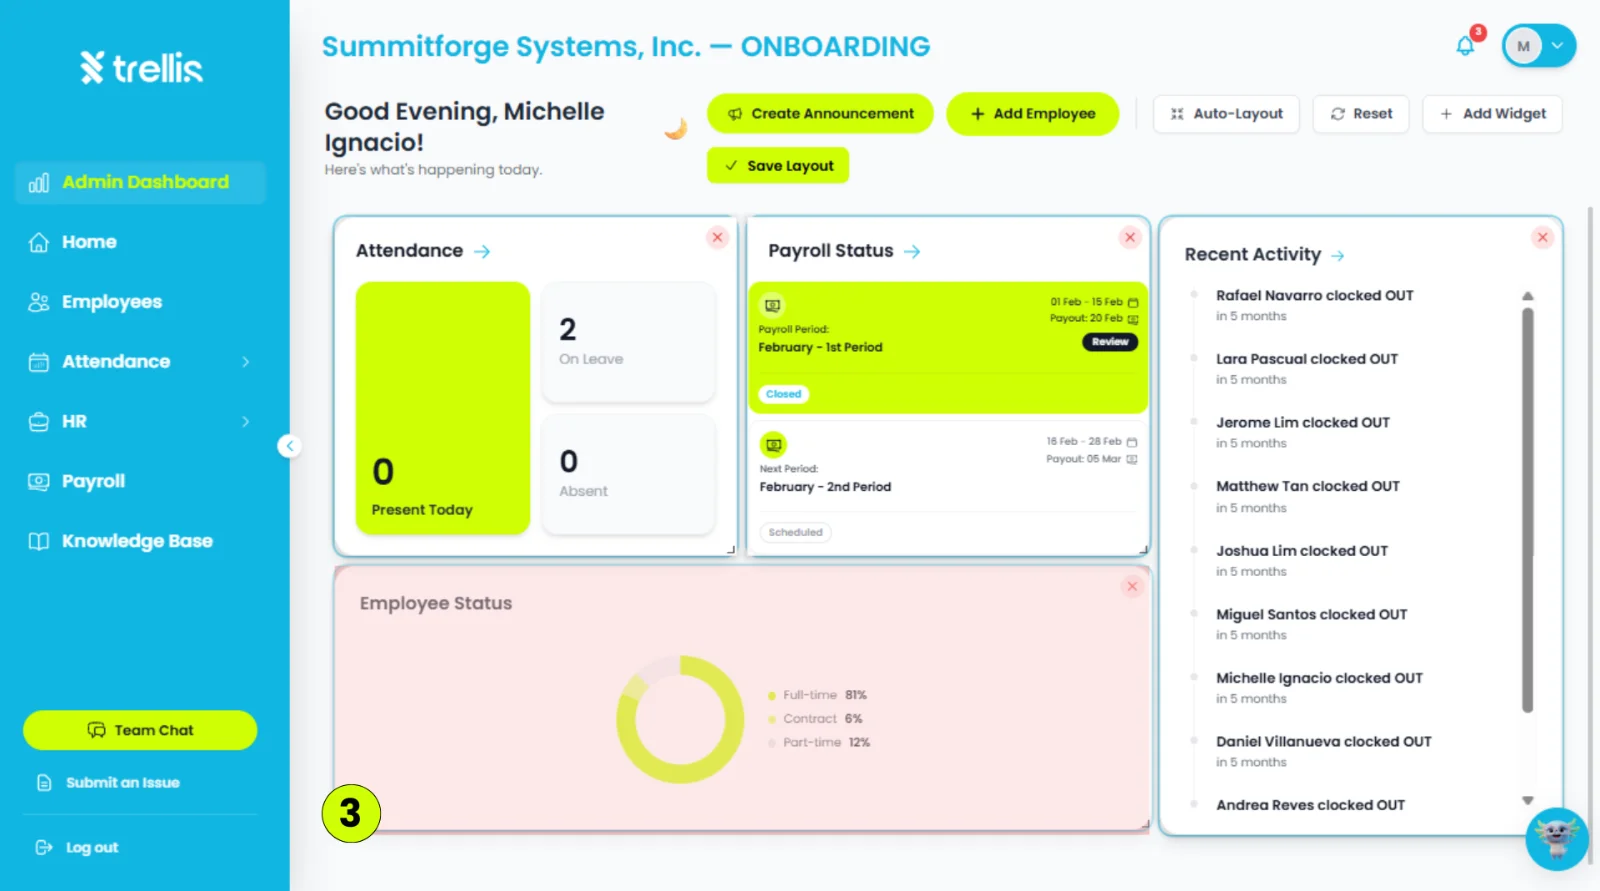
To add a widget, click "Add Widget."
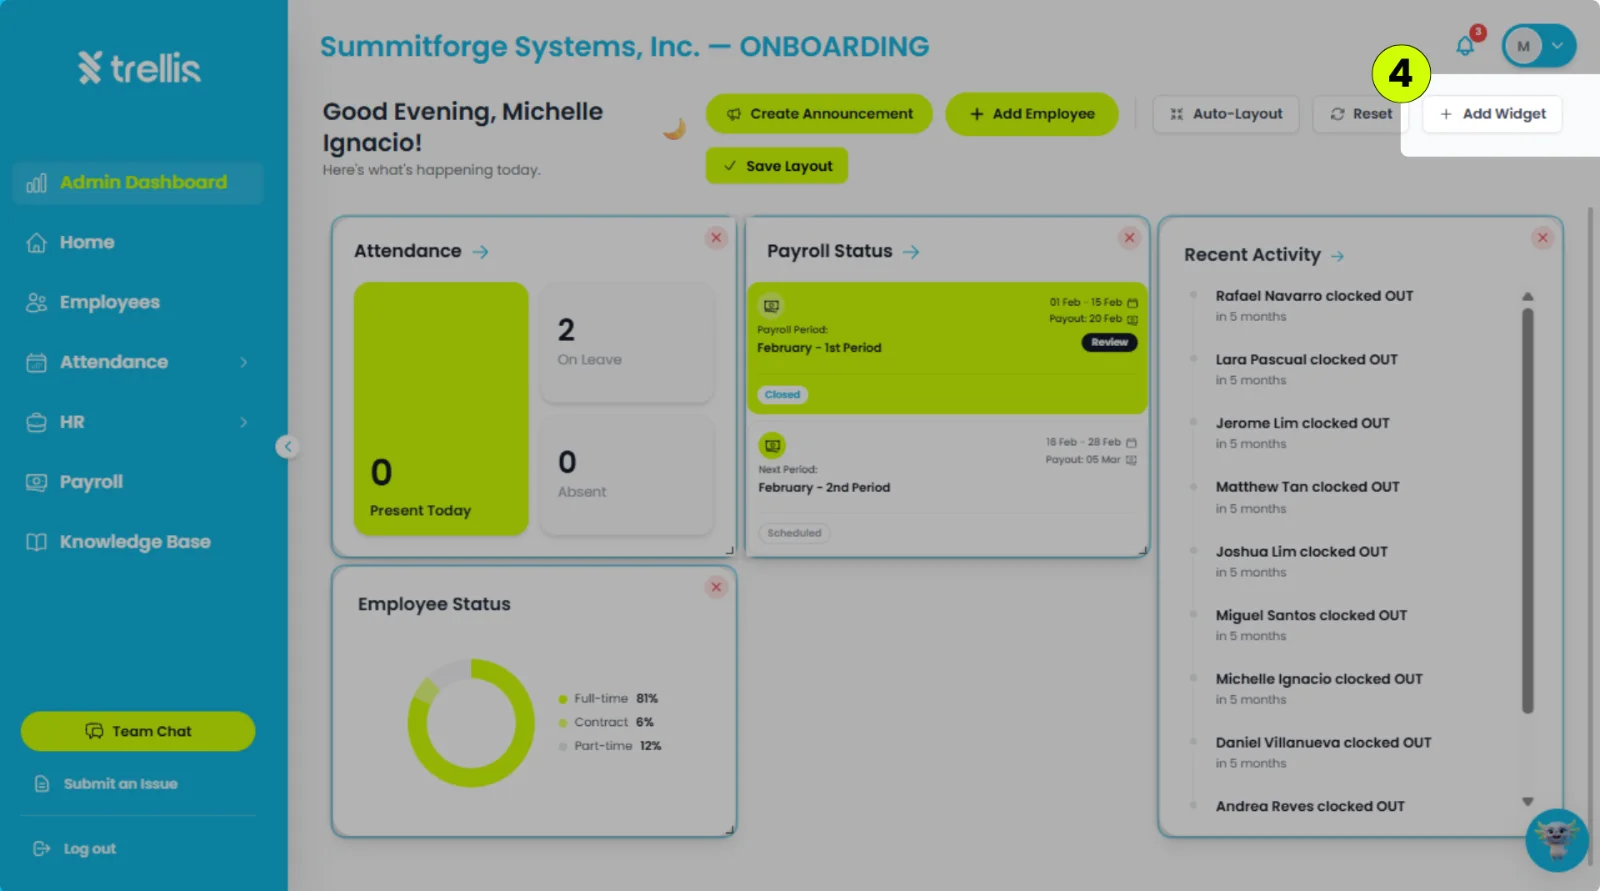
Once finished, click "Save Layout" to apply the changes.
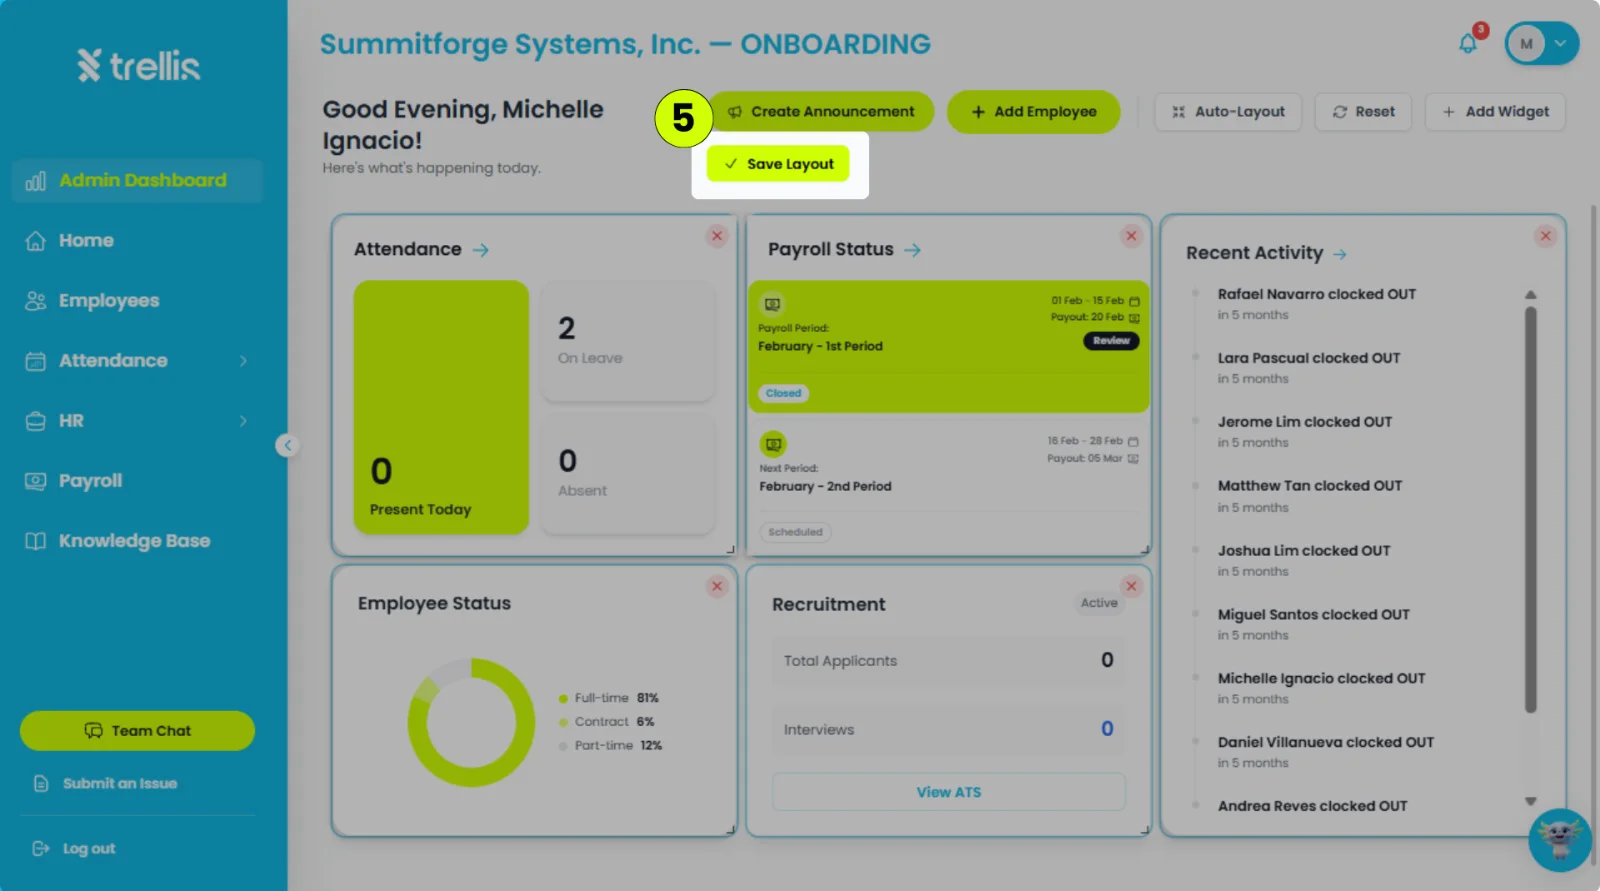 Read the full guide →
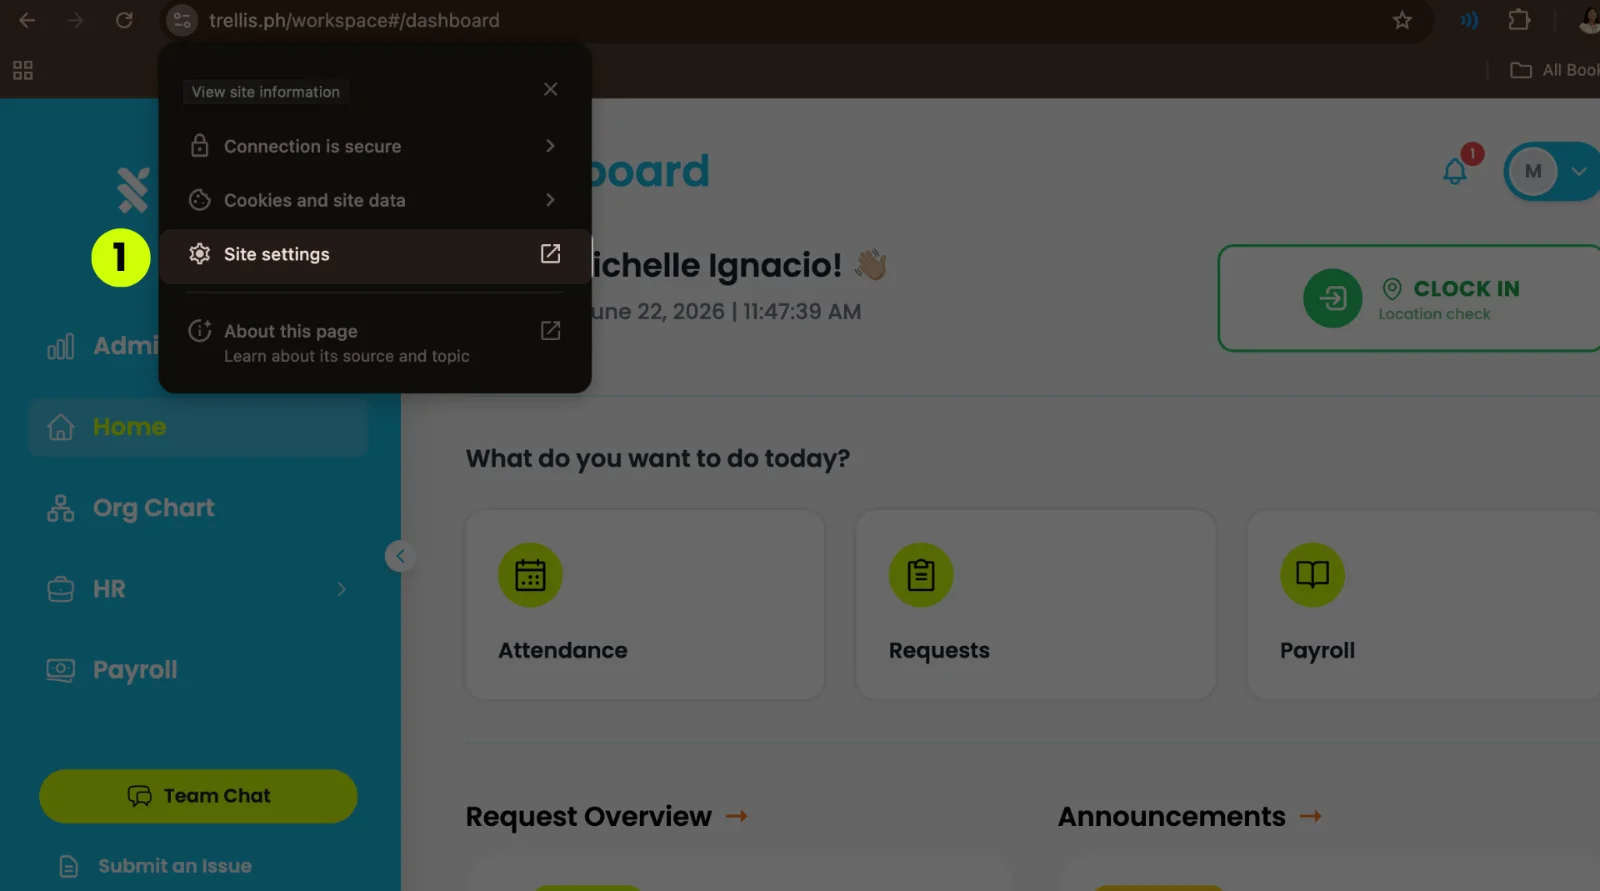
On the left side of the address bar click the button and select “Site Settings”.
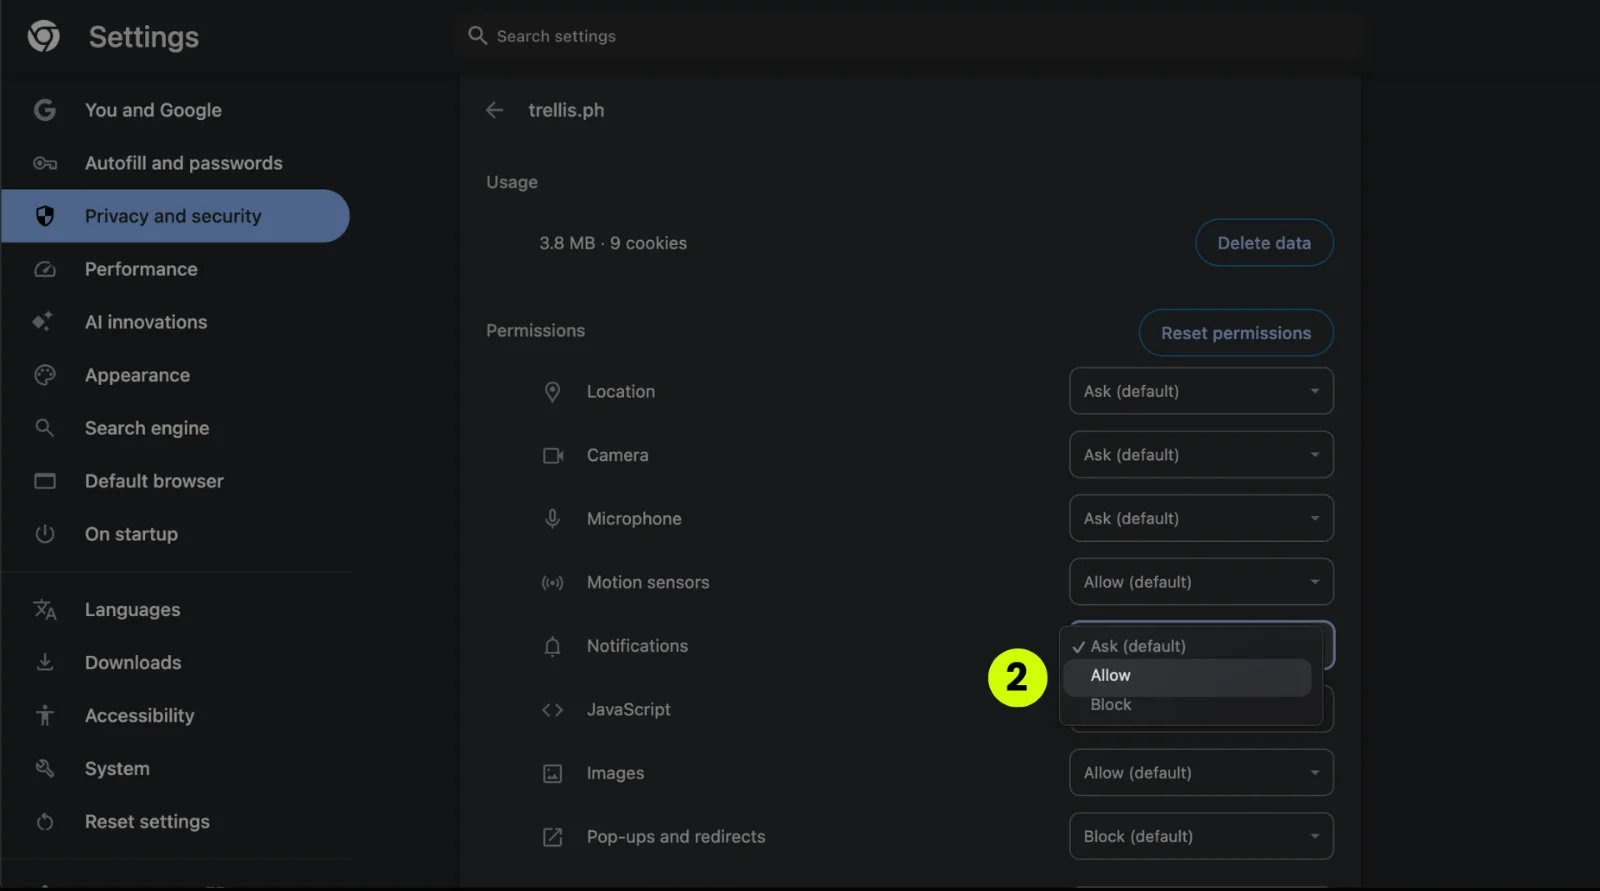
Under “Privacy and secrurity”, in “Permissions”, click on “Allow” in the “Notifications” section.
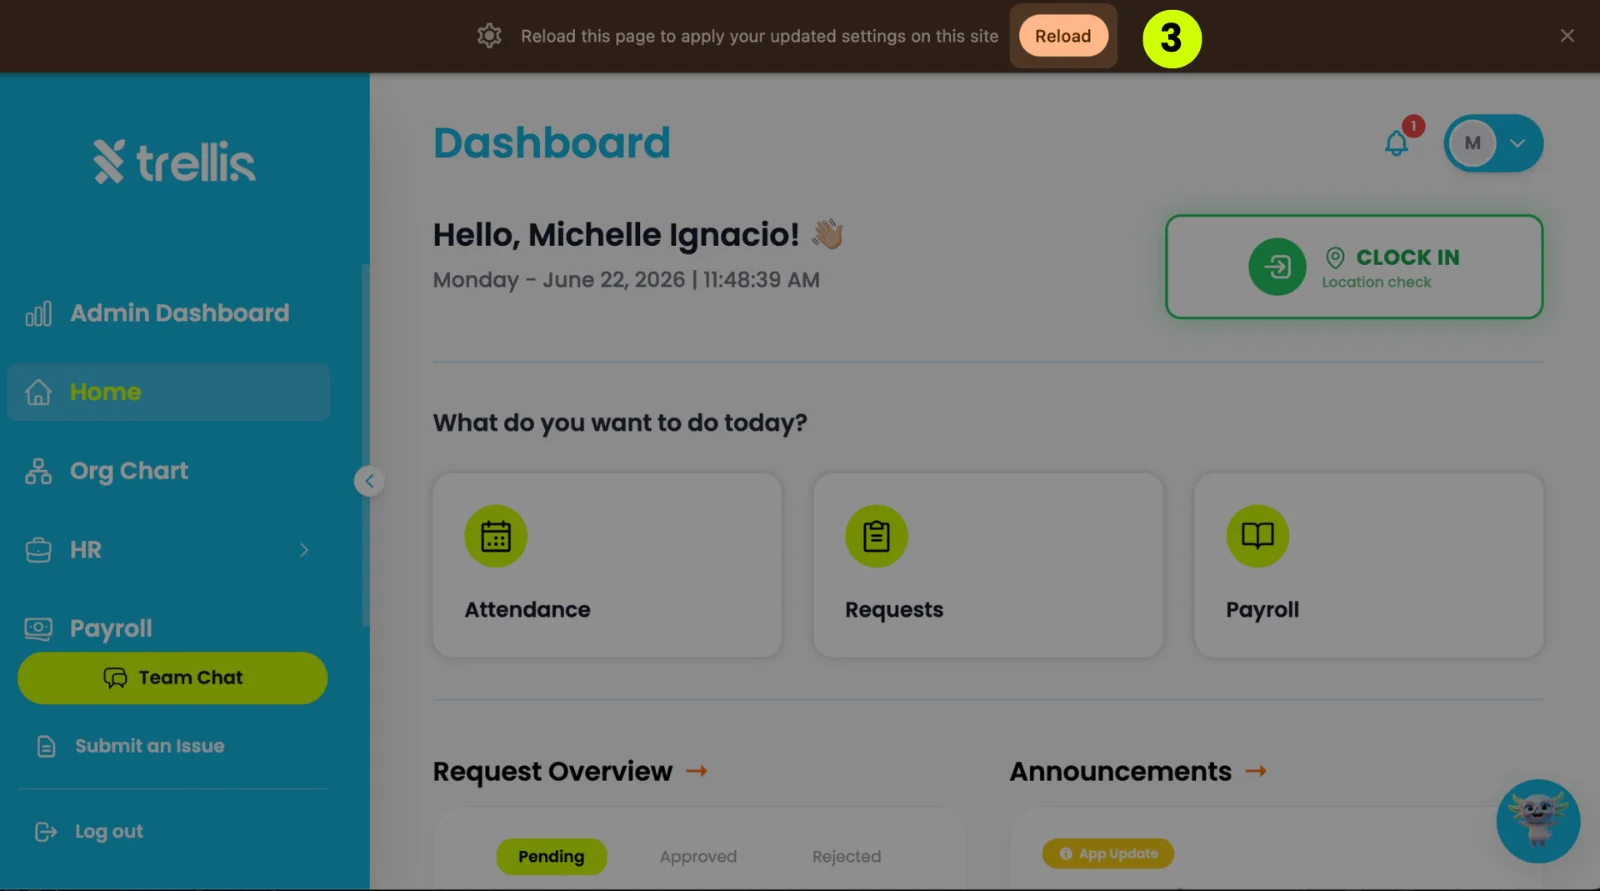
Go back to the Trellis website and press “Reload” to apply the changes.
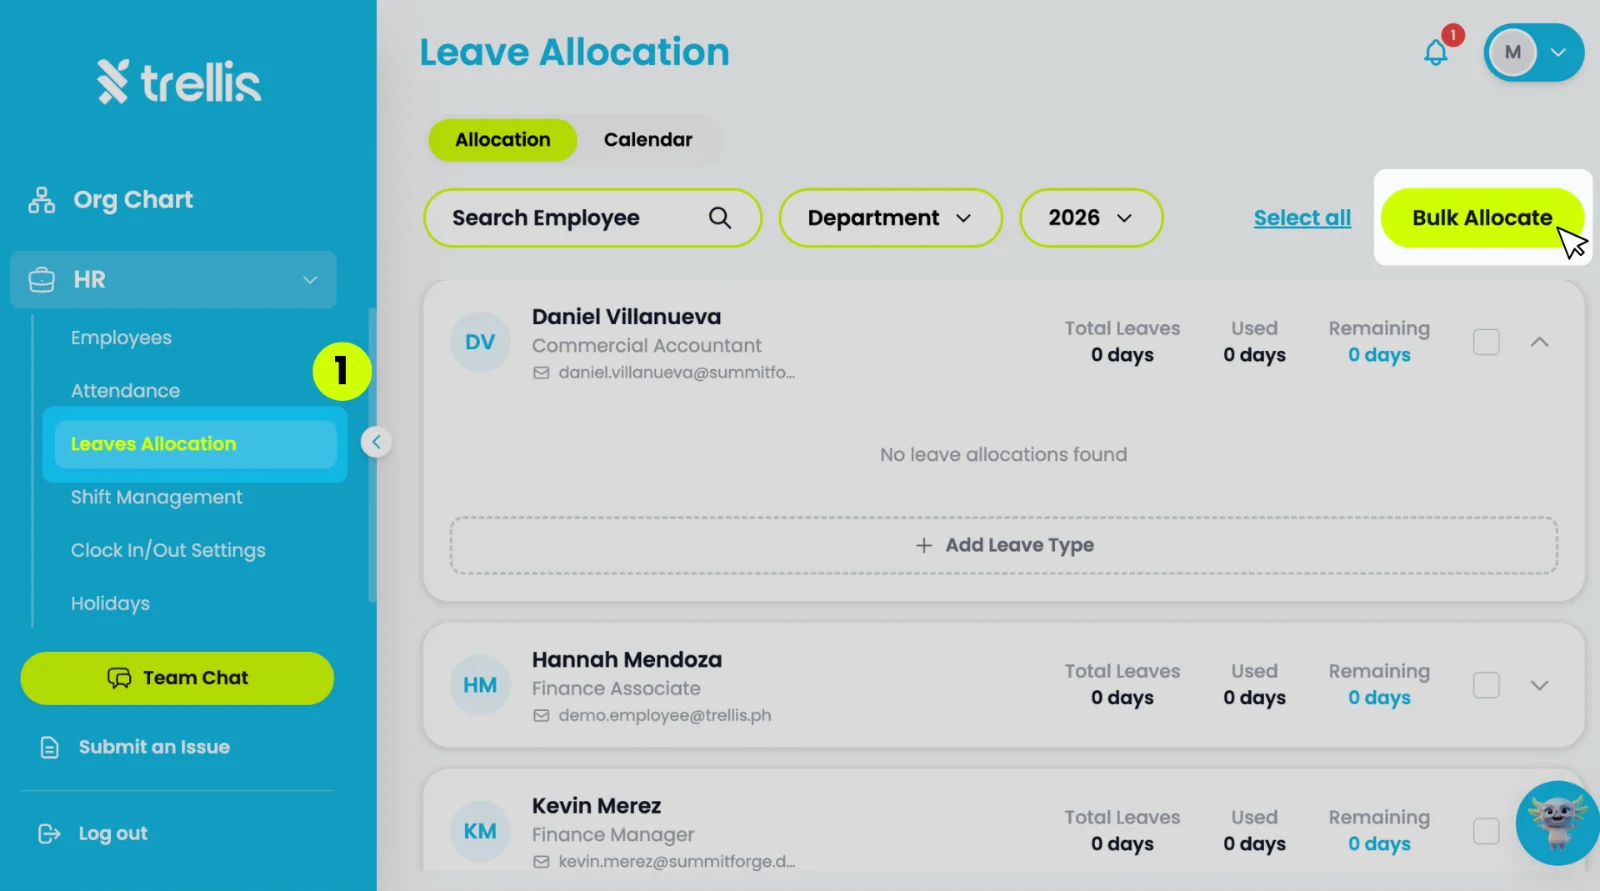
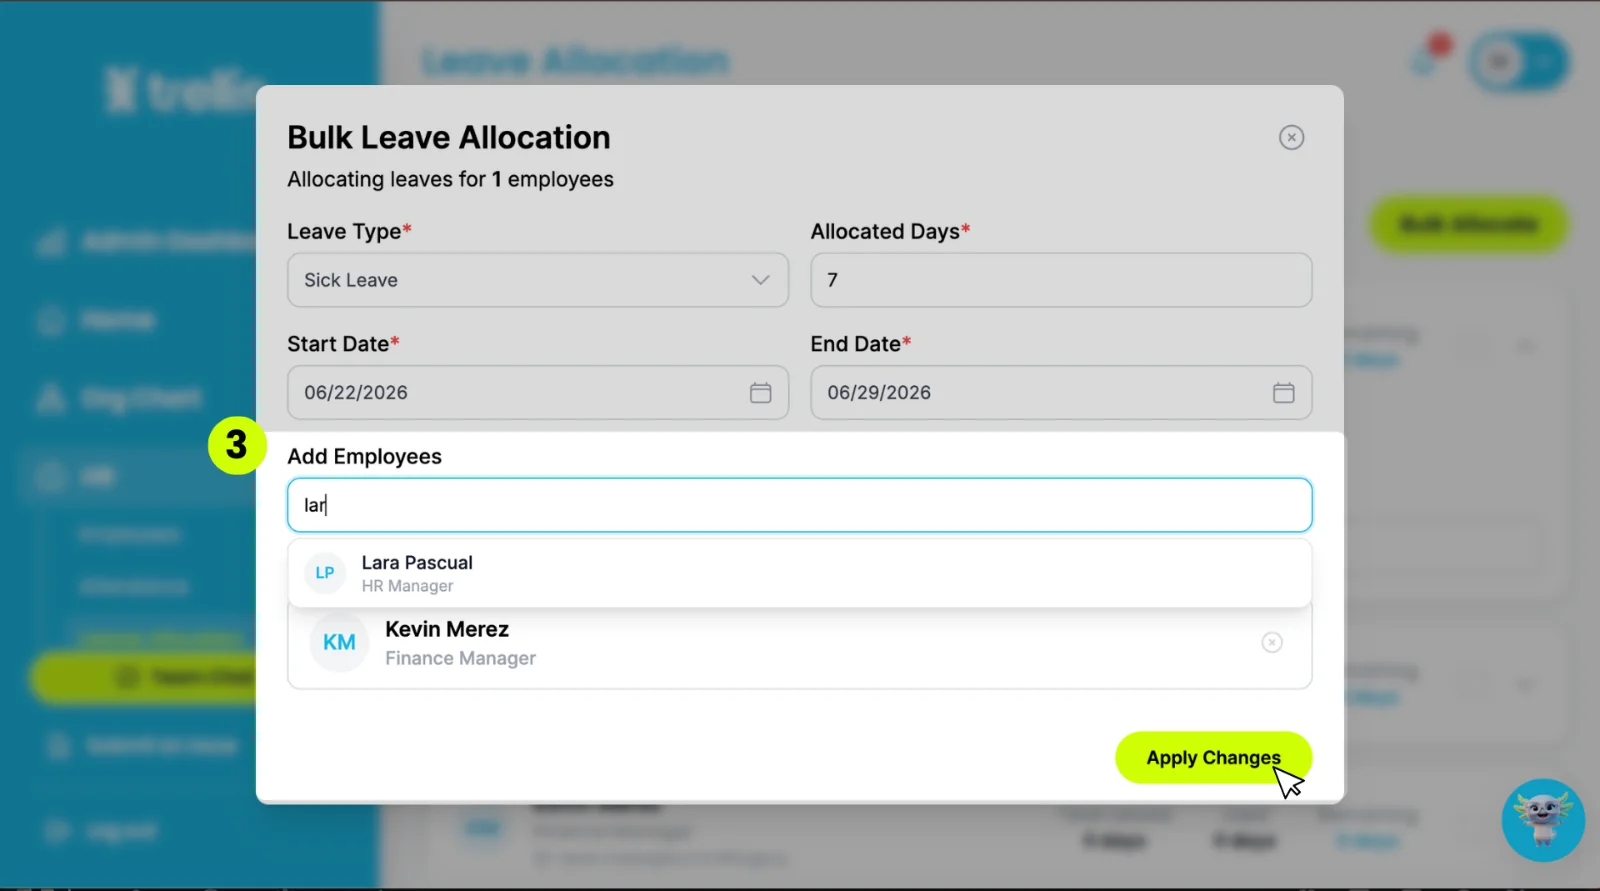
From the sidebar, click "HR" to expand the menu, then select "Leaves Allocation.” Press “Bulk Allocate.”
Fill in the following details.
Leave Type
Allocated Days
Start Date
End Date
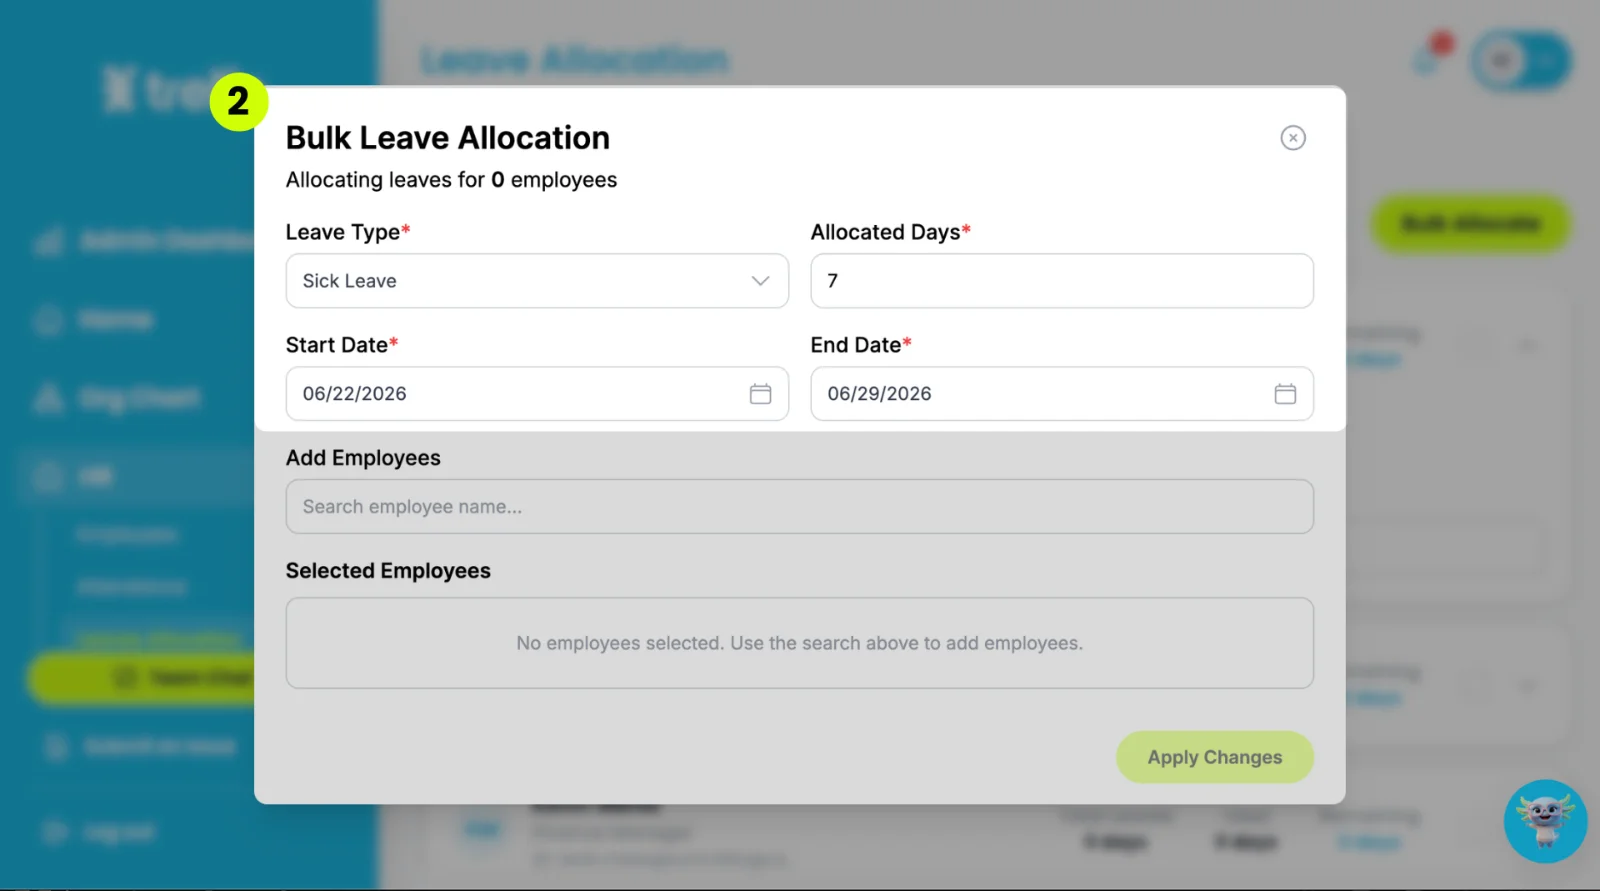
Use the search bar “Add Employees” to fill in “Selected Employees.” Finally, click “Apply Changes.”
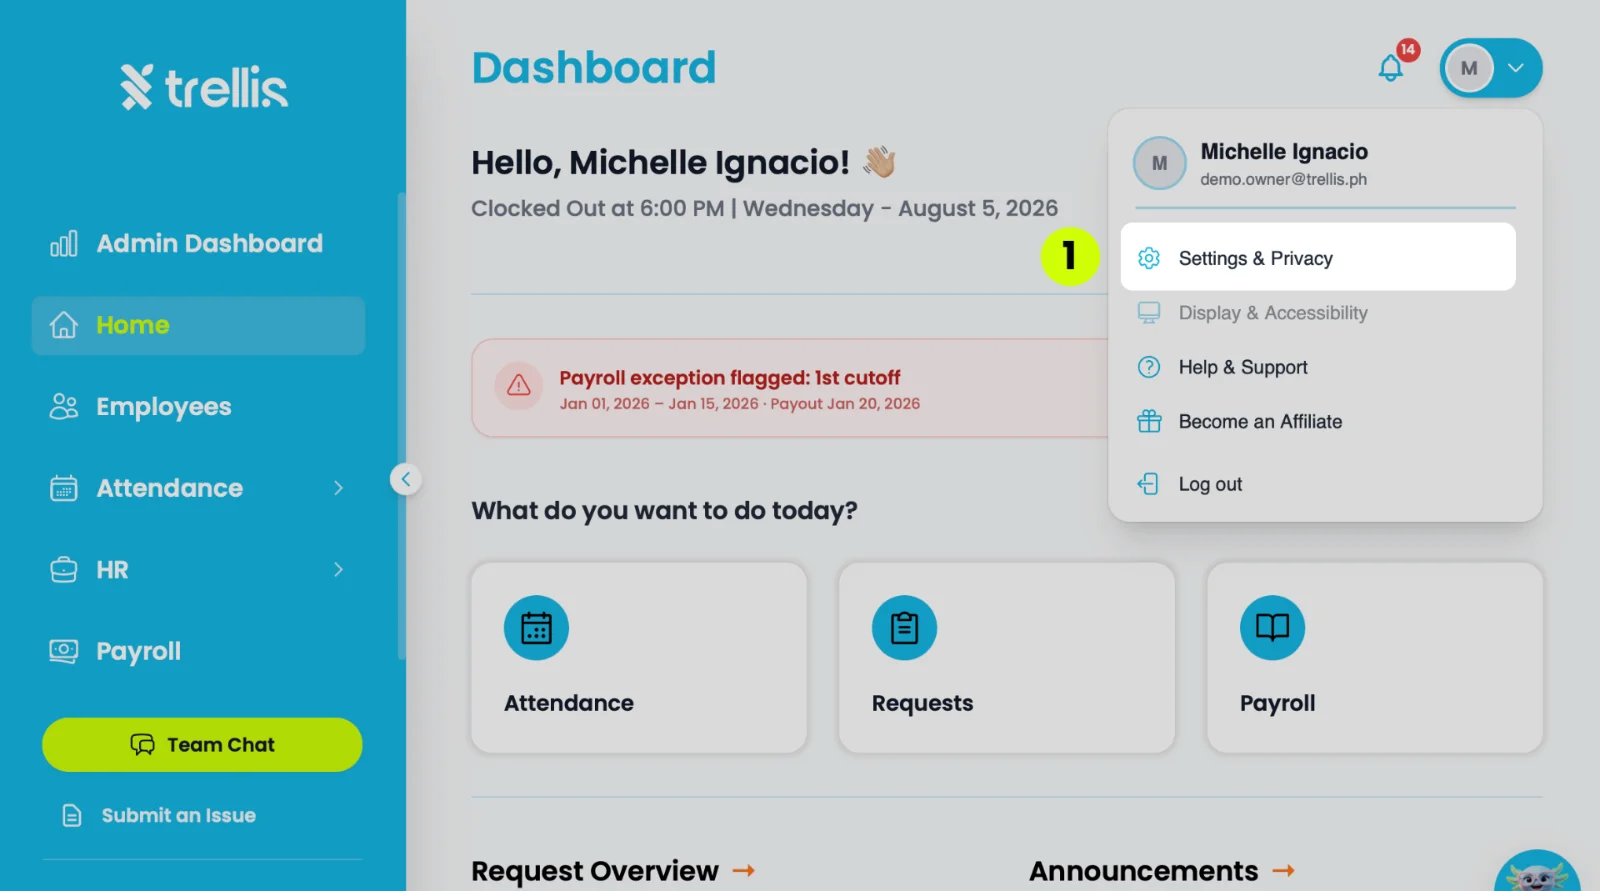
Click your profile icon at the top right, then select “Settings & Privacy”
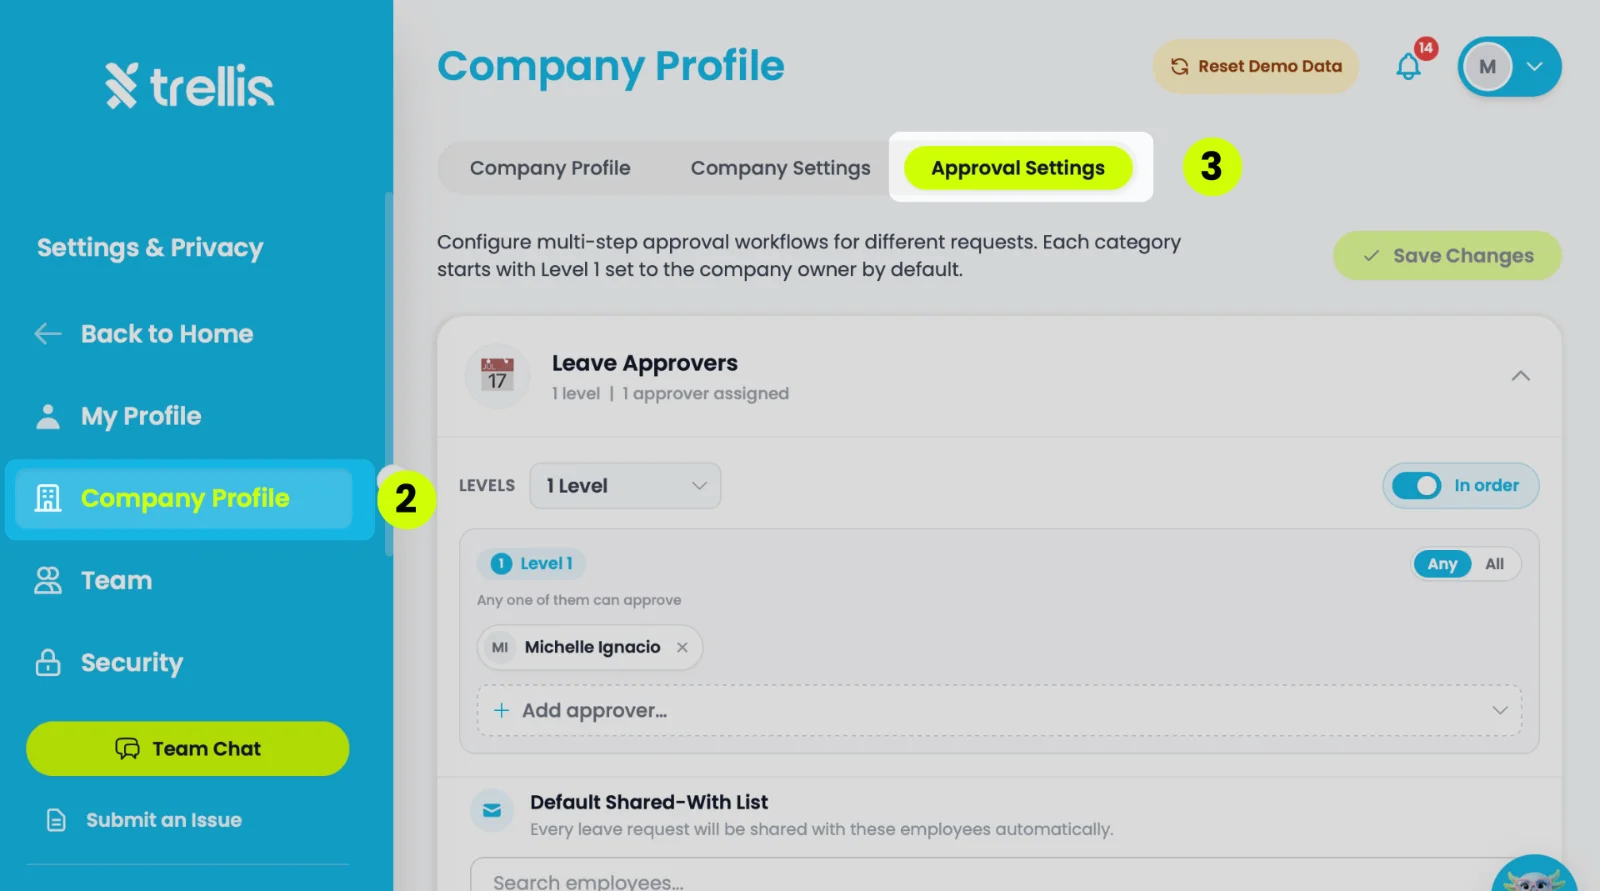
From the sidebar, click "Company Profile" to expand the menu.
Select “Approval Settings”
Update the Approval Settings by role:
Leave Approvers
Finance Approvers
Shift Approvers
HR Updates Approvers
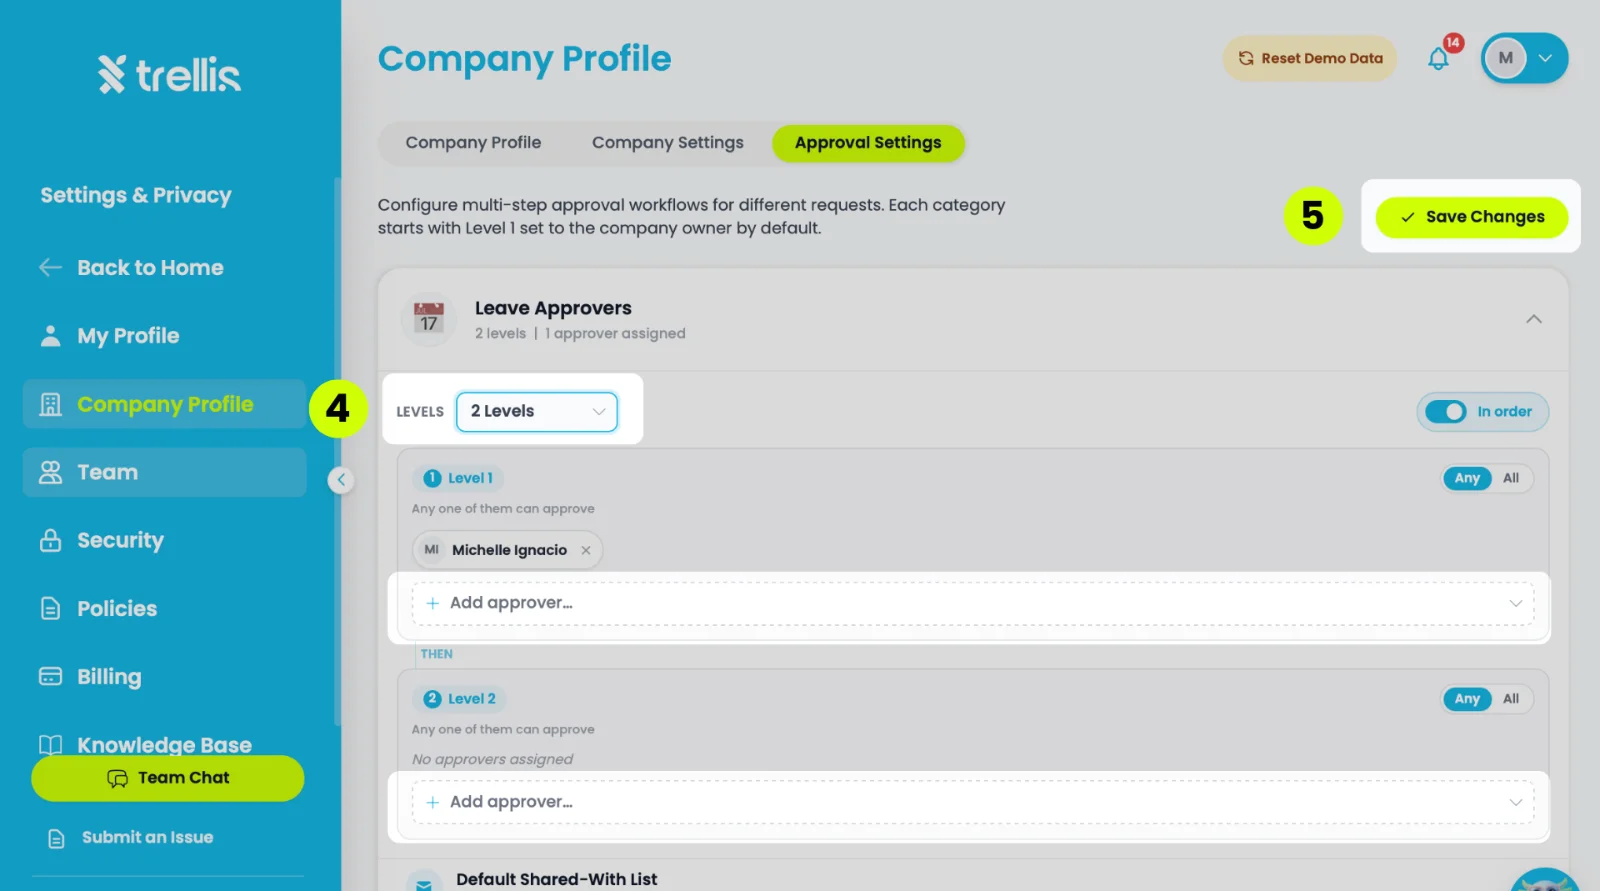
Click the desired assigned role of the employee. Under the dropdown “Levels” select the amount of levels you want and use the “Add approver” dropdown to select the approvers per level.
Click “Save Changes.”
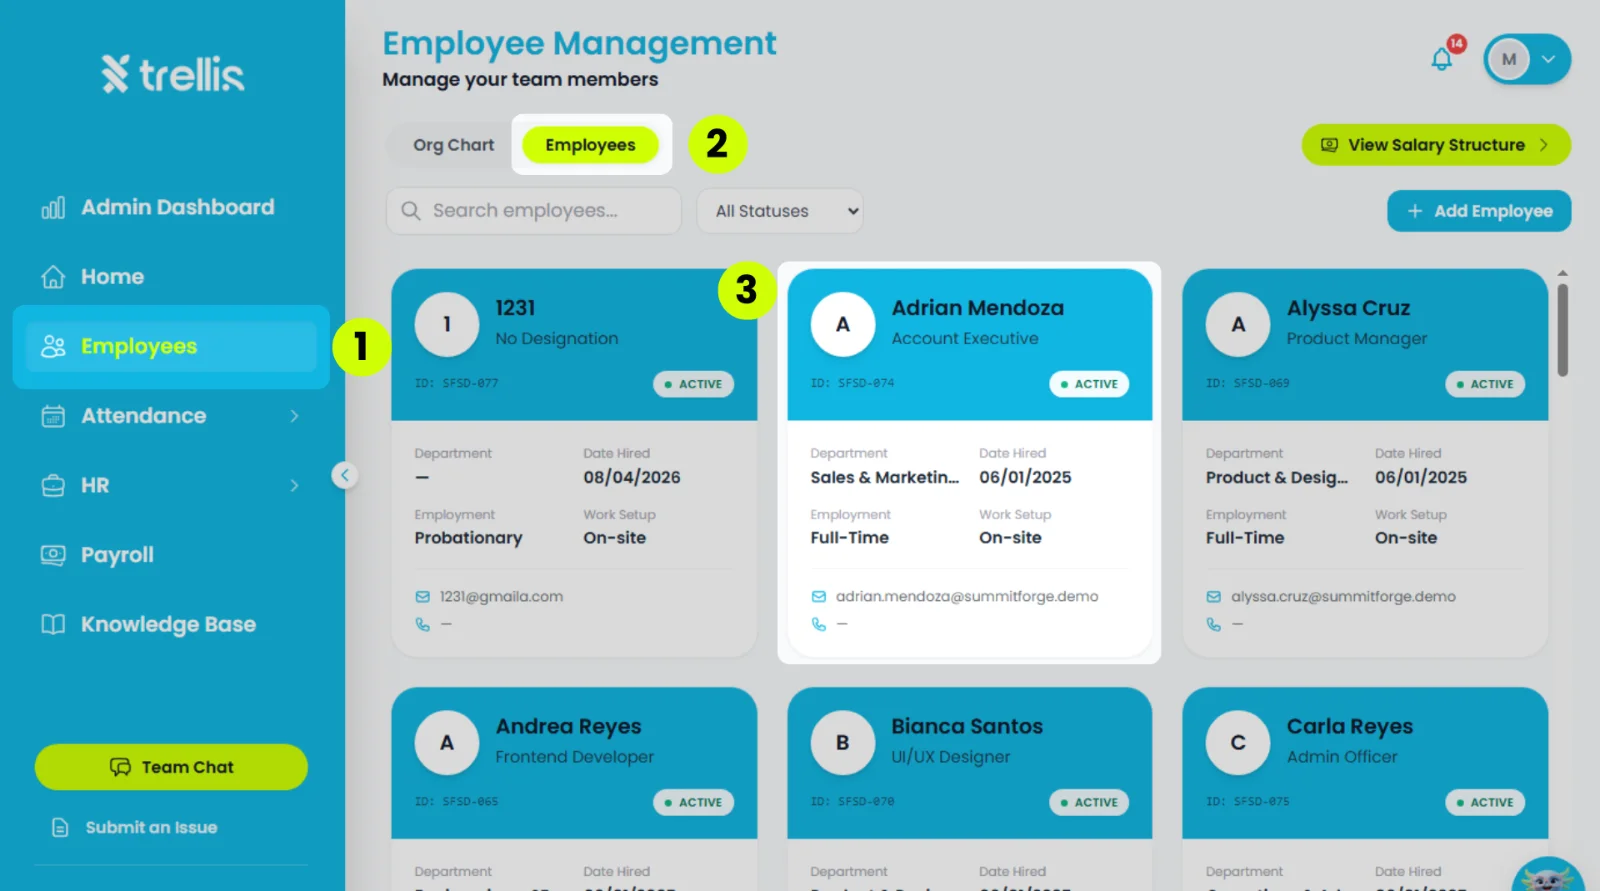
From the sidebar, click "Employees" to expand the menu,
Select the tab "Employees” at the top part of the screen.
Click the employee profile for which you want to set the default approvers.
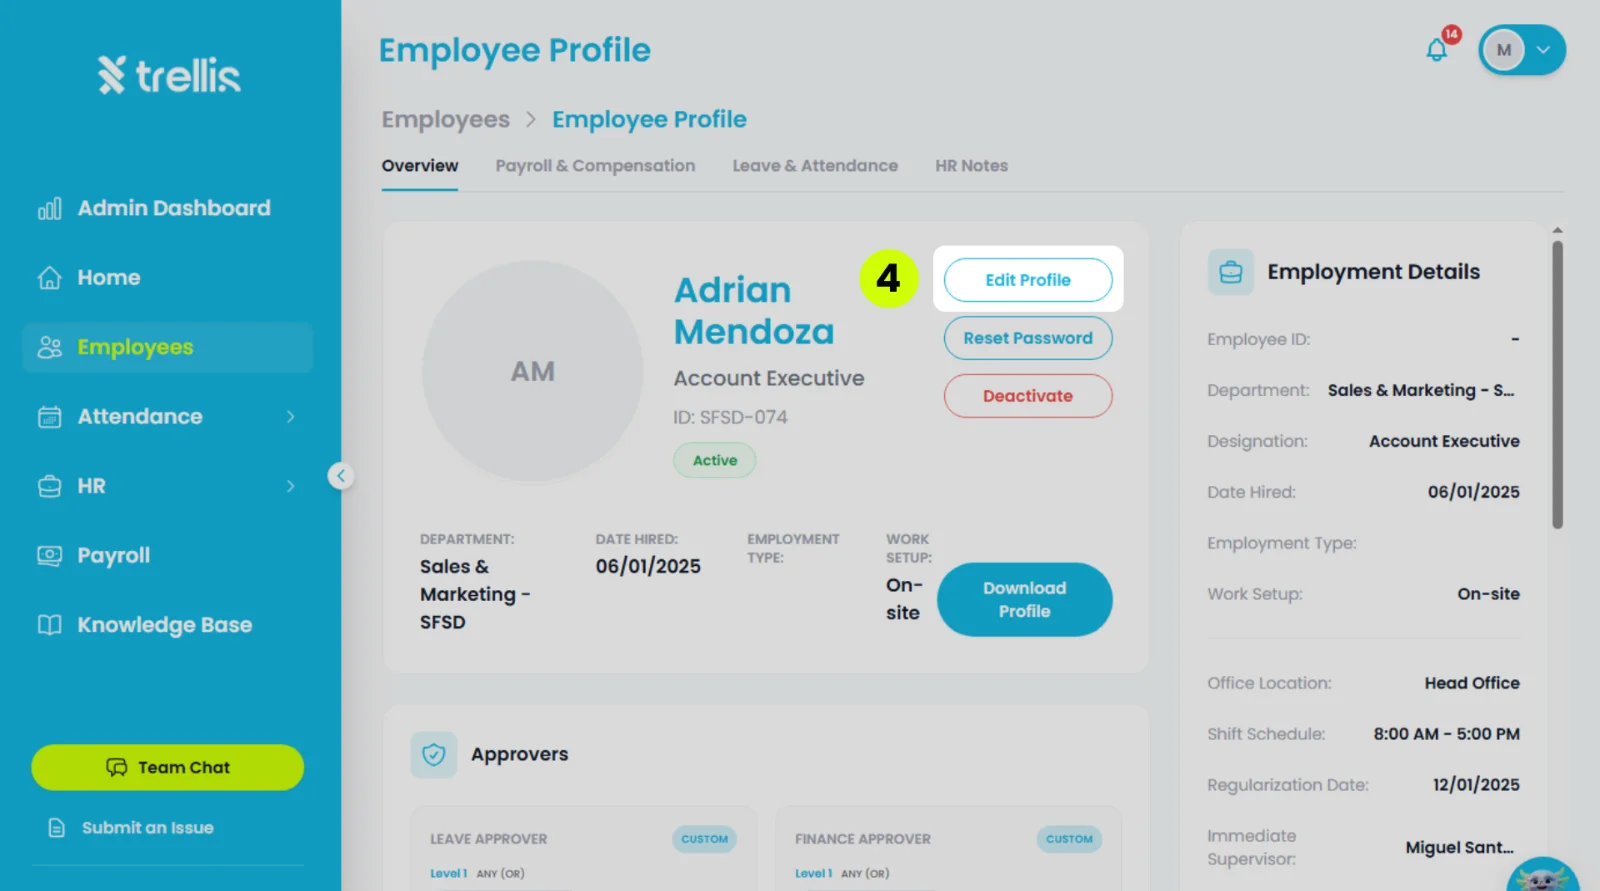
Click “Edit Profile.”
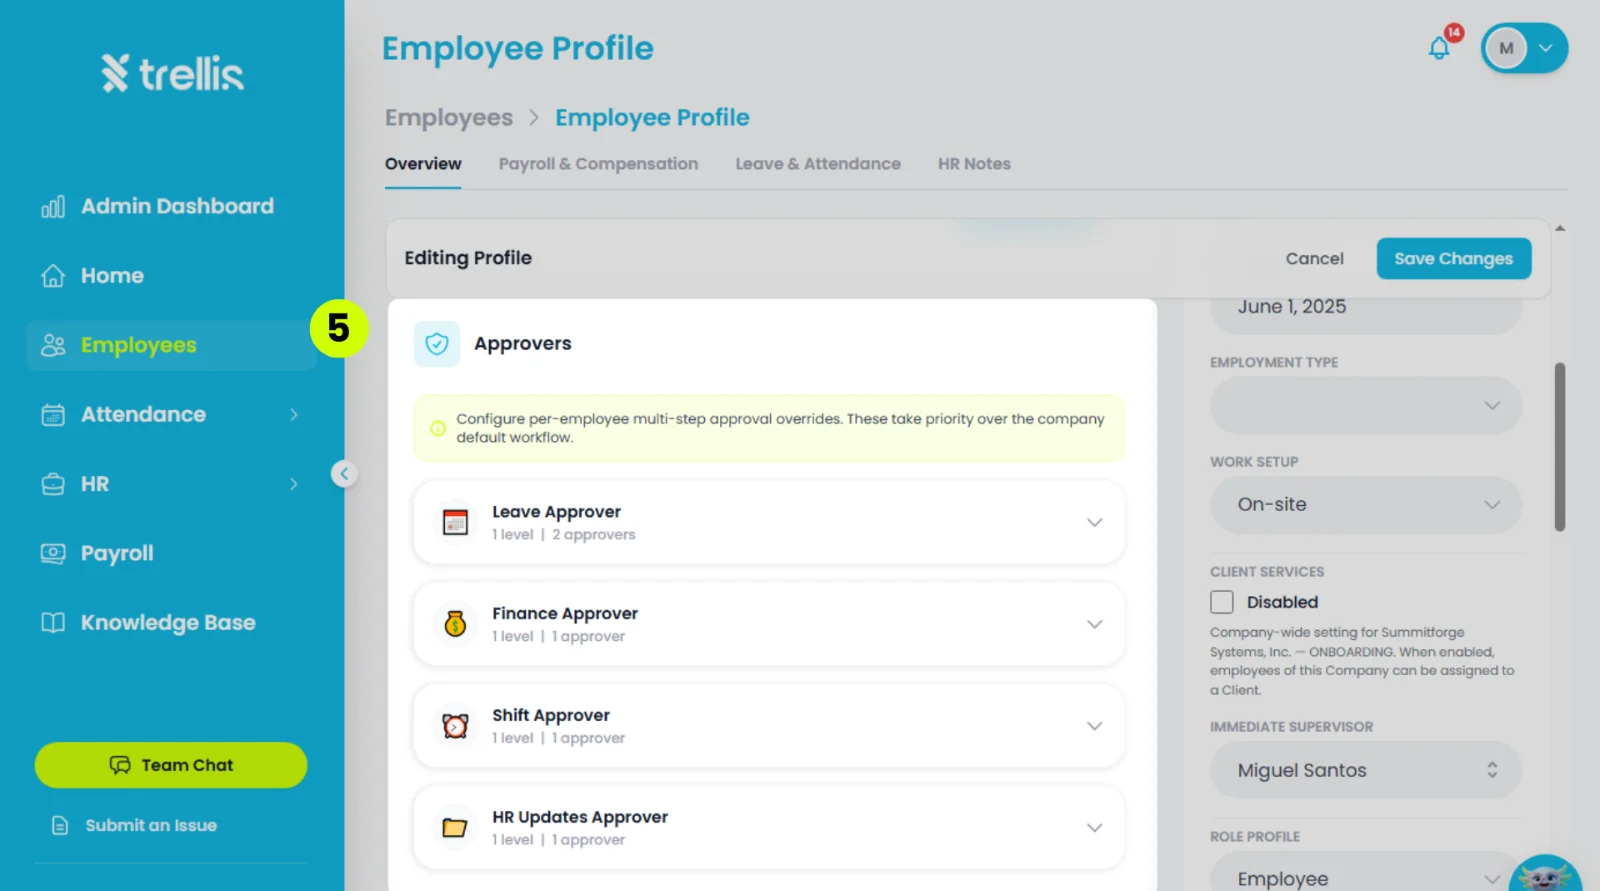
Scroll down to “Approvers” and select the desired approver role you want to set.
Leave Approver
Finance Approver
Shift Approver
HR Updates Approver
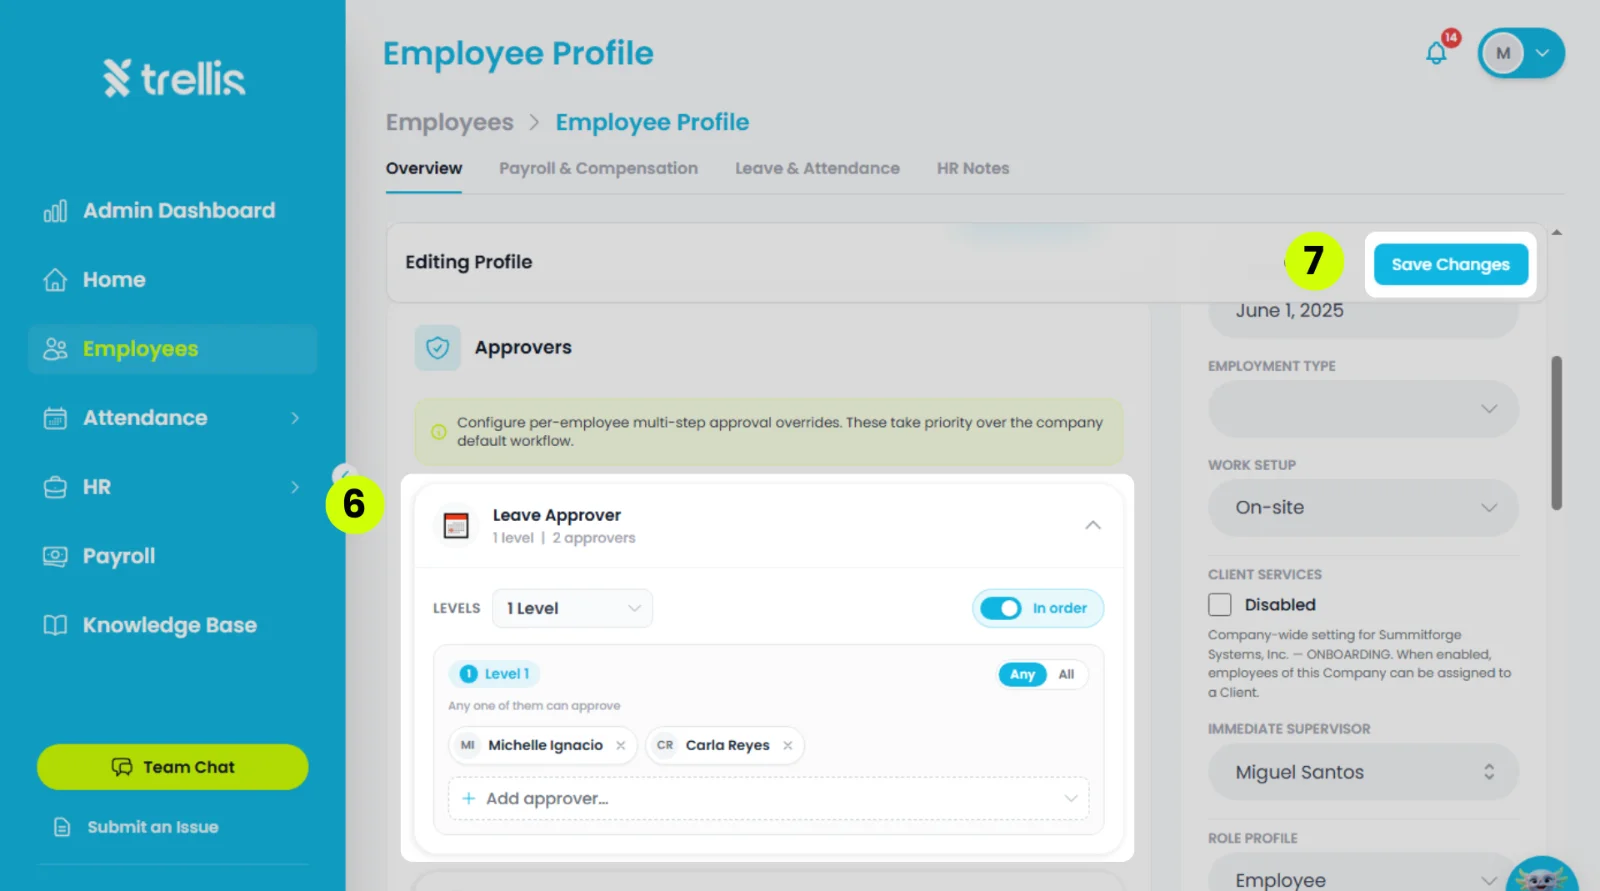
Next, click the dropdown “Add Approver” to pick the default approver.
Finally, select “Save Changes.”
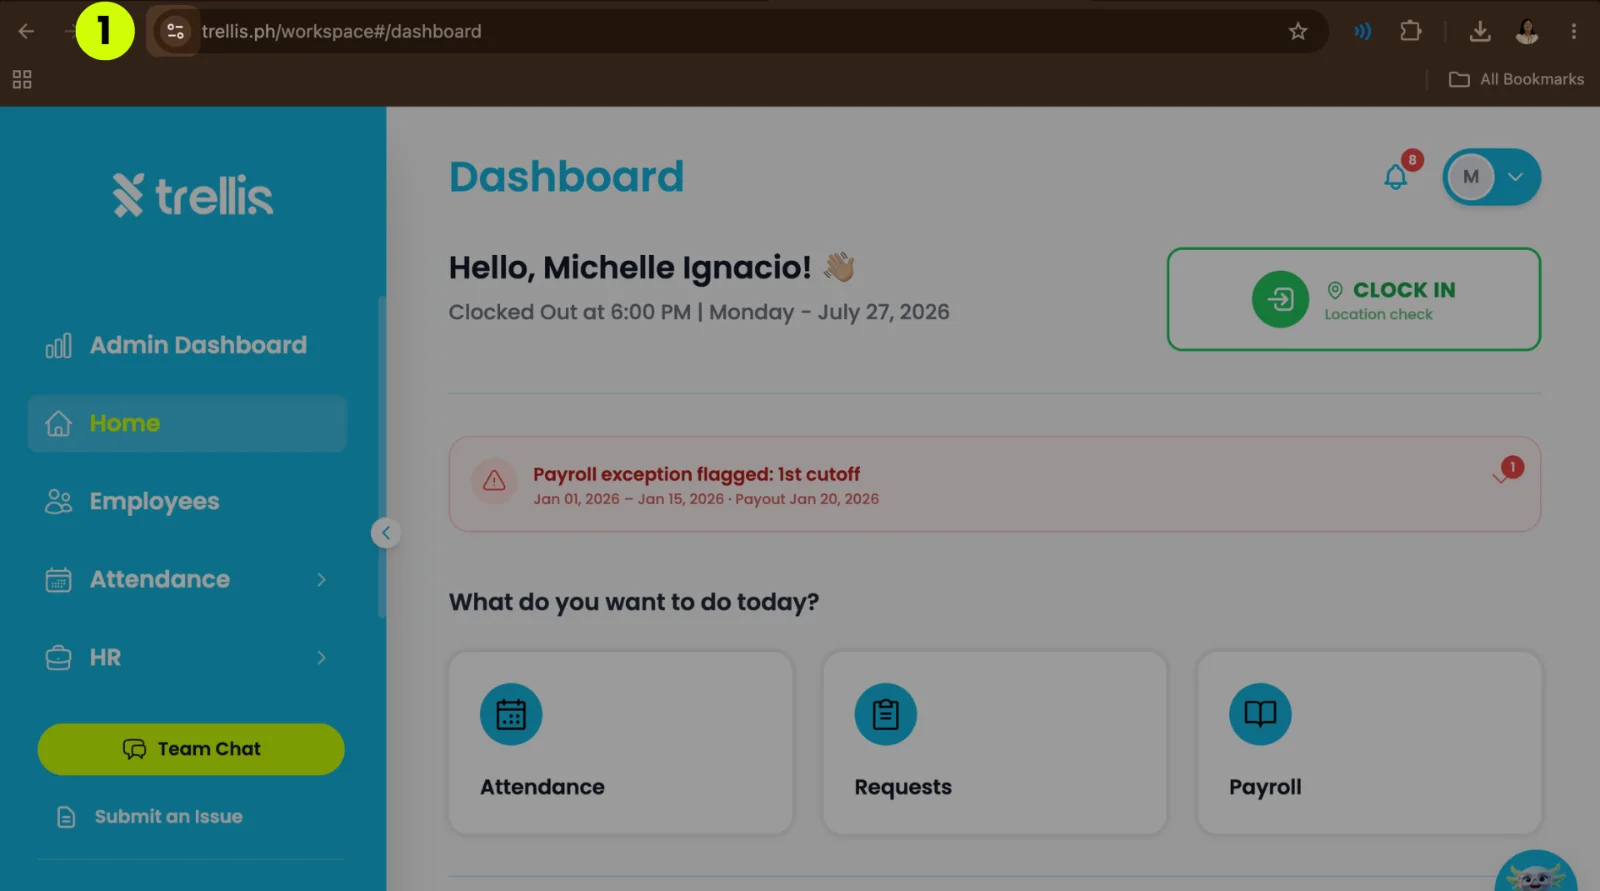
Click the Site Settings button on the upper left corner of the screen to expand the menu.
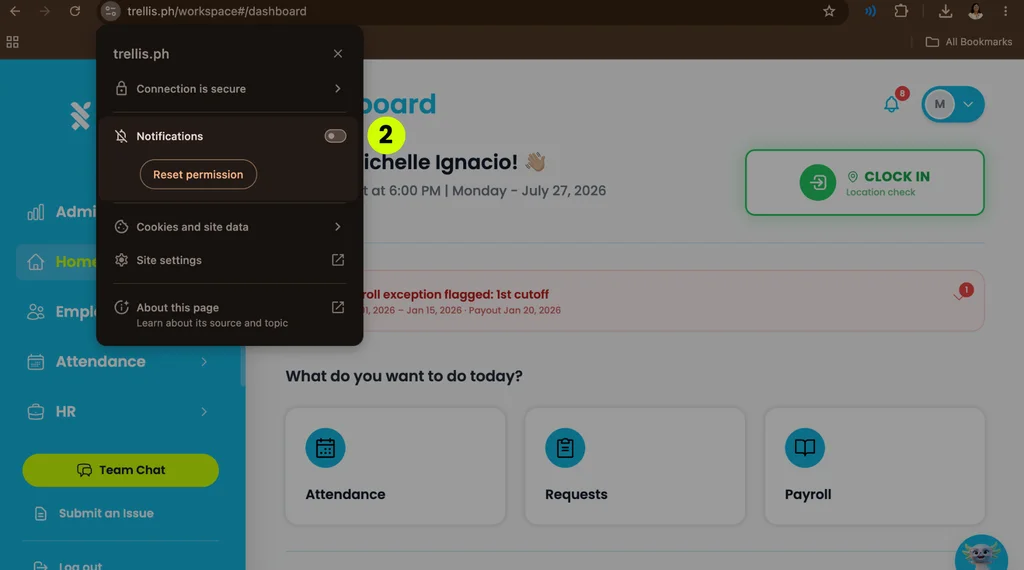
Toggle off the “Notifications” button on the expanded menu.
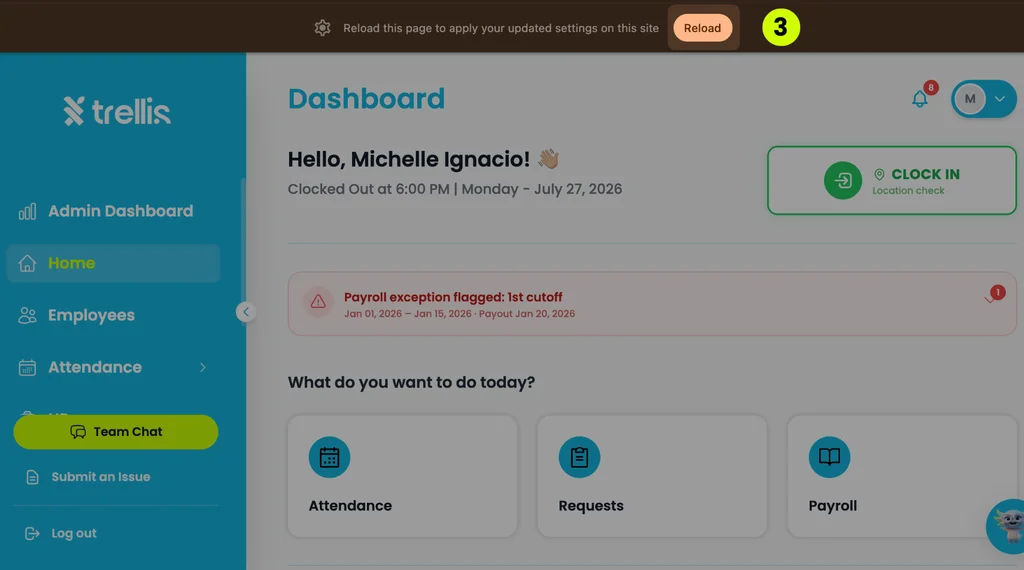
Press “Reload.”
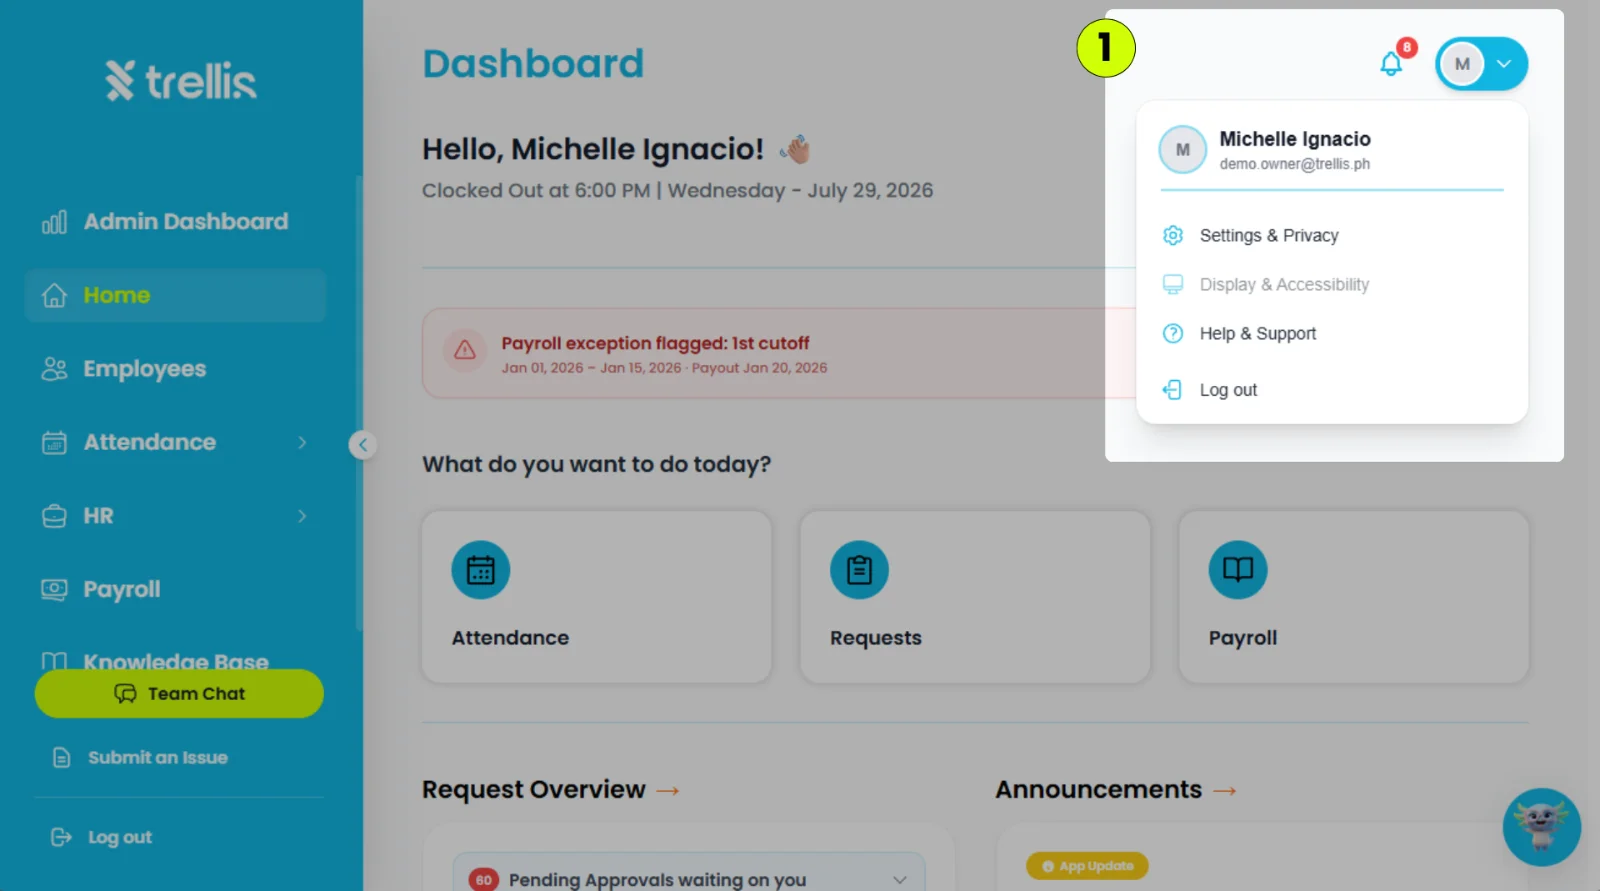
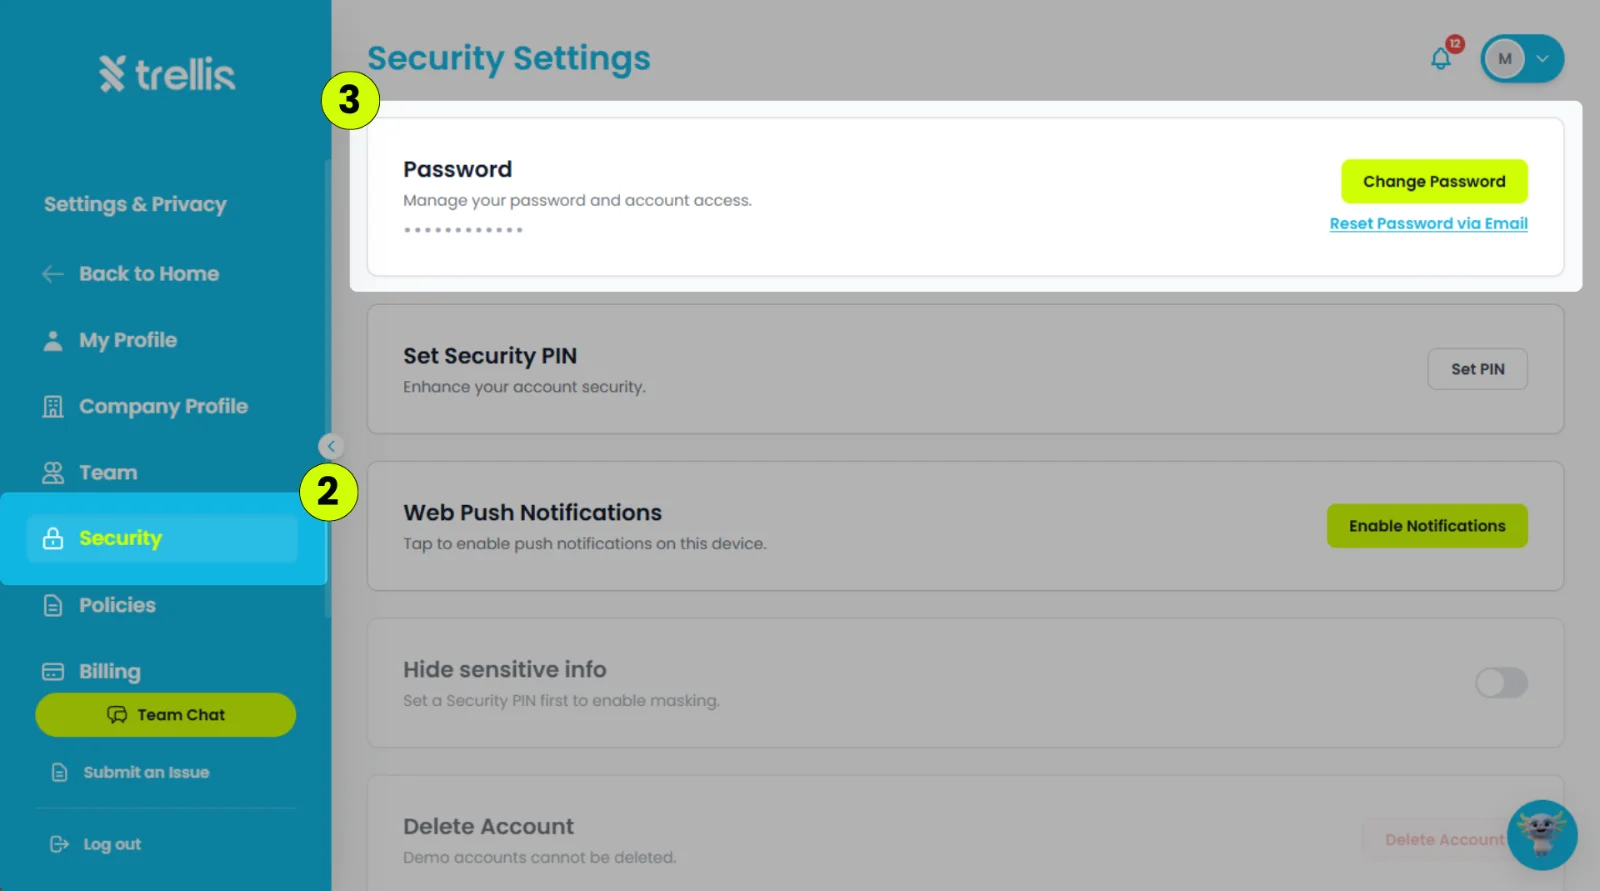
Click your profile icon in the top-right corner, then select "Settings & Privacy."
Click the "Security" in menu tab.
In the Password section, click "Change Password."
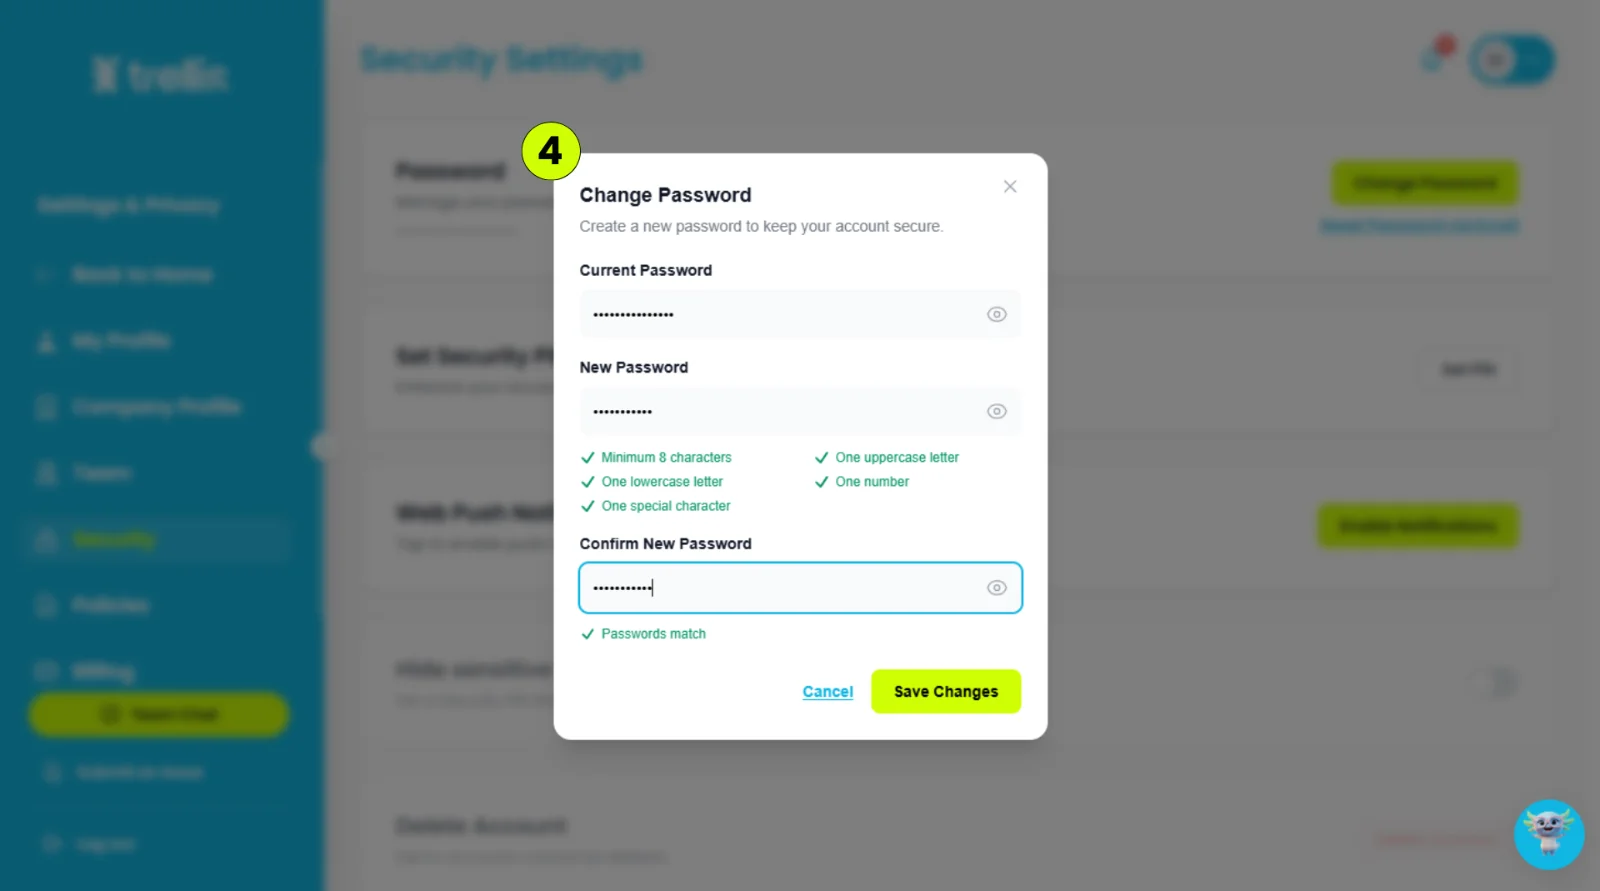
Enter the following information, then click "Save Changes."
Current Password – Your current account password.
New Password – The new password you want to use.
Confirm New Password – Re-enter your new password to confirm it.
Note: If you have forgotten your password, click "Reset Password via Email" to receive a password reset link in your email.
Read the full guide →No articles match your search.
Reach out to our support team and we'll guide you through it.
Contact Support