
How to manage employees
Comprehensive tools to manage your entire workforce
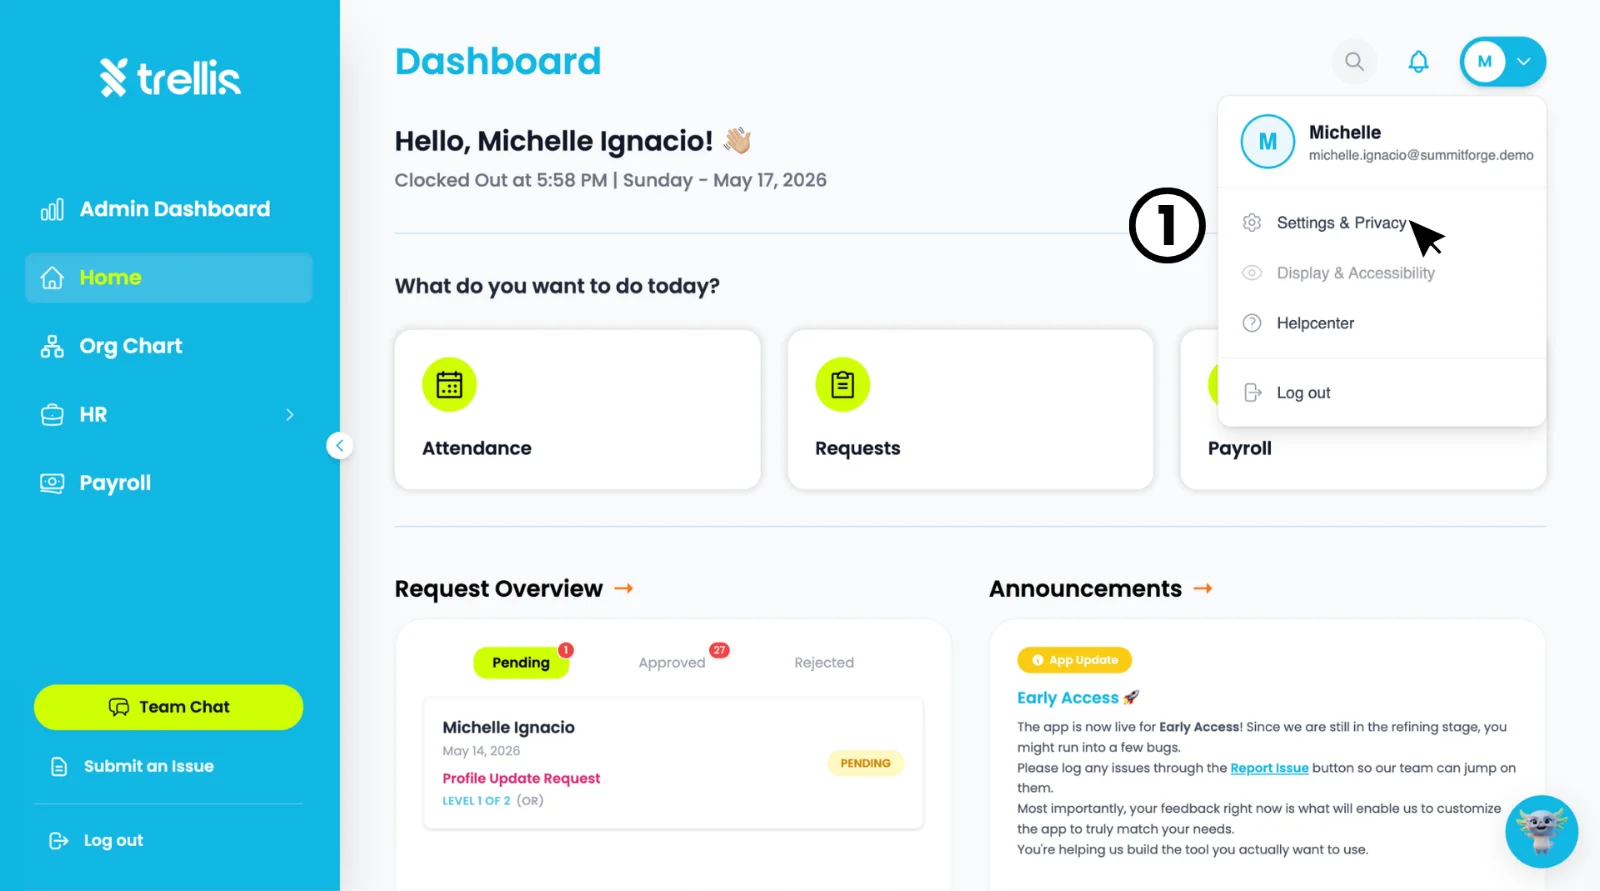
Click your profile icon at the top right corner of the dashboard, then select "Settings & Privacy."
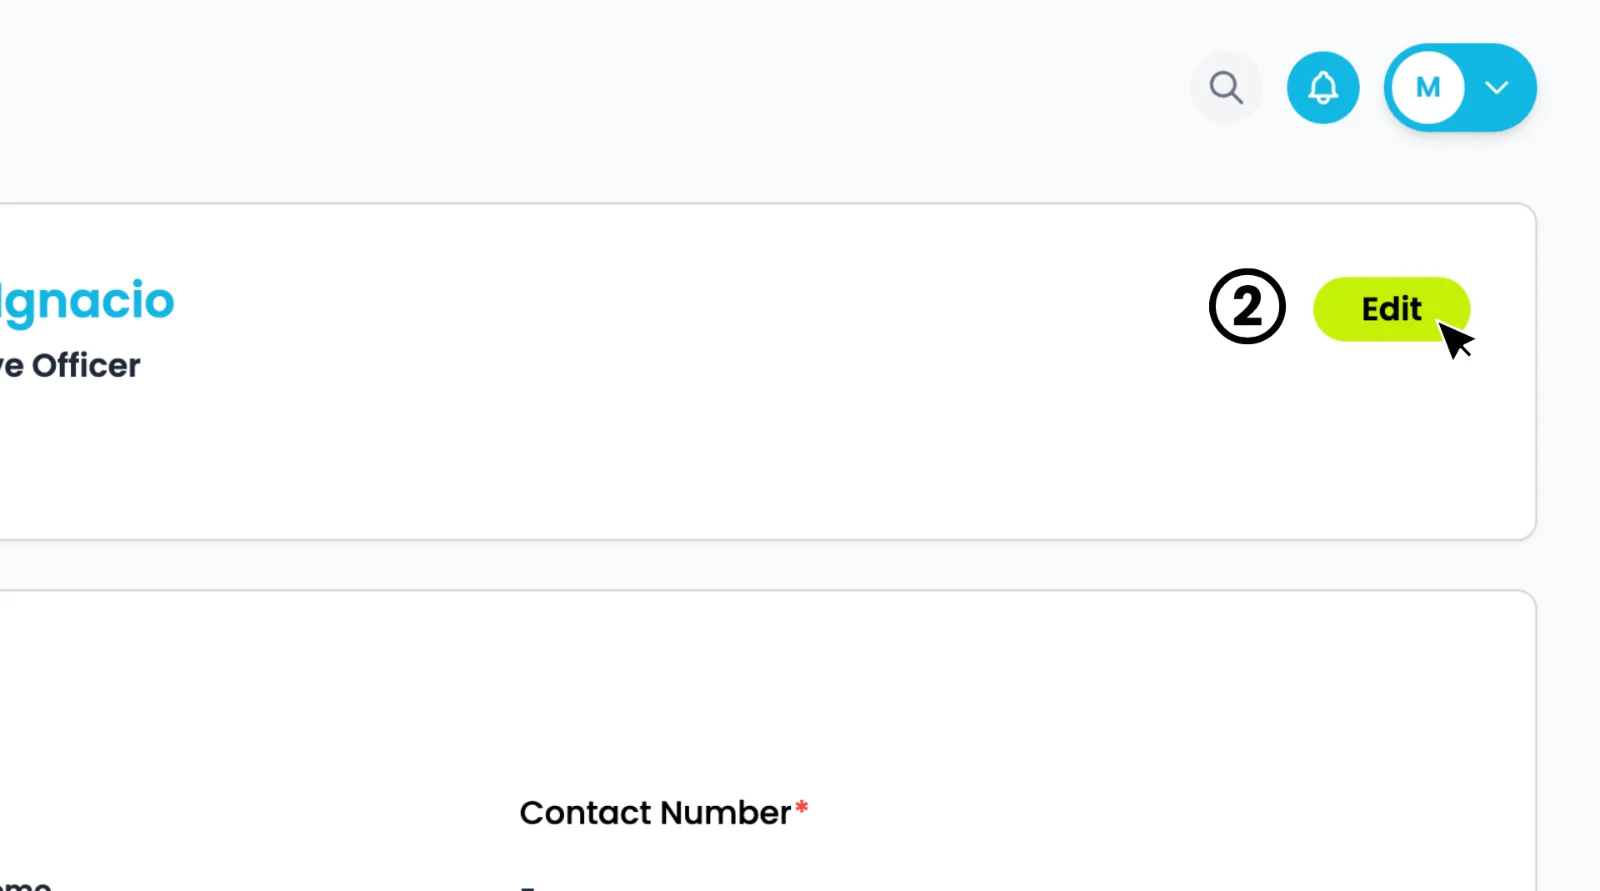
On the ““My Profile page, click the "Edit" button to start editing your profile.
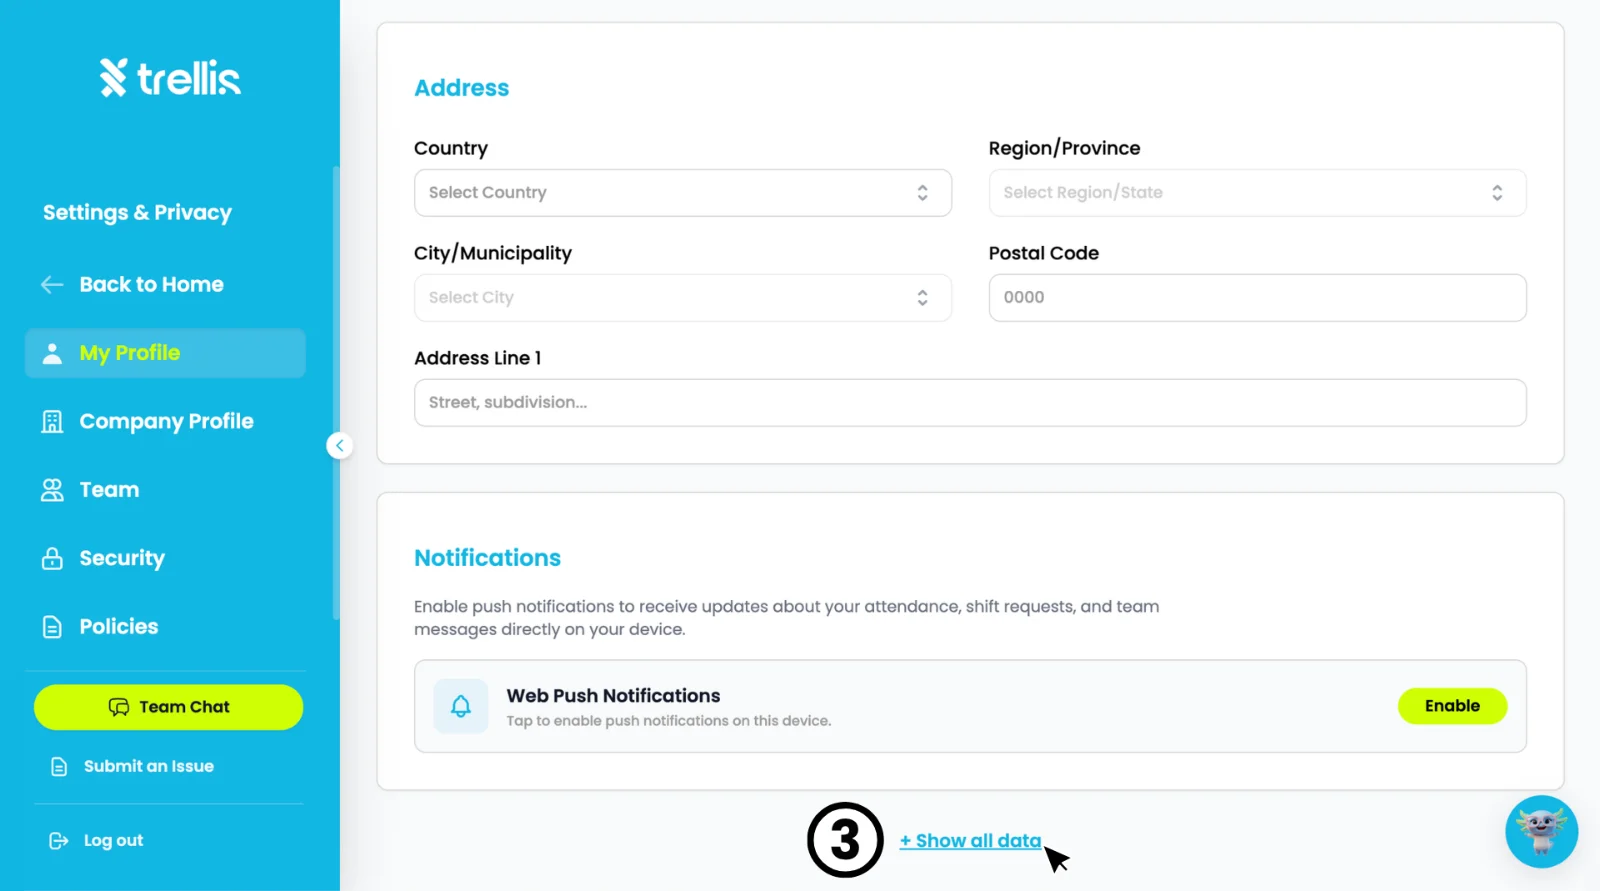
Scroll down and click "+ Show all data" to reveal the additional sections.
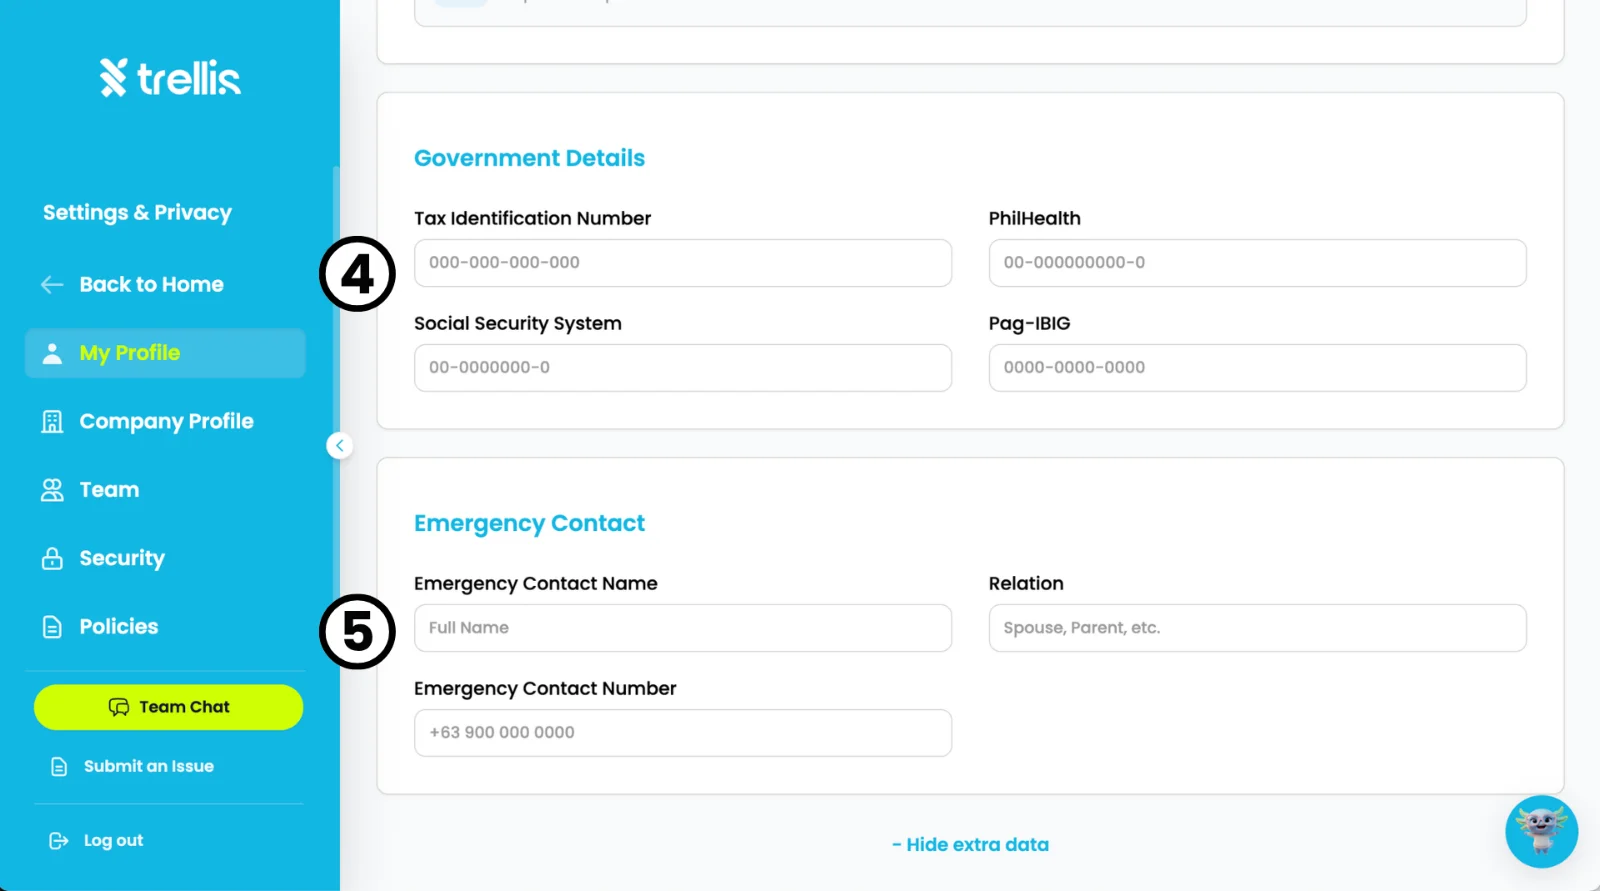
Fill in your "Government Details" including Tax Identification Number, PhilHealth, Social Security System, and Pag-IBIG.
Fill in your "Emergency Contact" details including Full Name, Relation, and Emergency Contact Number. Click "Save" once all changes are complete.
 Read the full guide →
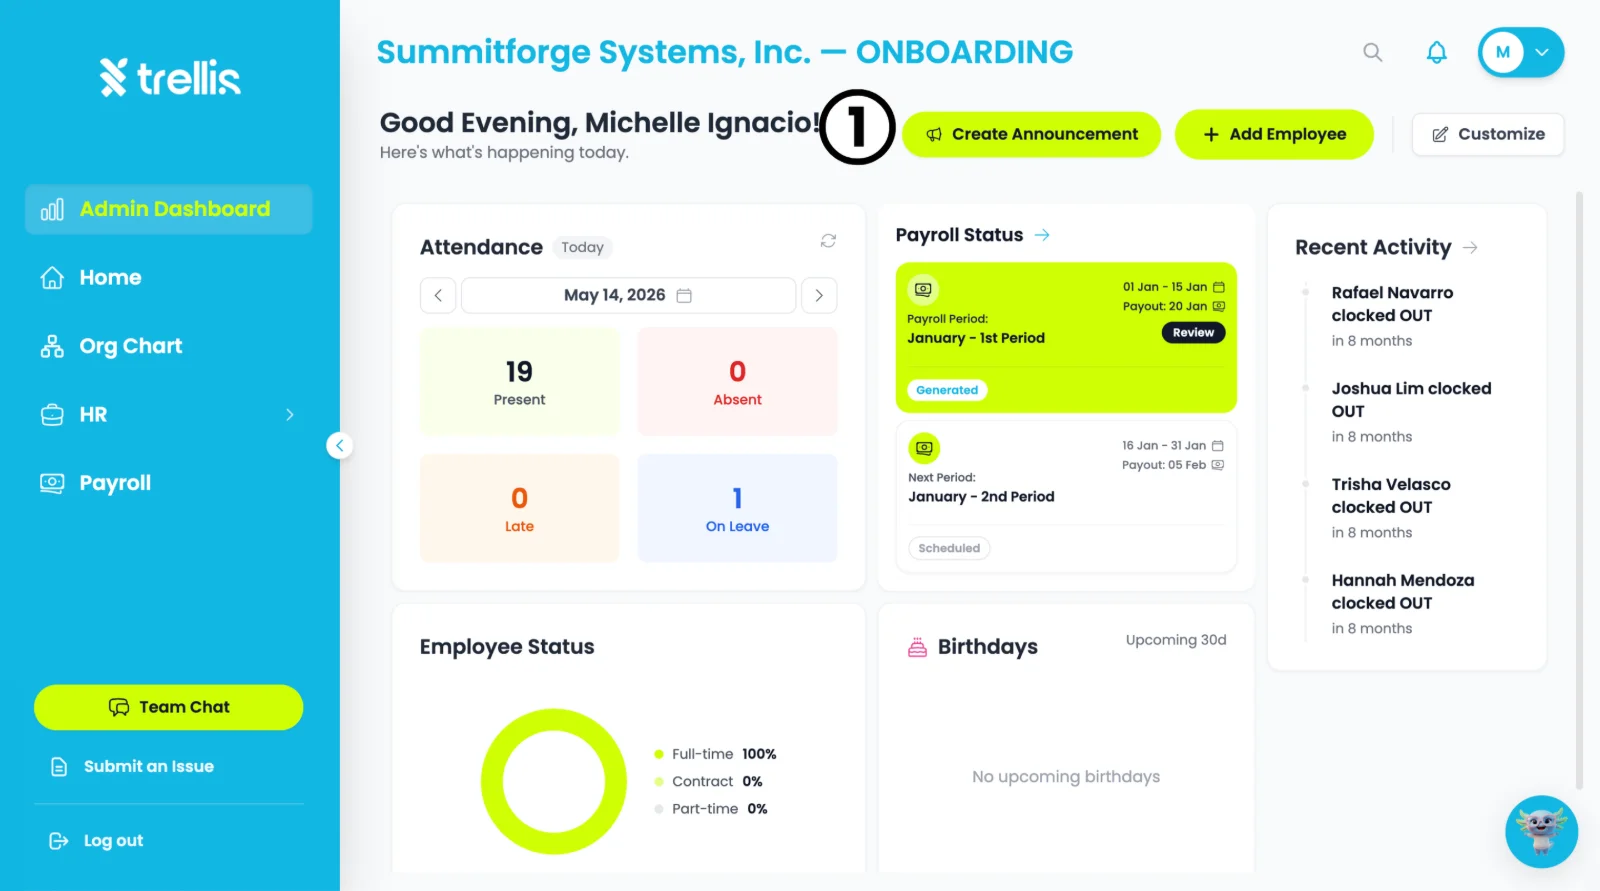
From the “Admin Dashboard”, click the "Create Announcement" button at the top of the page.
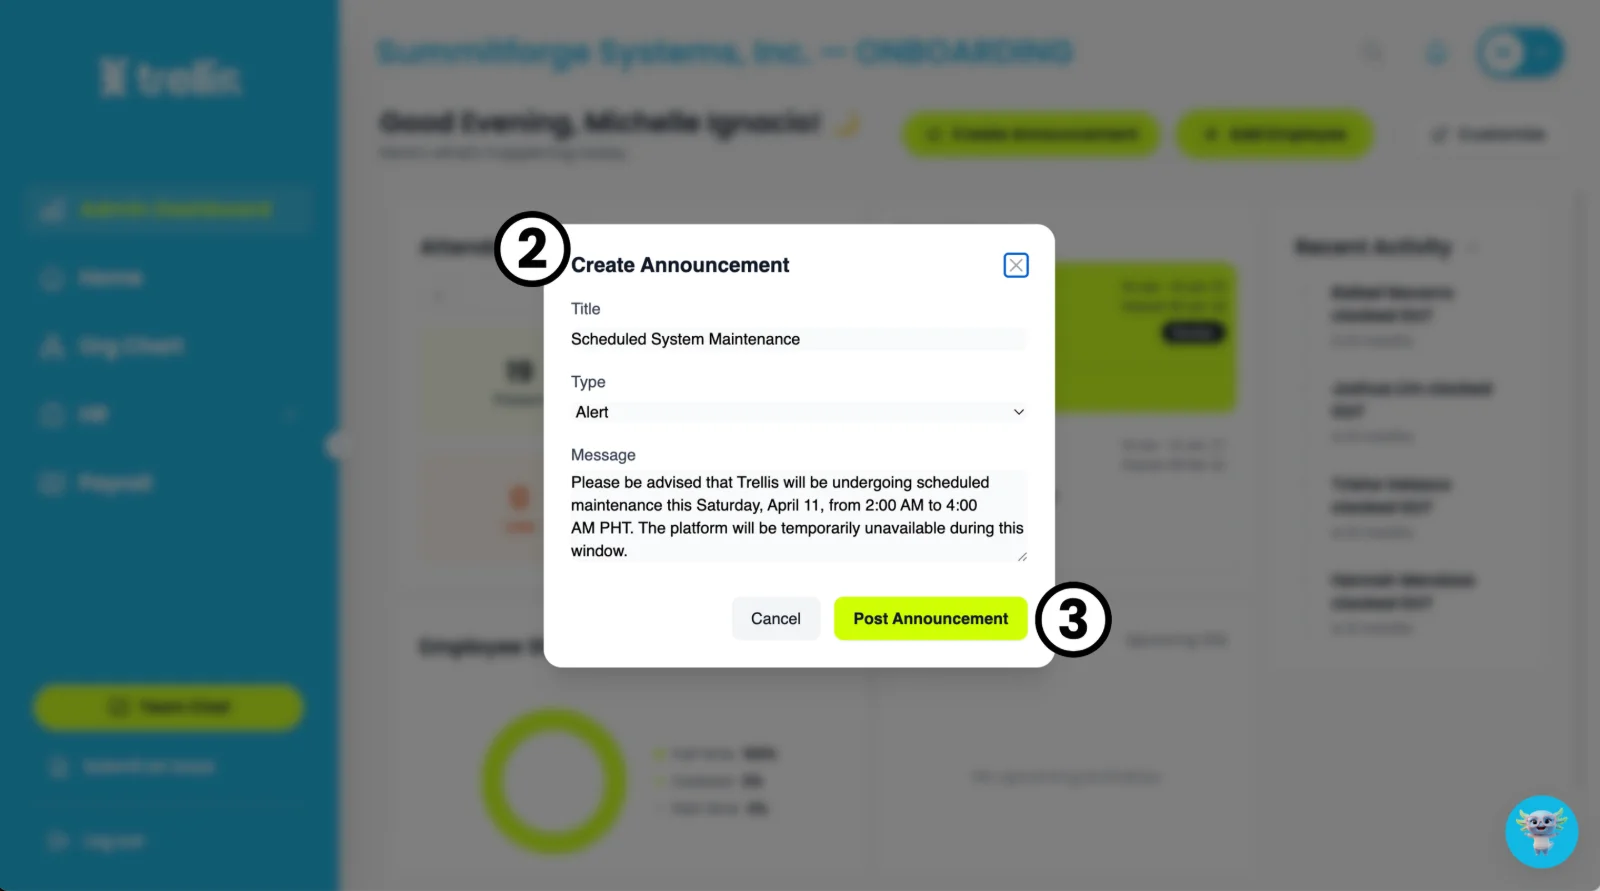
A Create Announcement window will appear. Fill in the Title, select the Type (e.g. Alert), and write your Message in the field provided.
Click "Post Announcement" to publish it to your team.
A success pop-up appears. Click “OK” to finish.
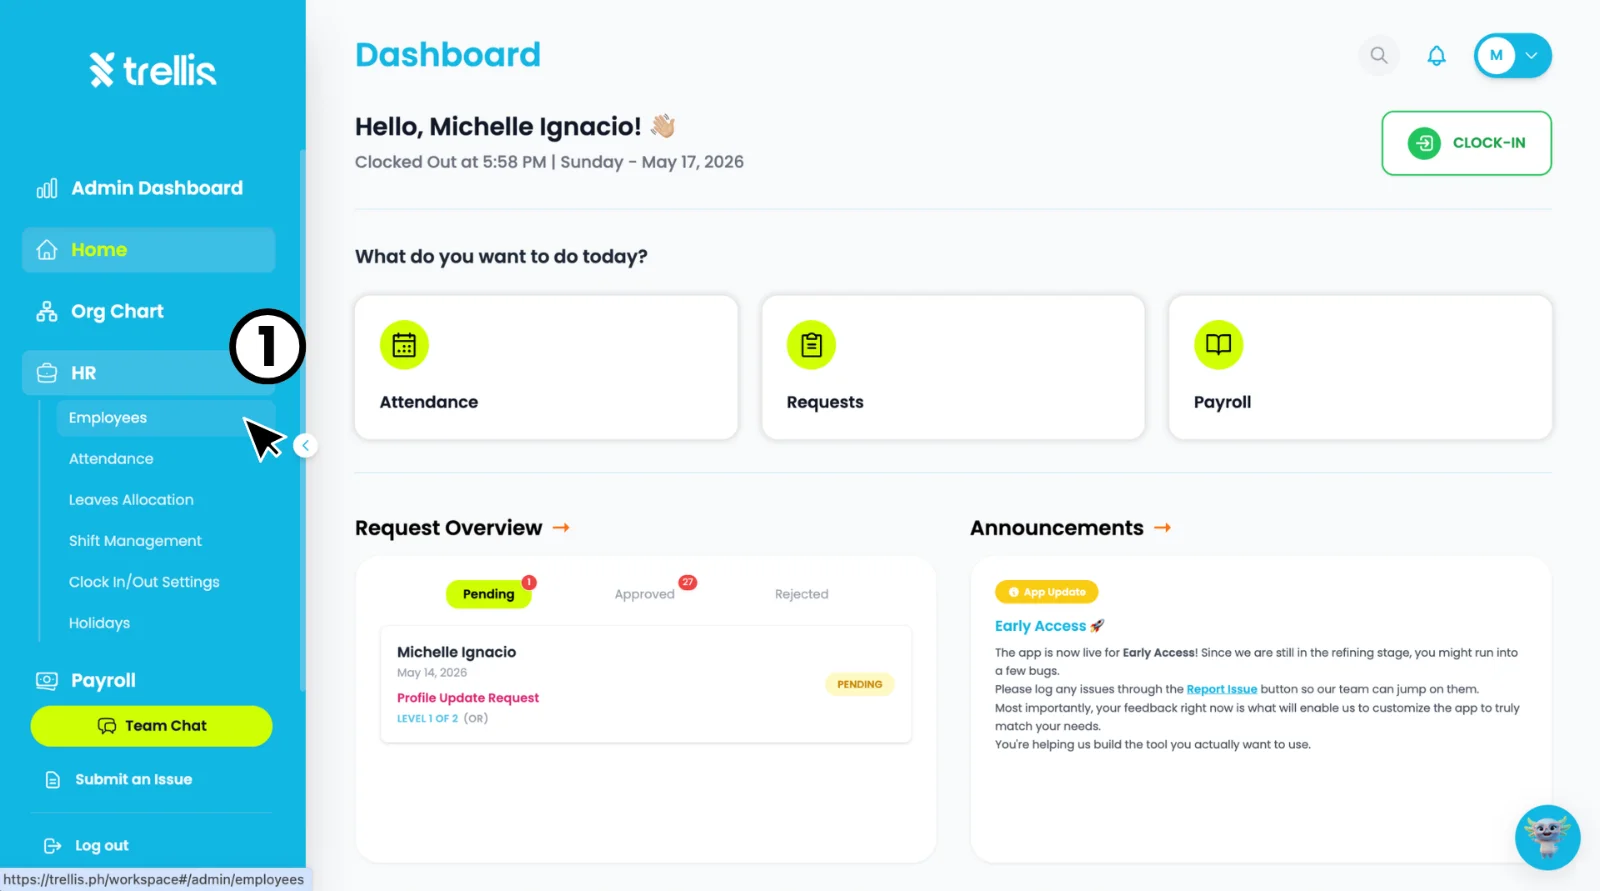
Read the full guide →From the sidebar, click "HR" to expand the menu, then select "Employees."
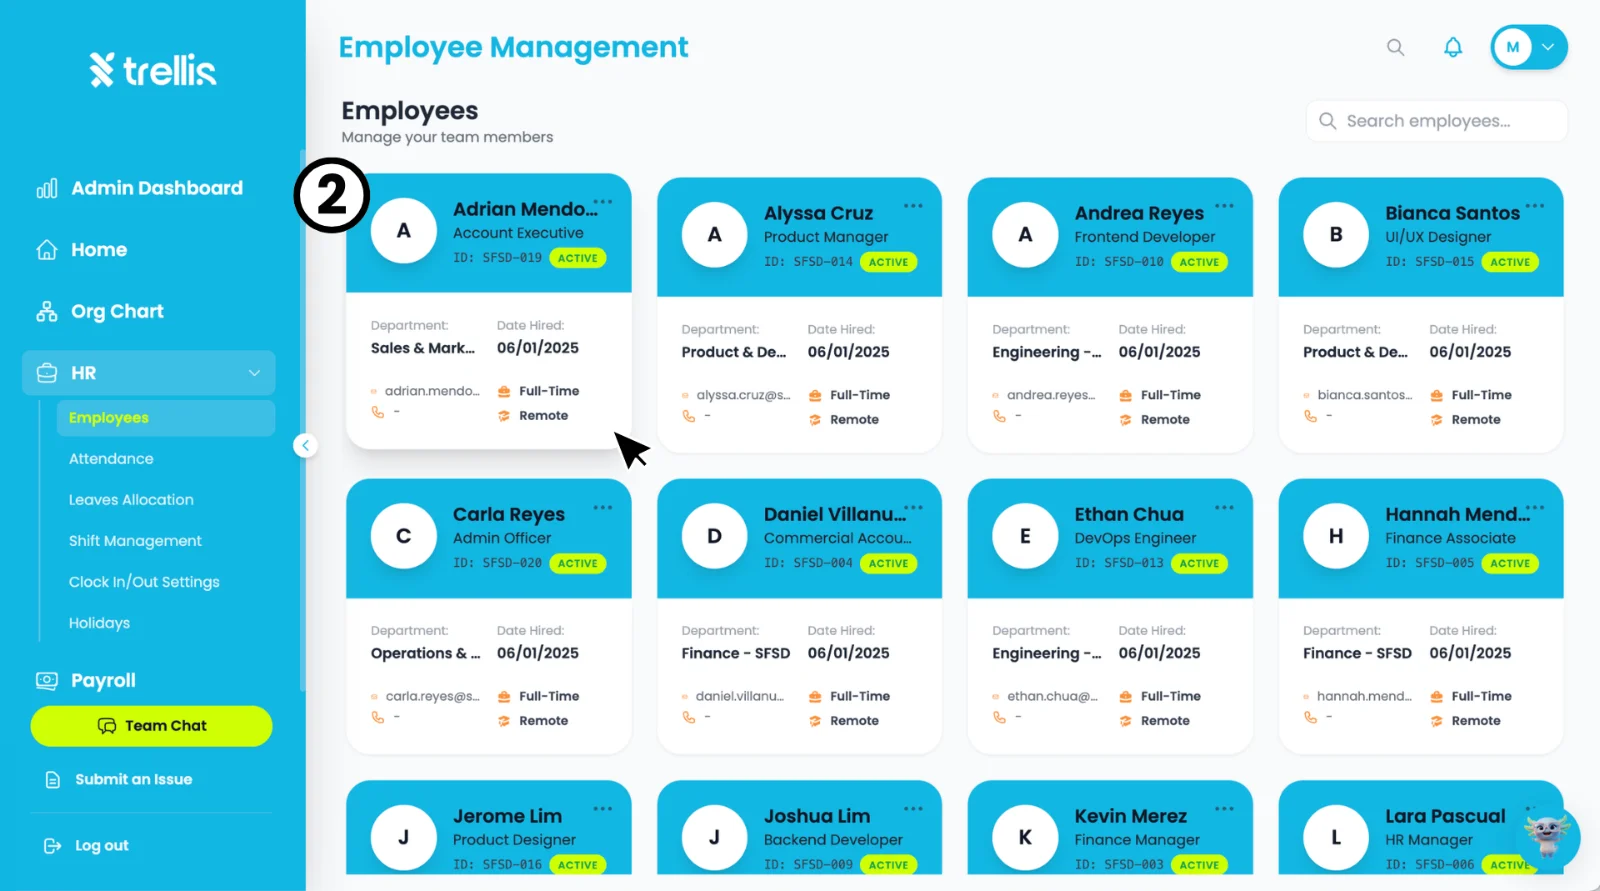
On the "Employee Management” page, click on the employee card you want to view.
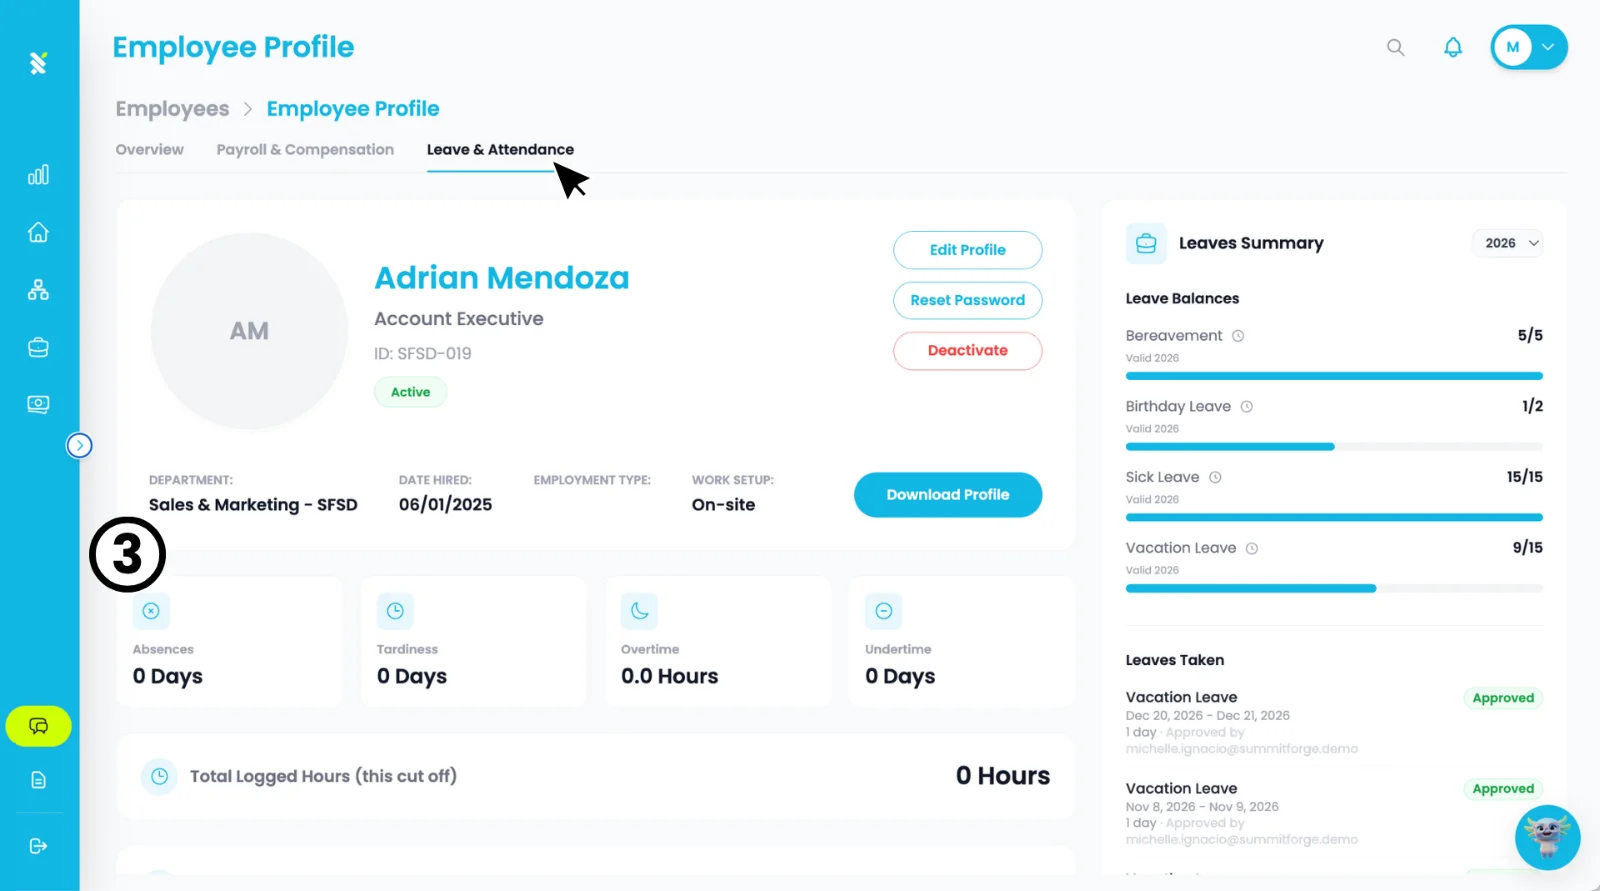
On the "Employee Profile" page, click the "Leave & Attendance" tab to view the employee's attendance summary including "Absences", "Tardiness", "Overtime, Undertime", and "Total Logged Hours". On the right side, you can also see their "Leave Balances" and "Leaves Taken". Scroll down to view the employee's "Daily Time Logs" and full "Leaves Taken" history.
 Read the full guide →
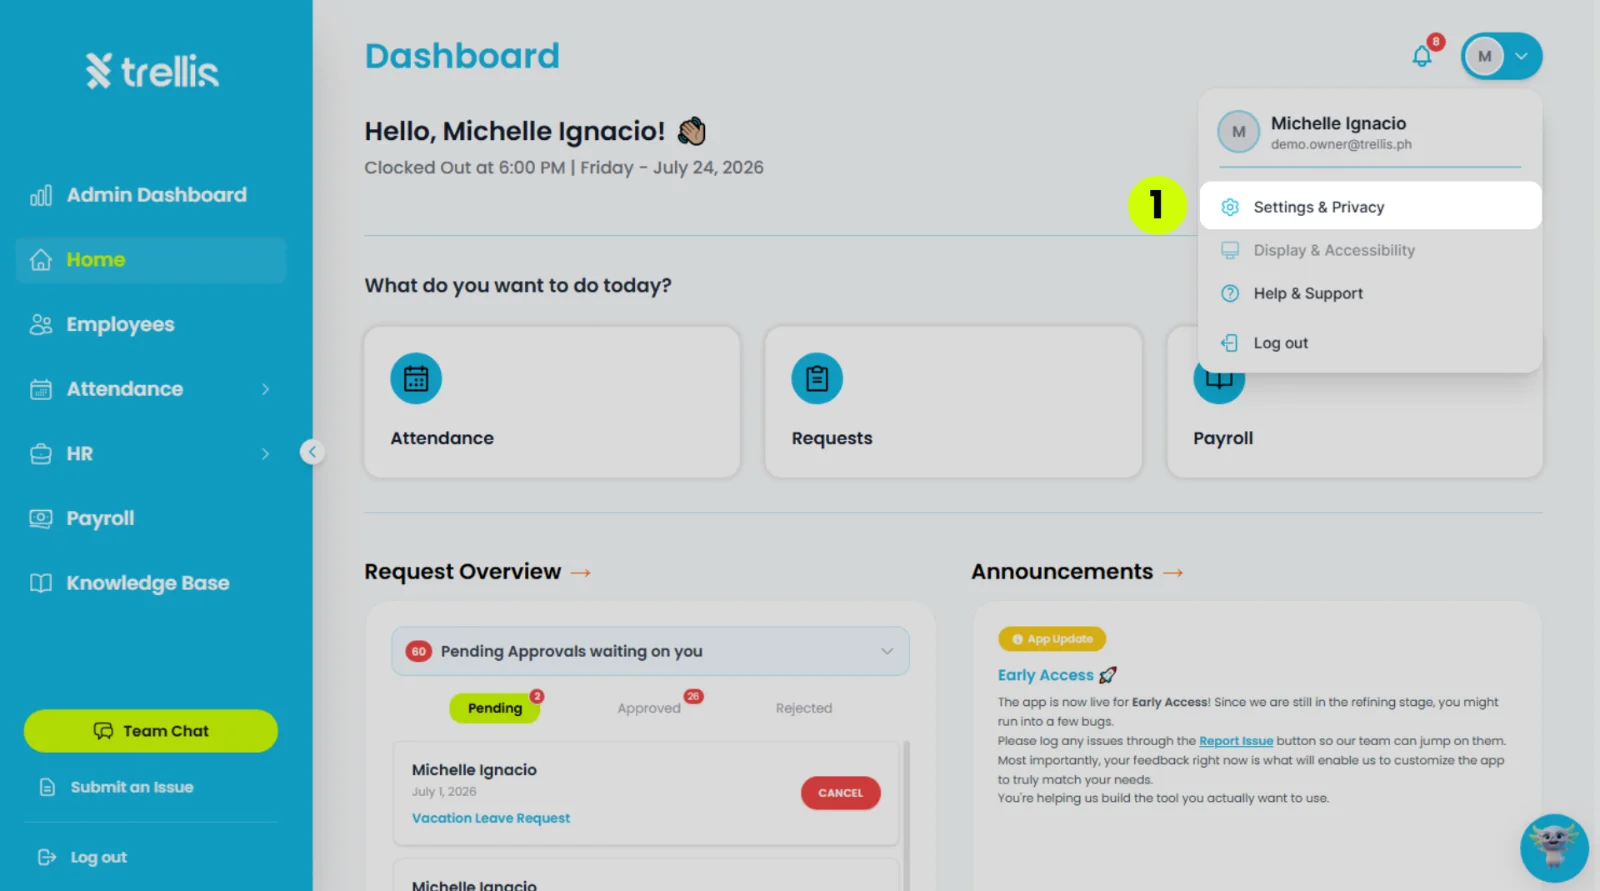
Click your profile icon at the top right, then select Settings & Privacy.
From the sidebar, click "Team" to expand the menu.
-1600.webp)
Scroll down to the “Pending Invitations” section
Under the “Action” column, press the “Cancel” button.
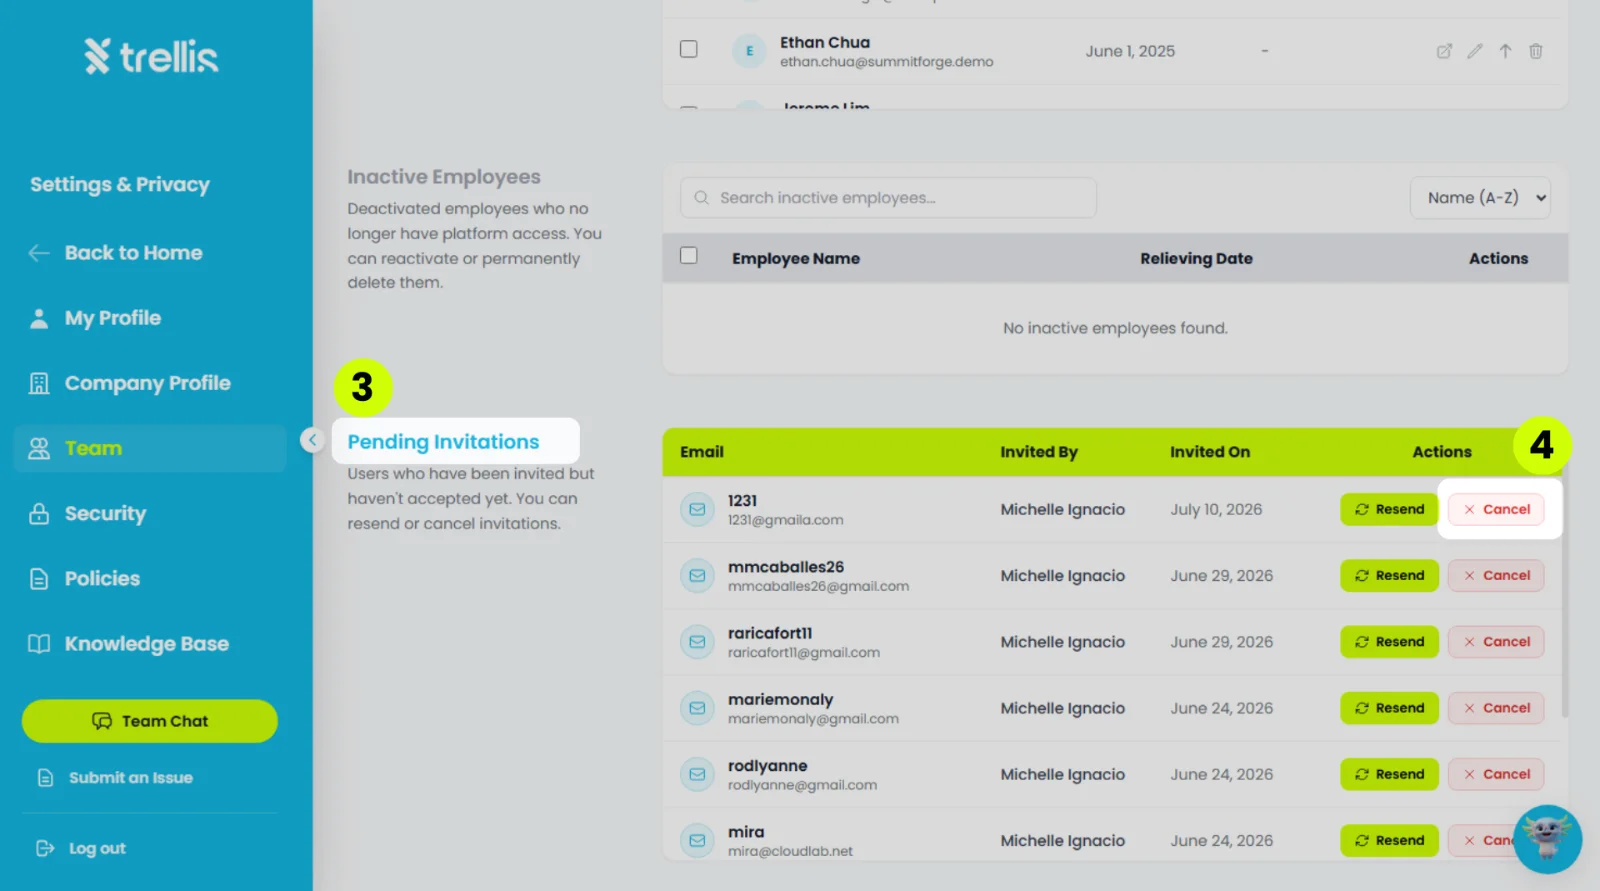
Note: If the person is also listed under “Account Users” (their invitation was resent, so they were added to your team straight away), cancelling the invitation also removes them from your team. To remind them to sign in instead, press “Resend”.
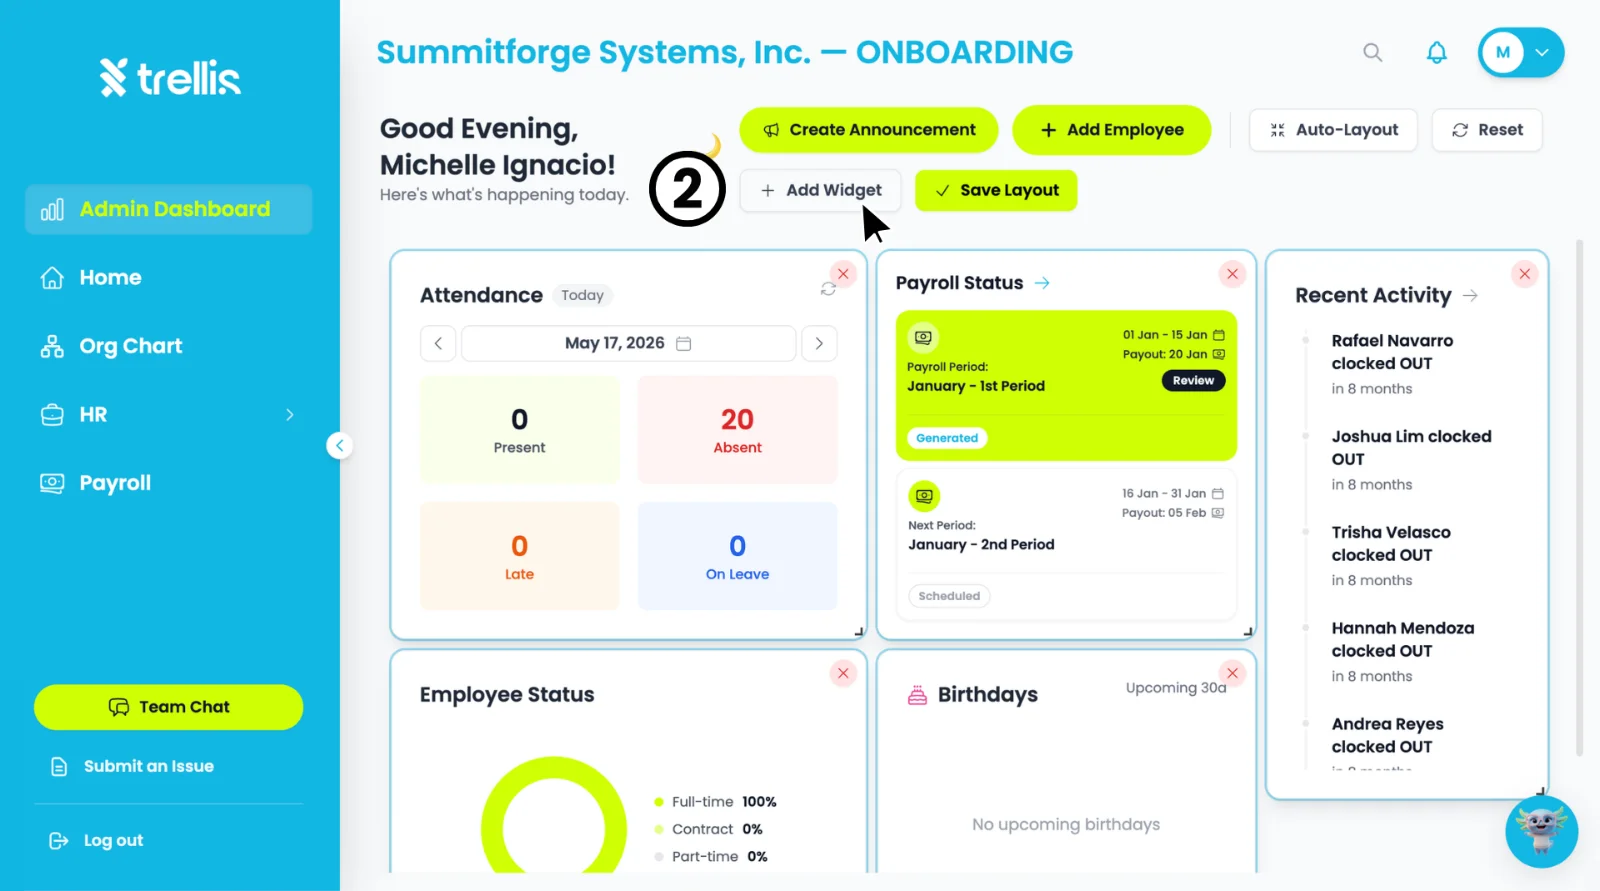
Read the full guide →From the "Admin Dashboard", click the "Customize" button at the top right of the page to enter edit mode.
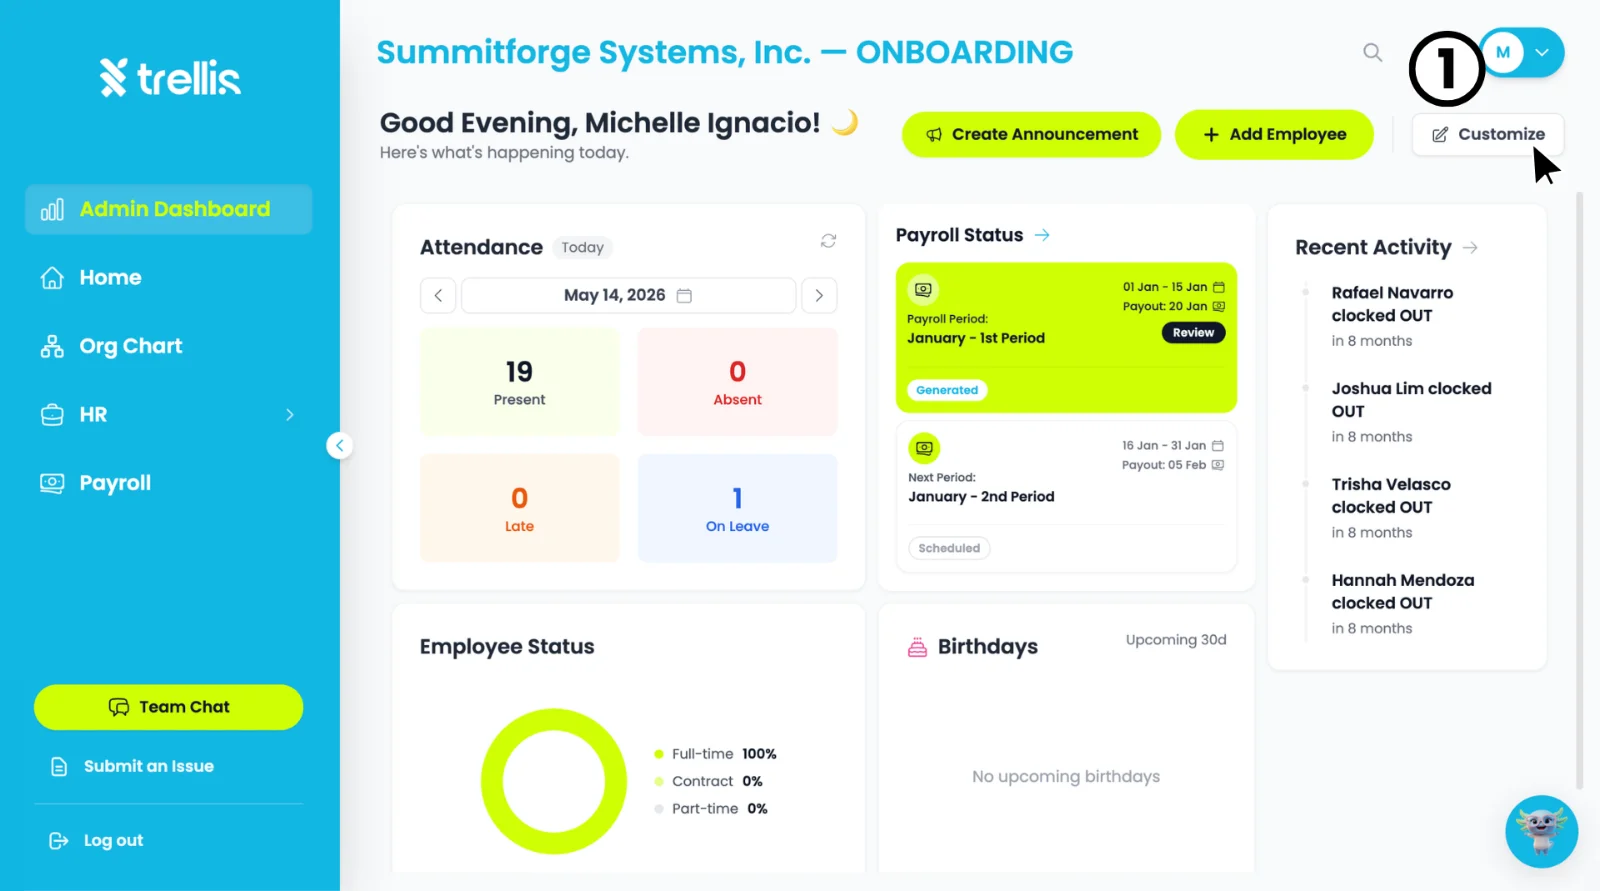
Click the "+ Add Widget" button that appears in the toolbar.
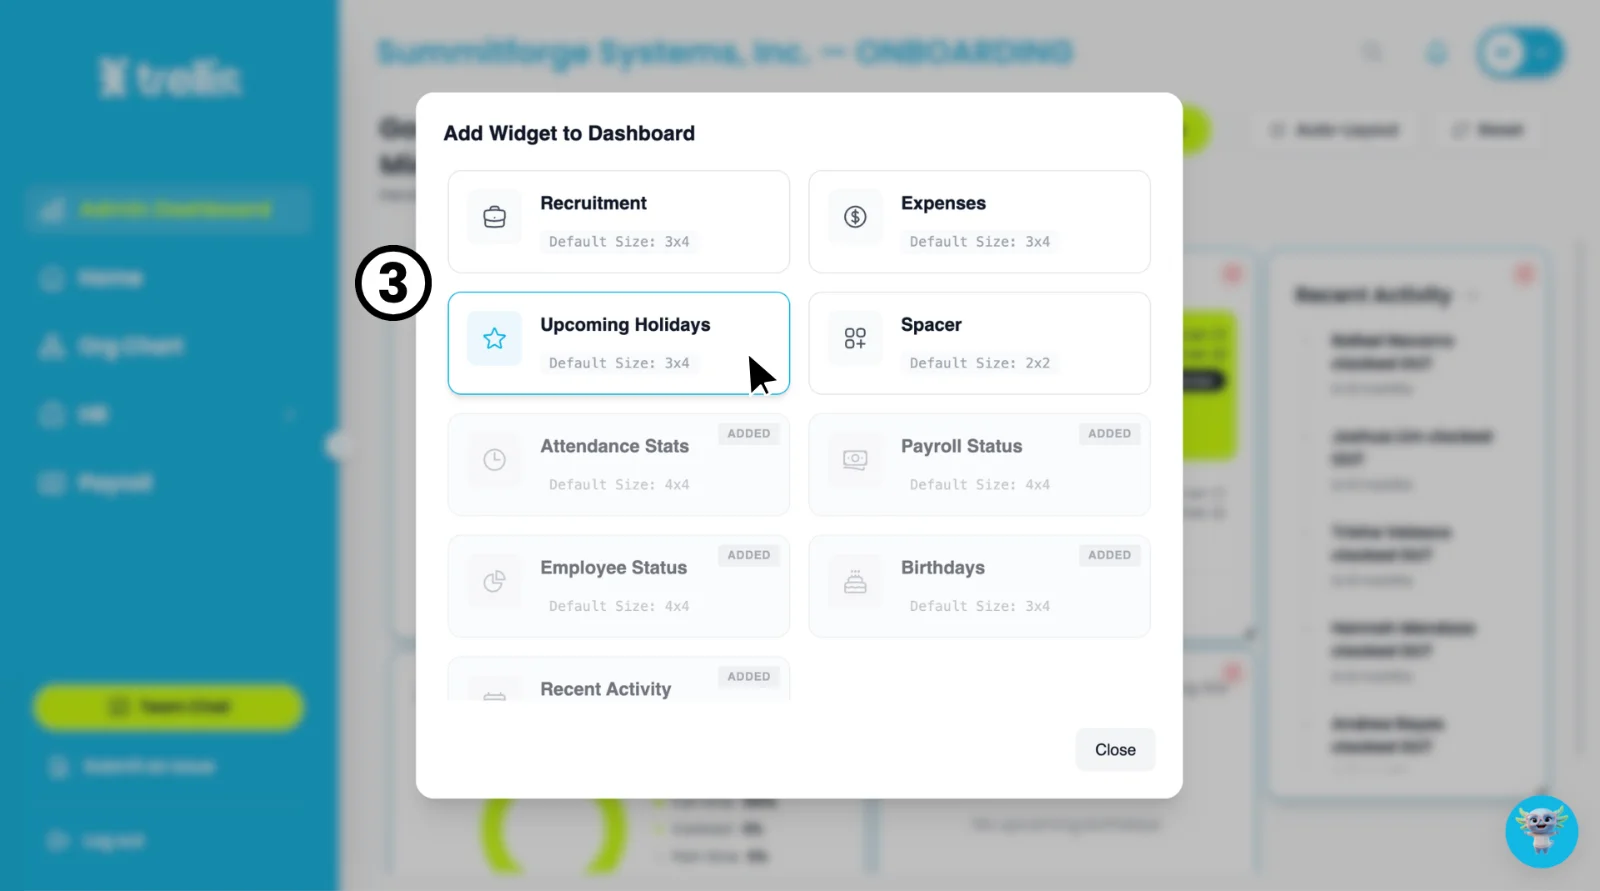
An "Add Widget to Dashboard" window will appear. Select the widget you want to add — widgets already on your dashboard will be marked as "Added."
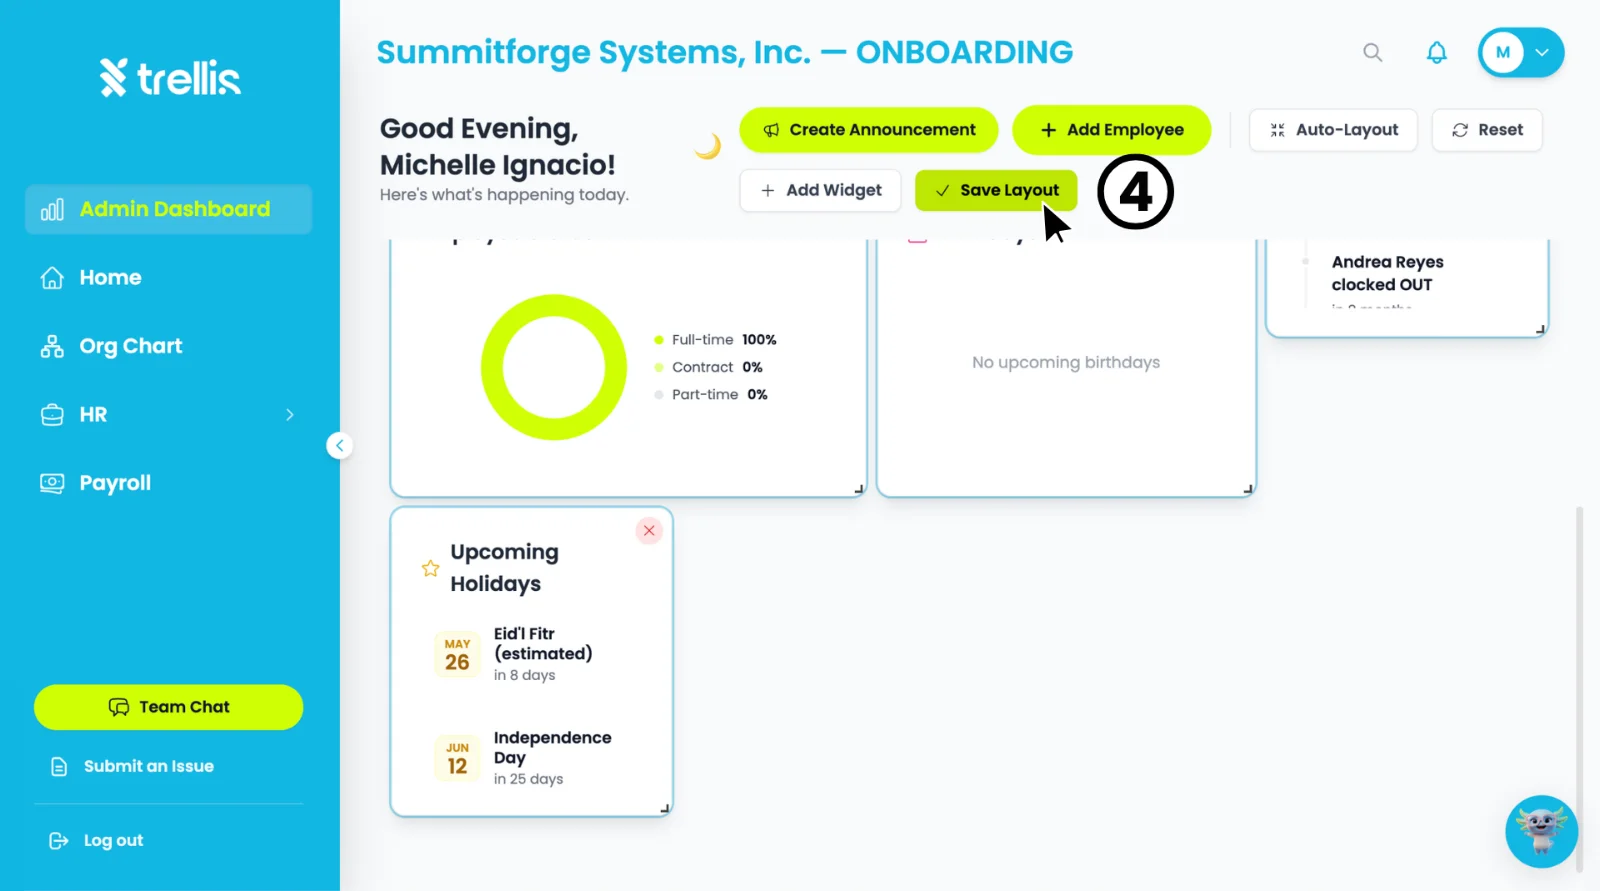
Your selected widget will appear on the dashboard. Click "Save Layout" to apply your changes.
 Read the full guide →
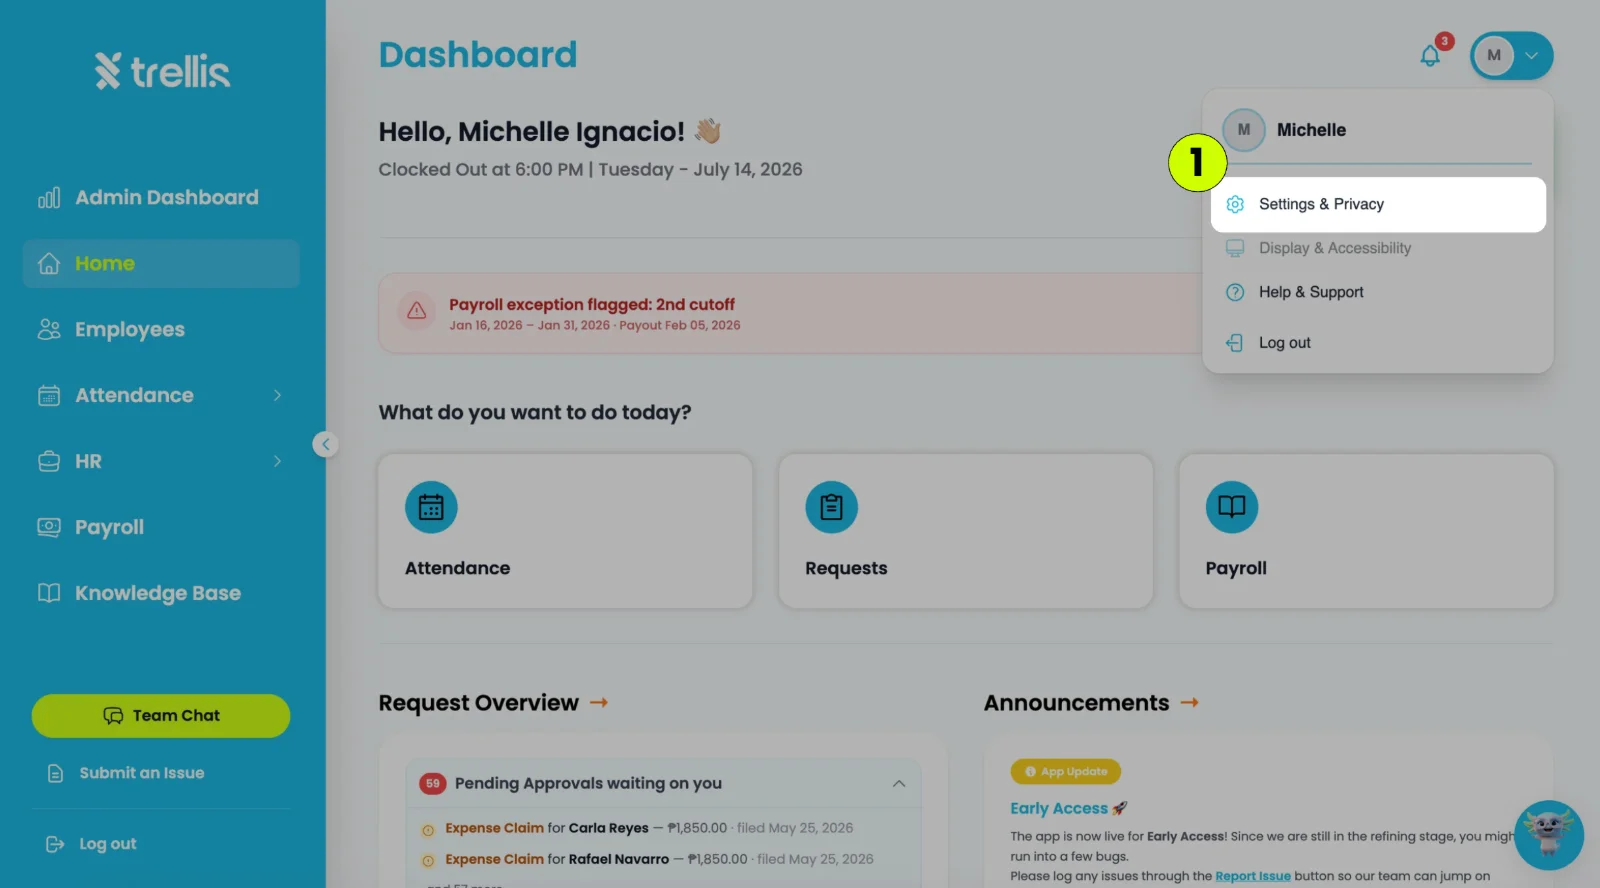
Click your profile icon at the top right, then select “Settings & Privacy”.
Select "Team" and then locate the employee whose access you want to customize.
In the “Actions” column, click "Edit Access" icon.
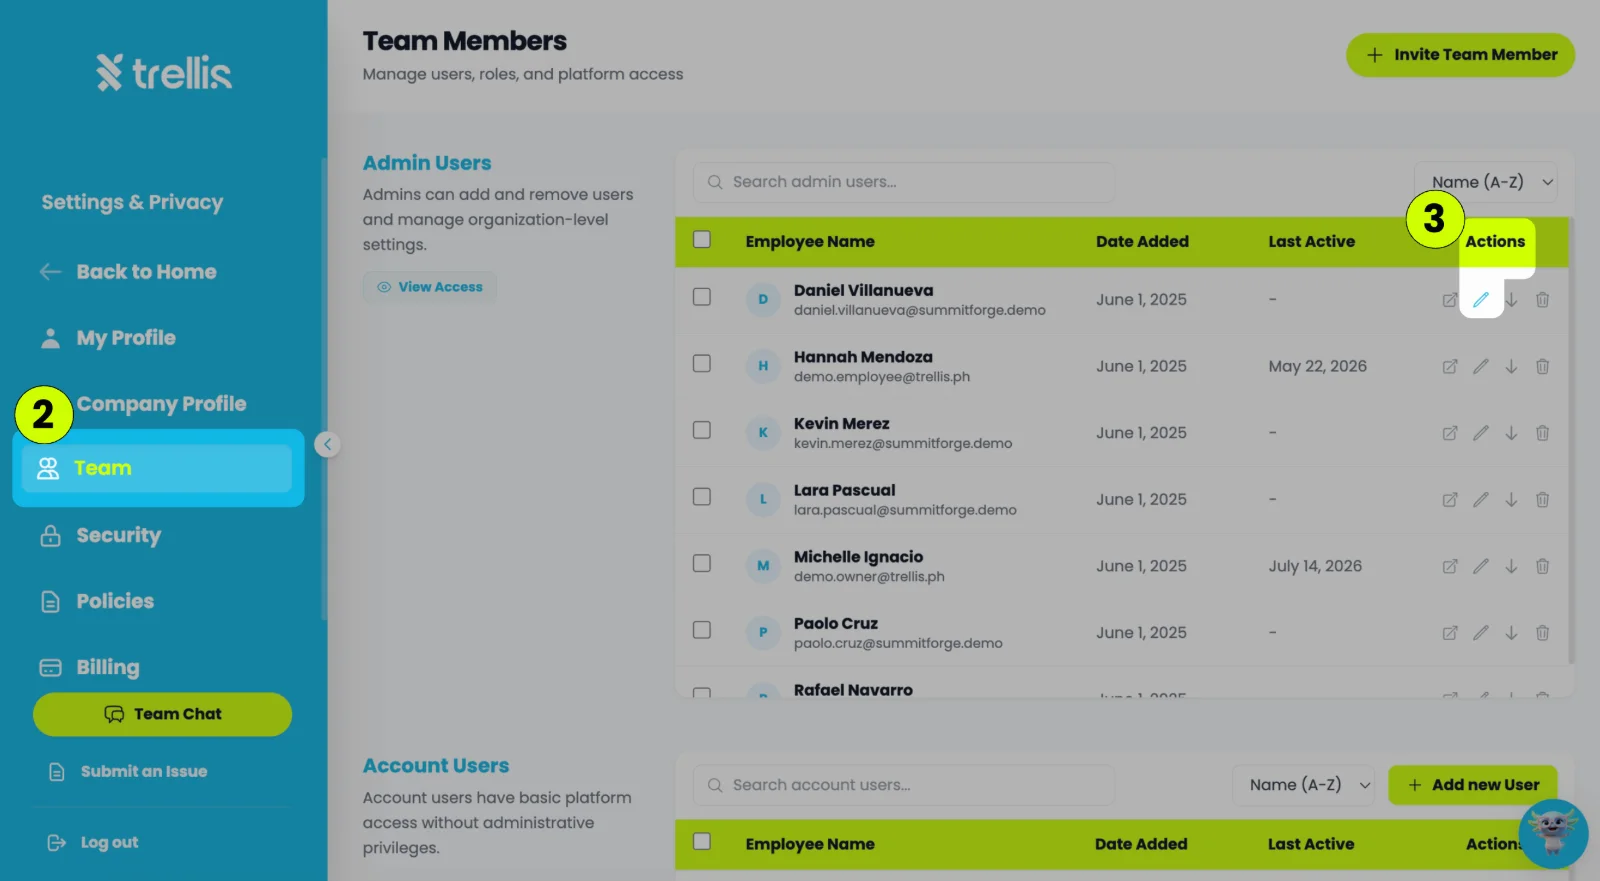
In “Team Access” update the employee's access permissions and sidebar shortcuts as needed, then click "Save Changes".
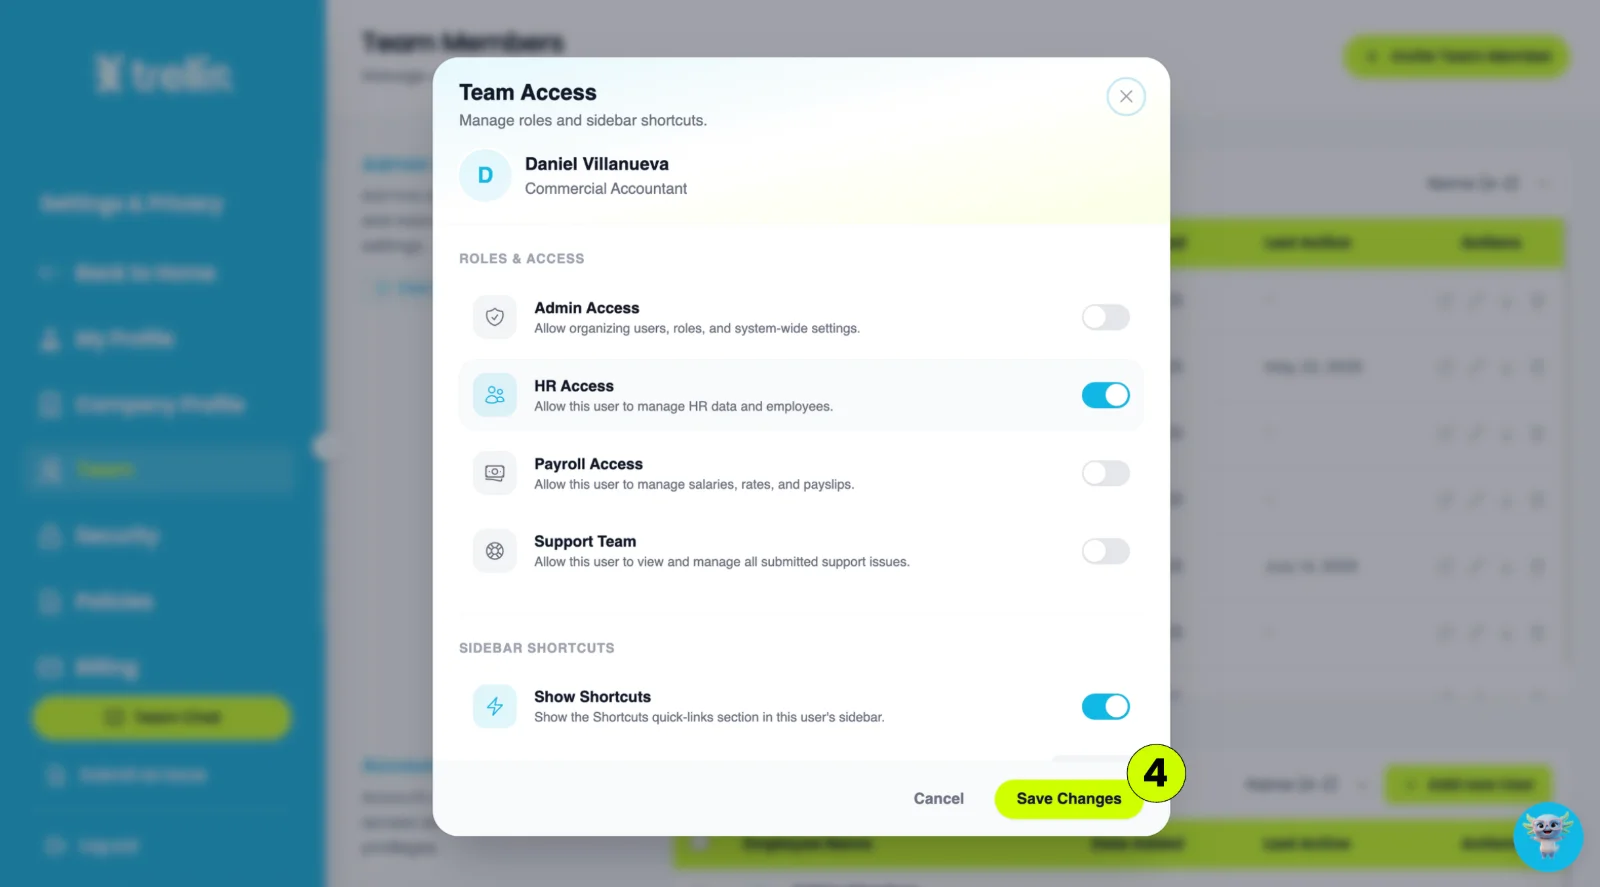
From the sidebar, click "Admin Dashboard."
On the Admin Dashboard page, click "Add Employee."
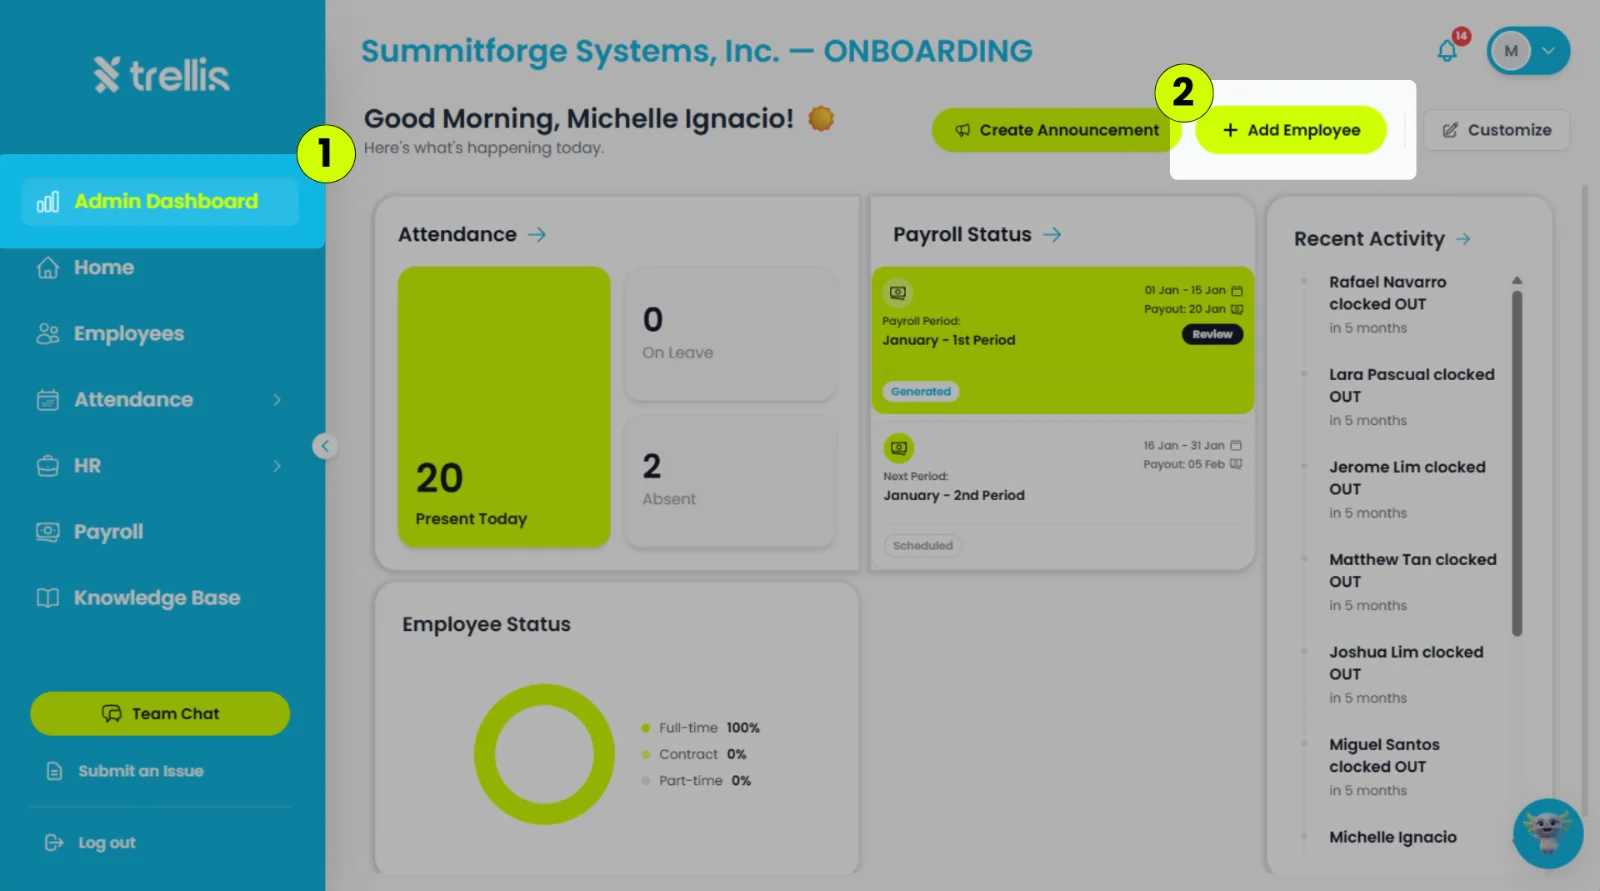
Click "Upload" to start a bulk employee upload.
Upload an .xlsx or .csv file containing the employee information. click "Download Template" to use the required file format.
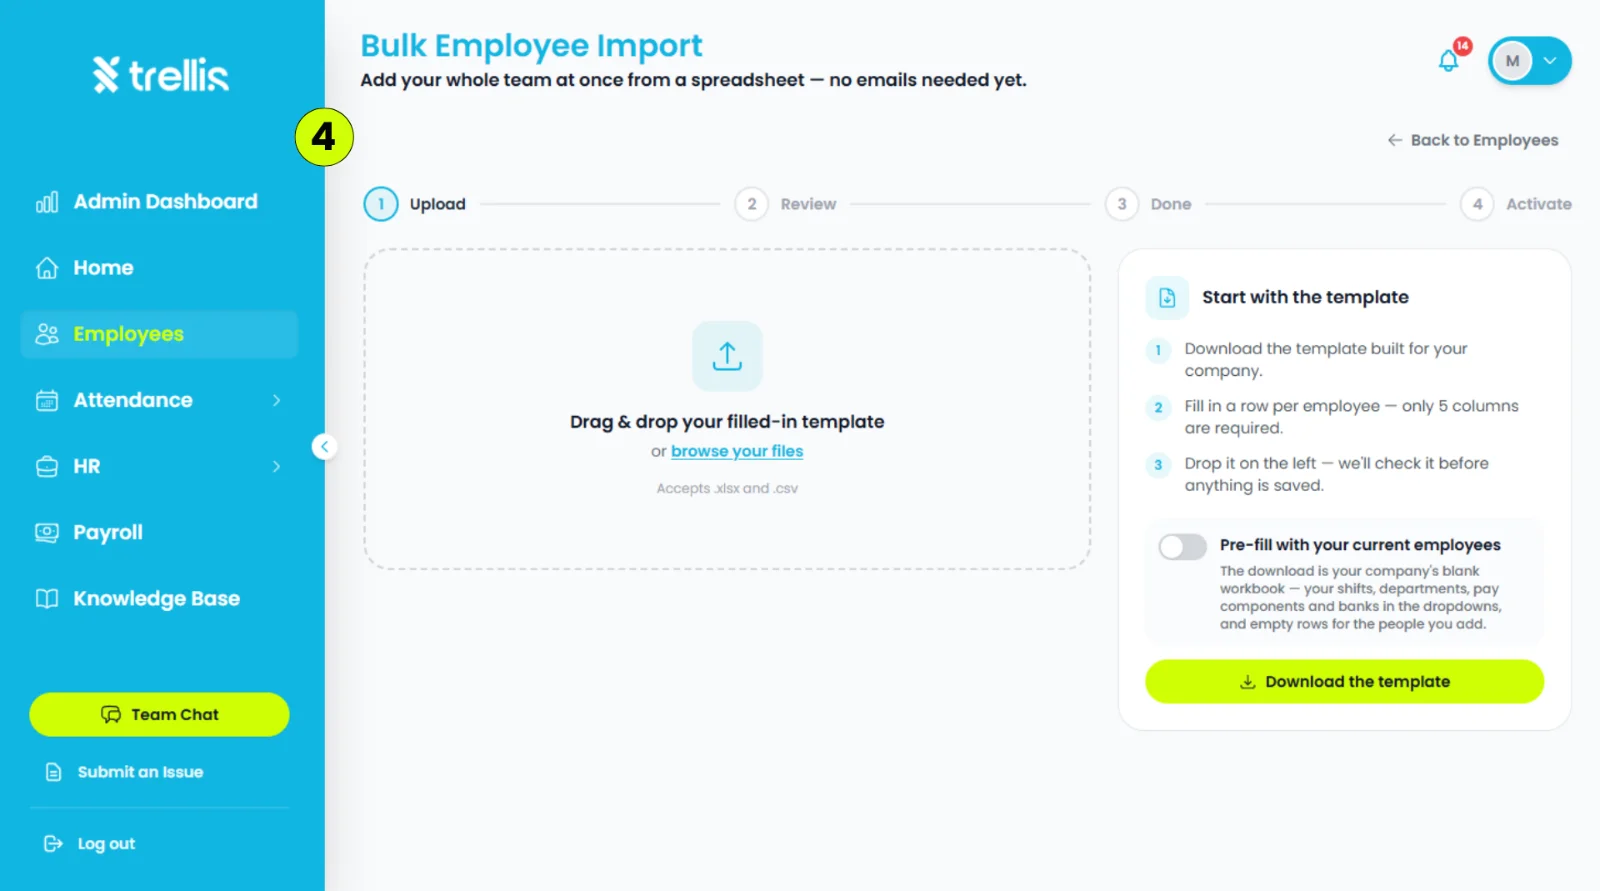
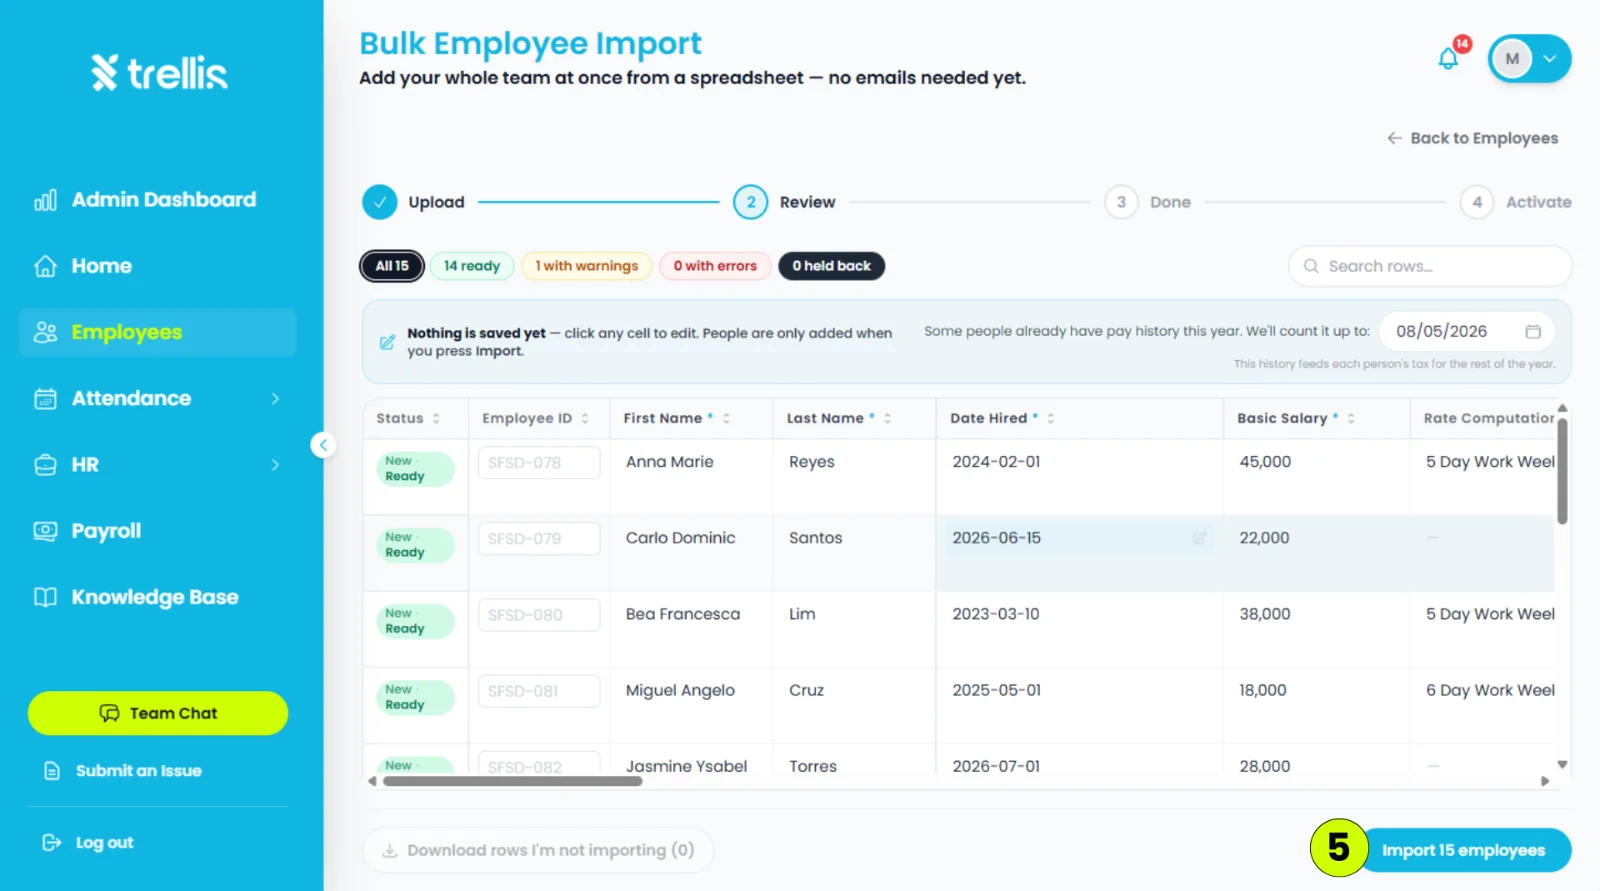
Review the uploaded employee information, then click "Import Employees."
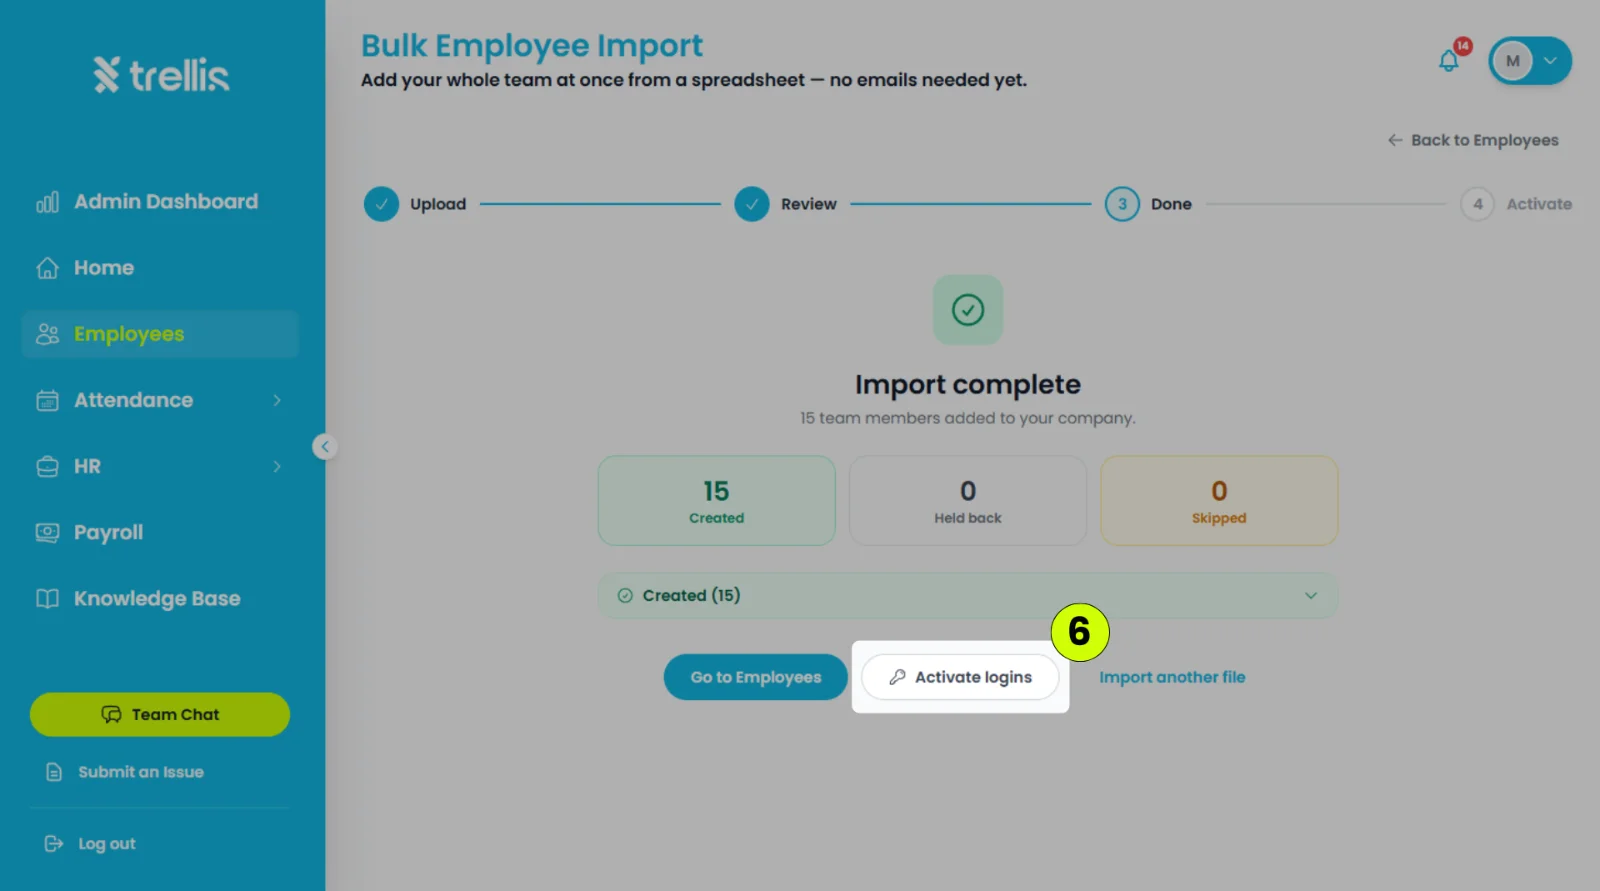
Click "Activate Logins" to create employee accounts.
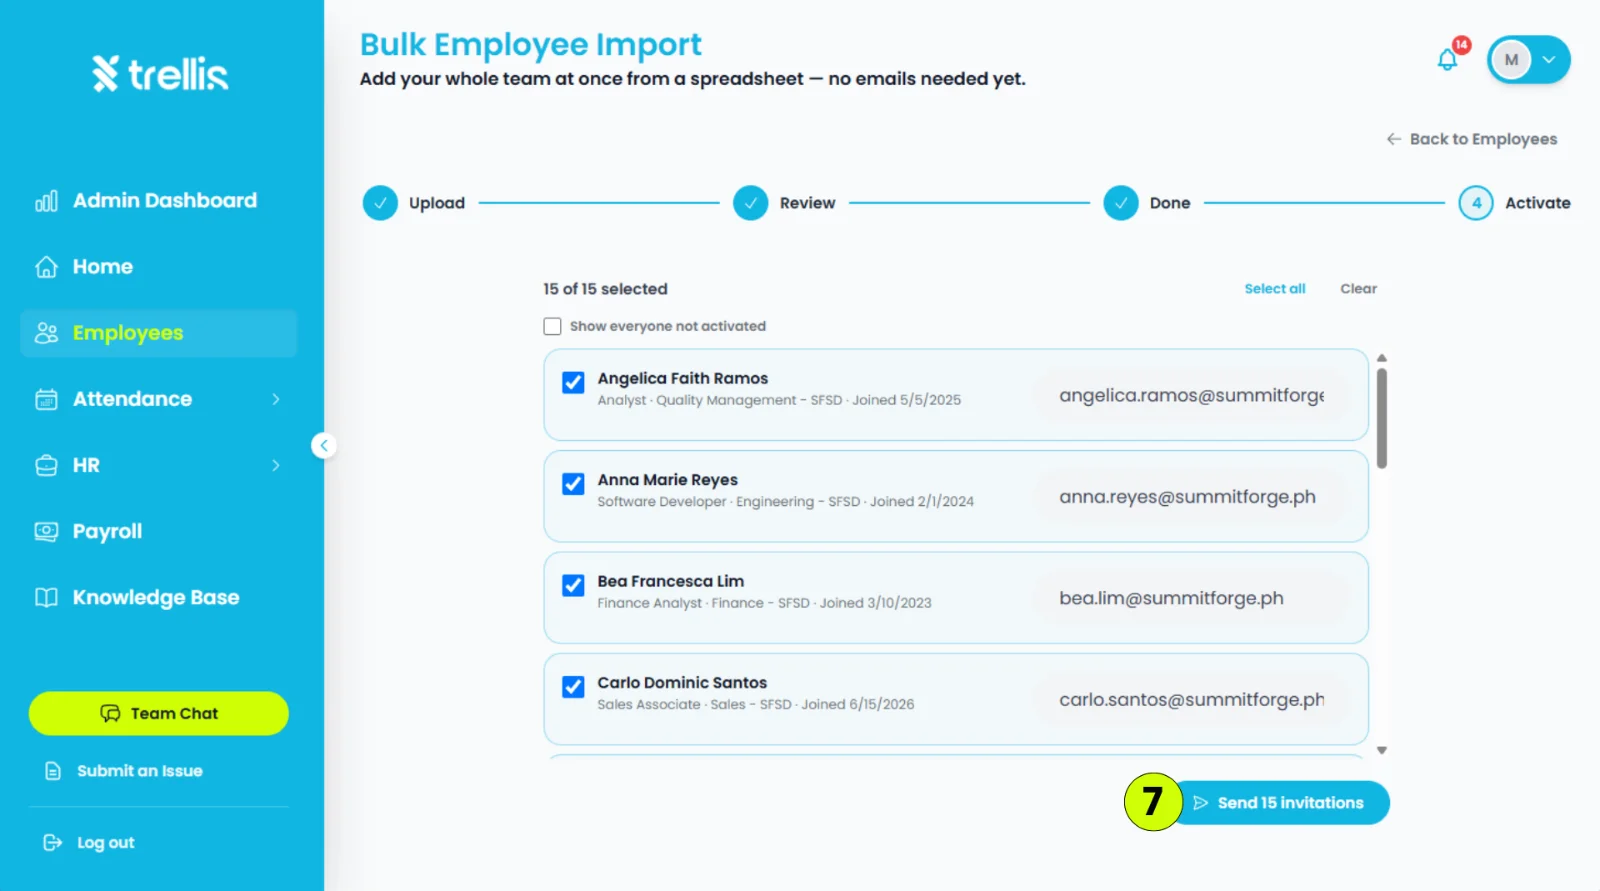
Review the employee list, then click "Send Invitation."
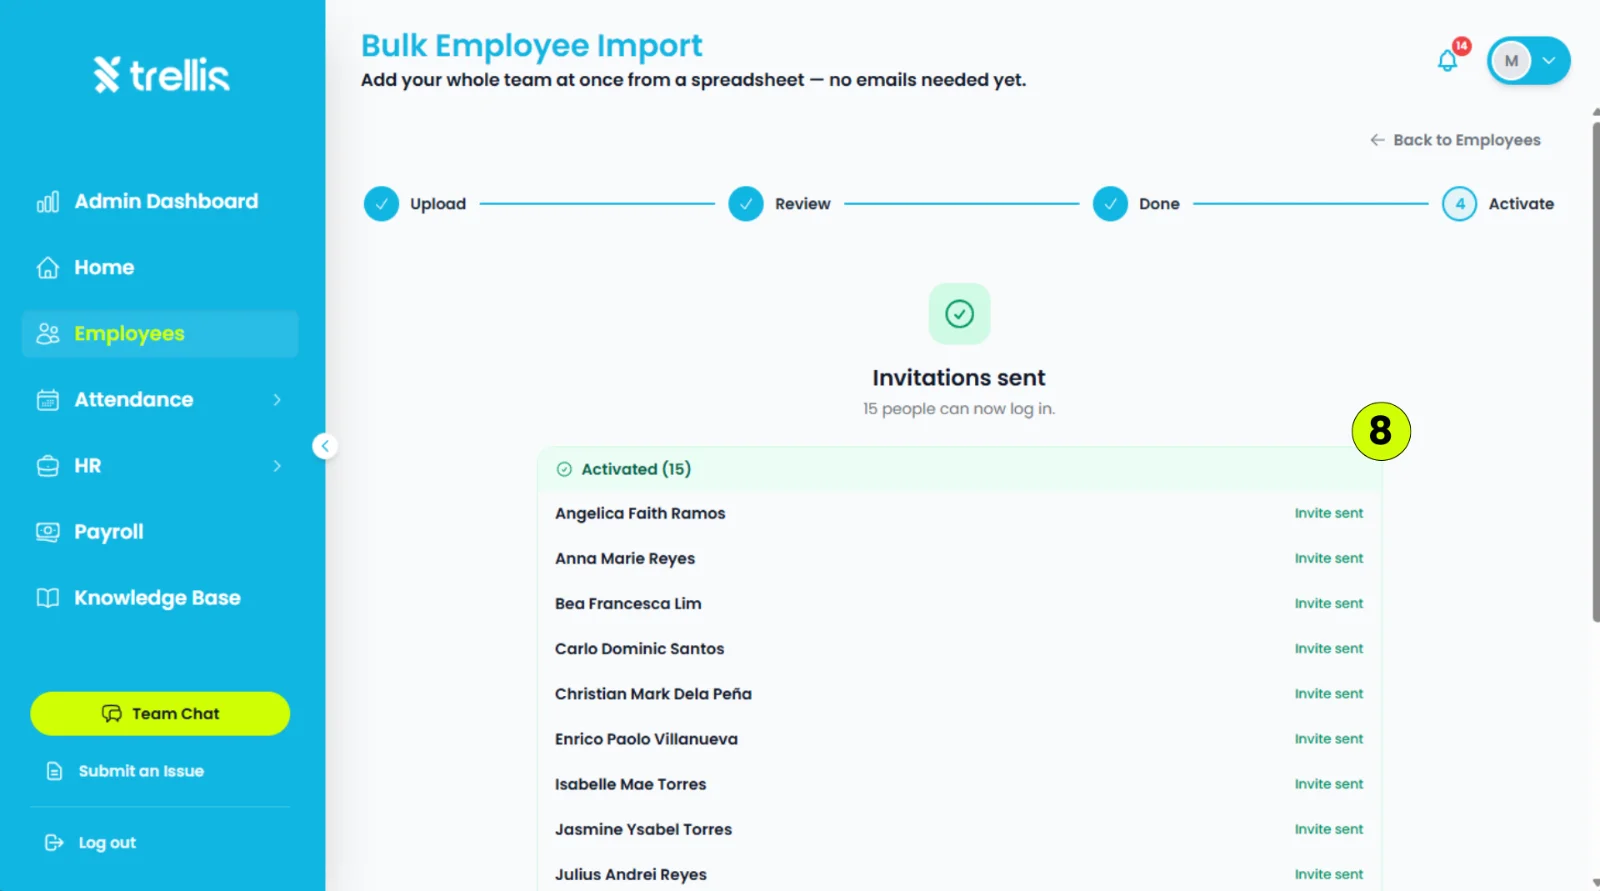
A page will appear, displaying the employees who have successfully received their invitation emails.
 Read the full guide →
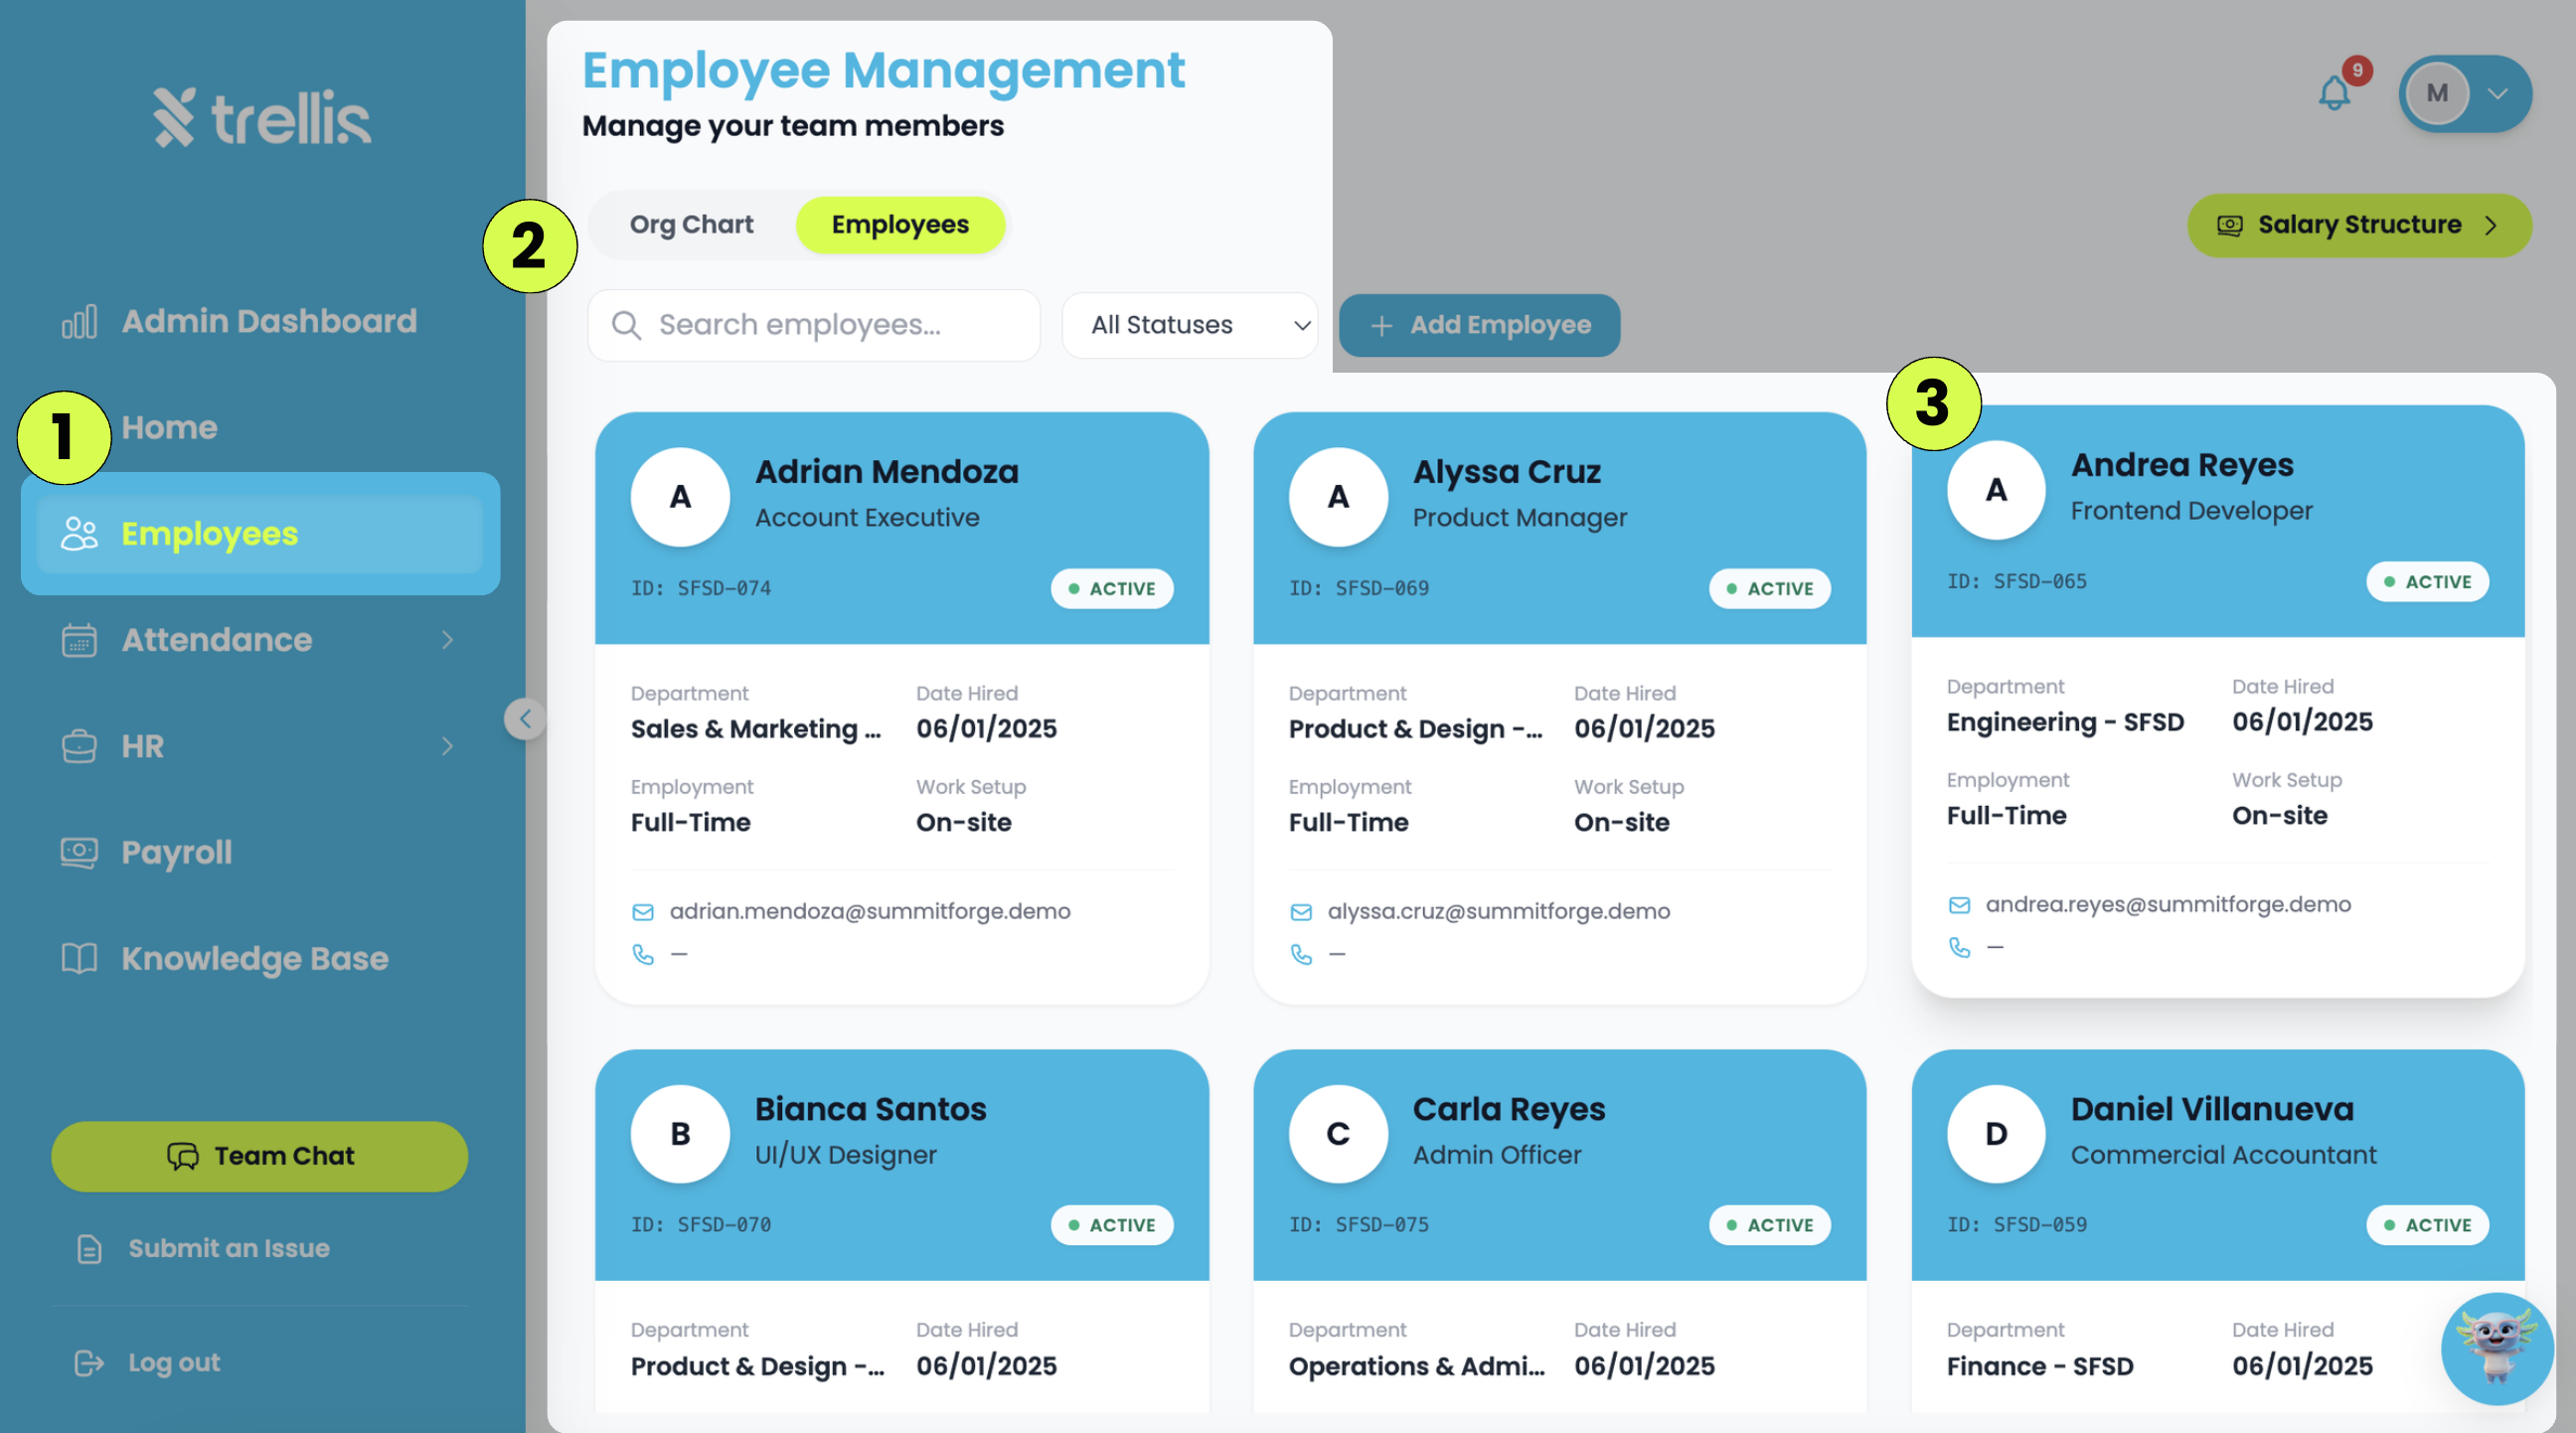
From the sidebar, click "Employees.”
Under “Employee Management”, click the “Employees" tab. You can browse all employee records.
Search Employees — enter an employee's name in the search bar.
Status Filter — the list opens on Active. Choose Not Activated to see employees who don't have a login yet, or Inactive, Pending Invite or All Statuses.
Click the employee card to open the profile and view the employee's complete record.
From the sidebar, click "Employees."
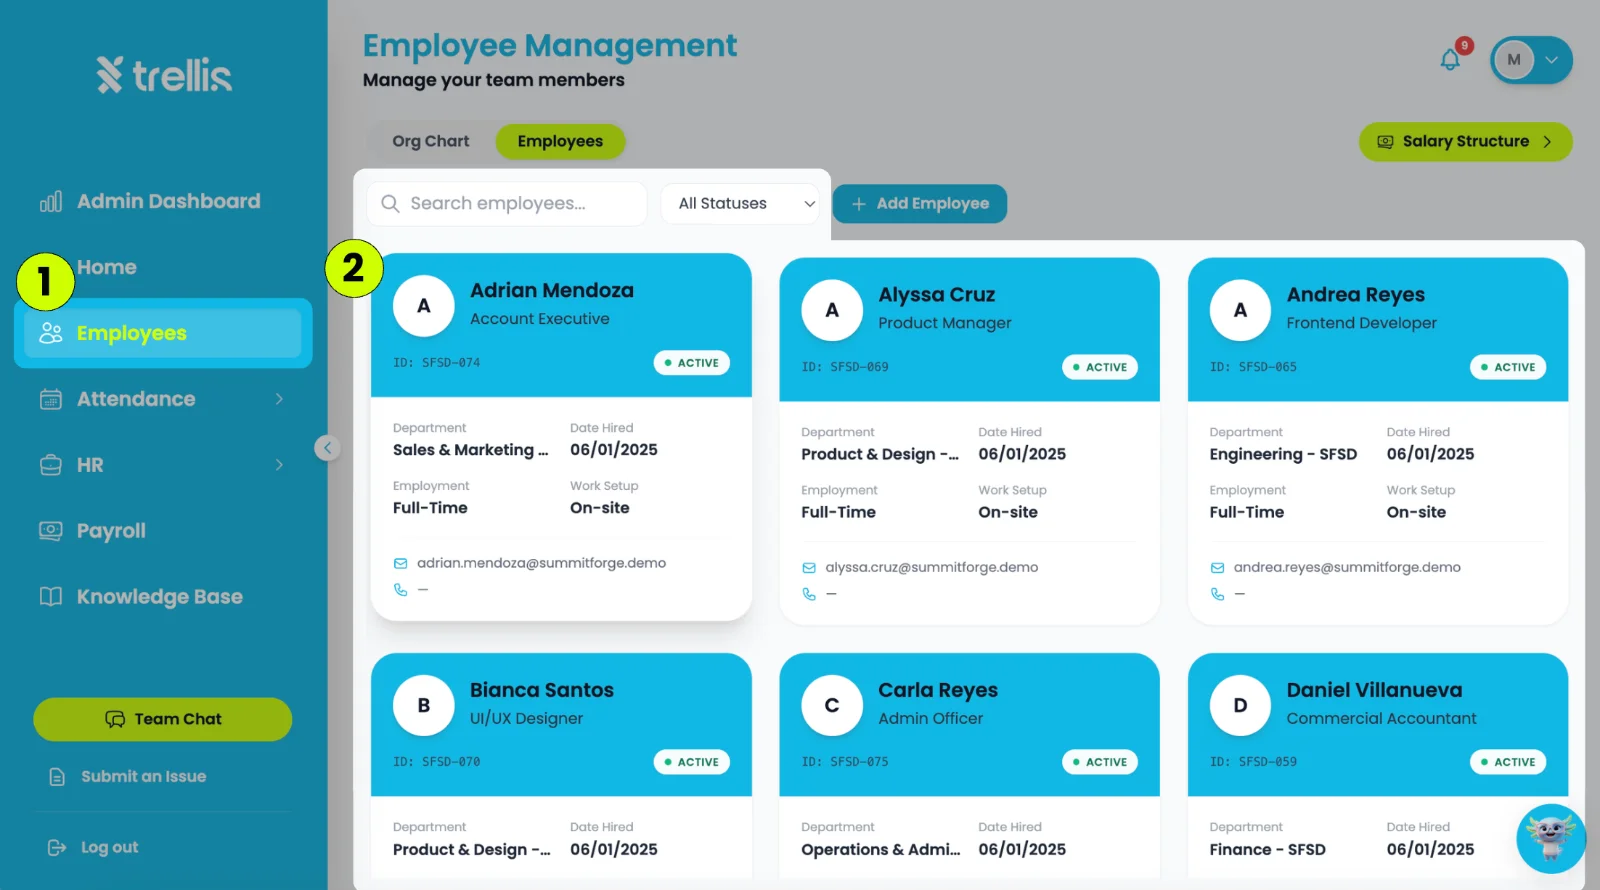
Search for the employee, then select their employee card.
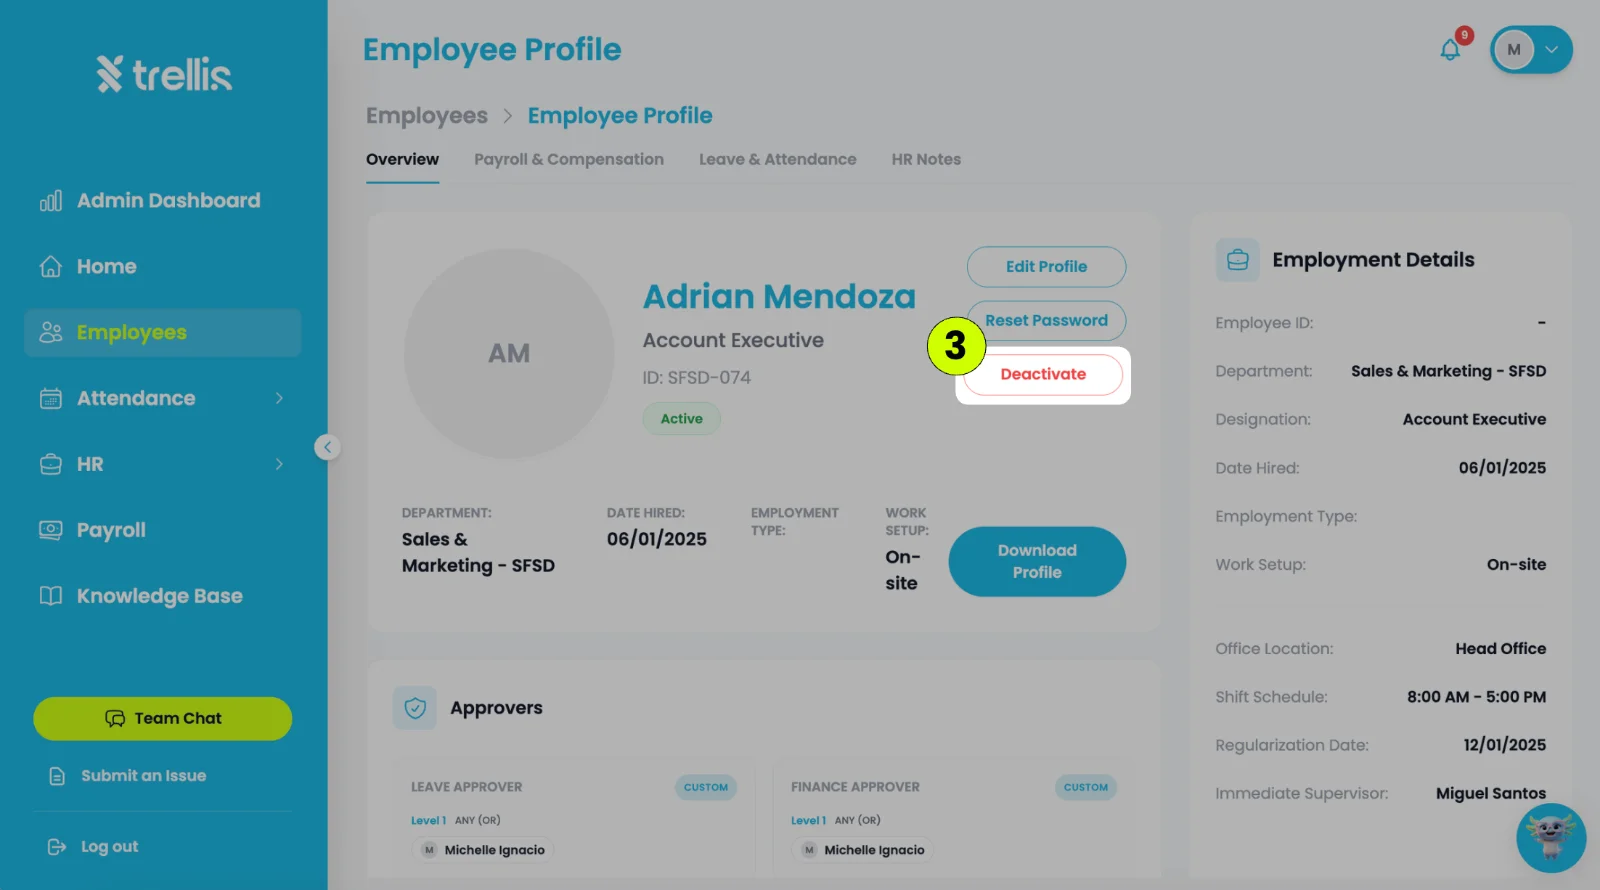
On the employee profile page, click "Deactivate." If you see a "⋯" button instead, click it, then choose "Deactivate Employee."
Enter the employee's "Separation Date" and fill in any other required fields, then click "Deactivate" to confirm.
Note: A deactivated employee keeps their seat for 3 months so you can bring them back, and is then removed automatically. To free the seat sooner, see How to Free Up a Seat.
Read the full guide →Click your profile icon at the top right, then select Settings & Privacy.
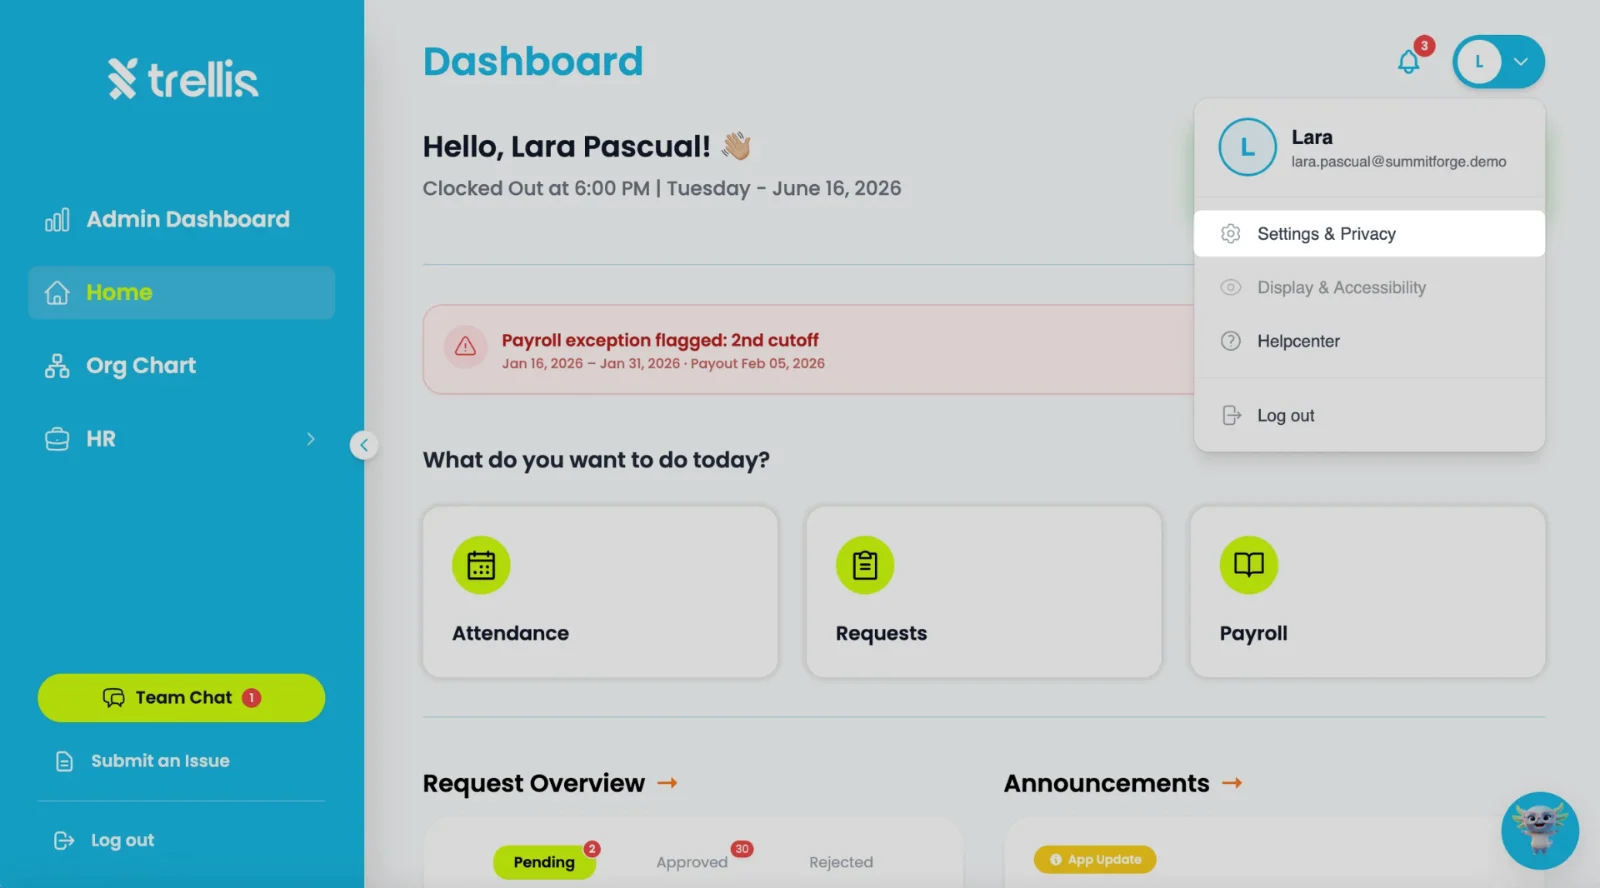
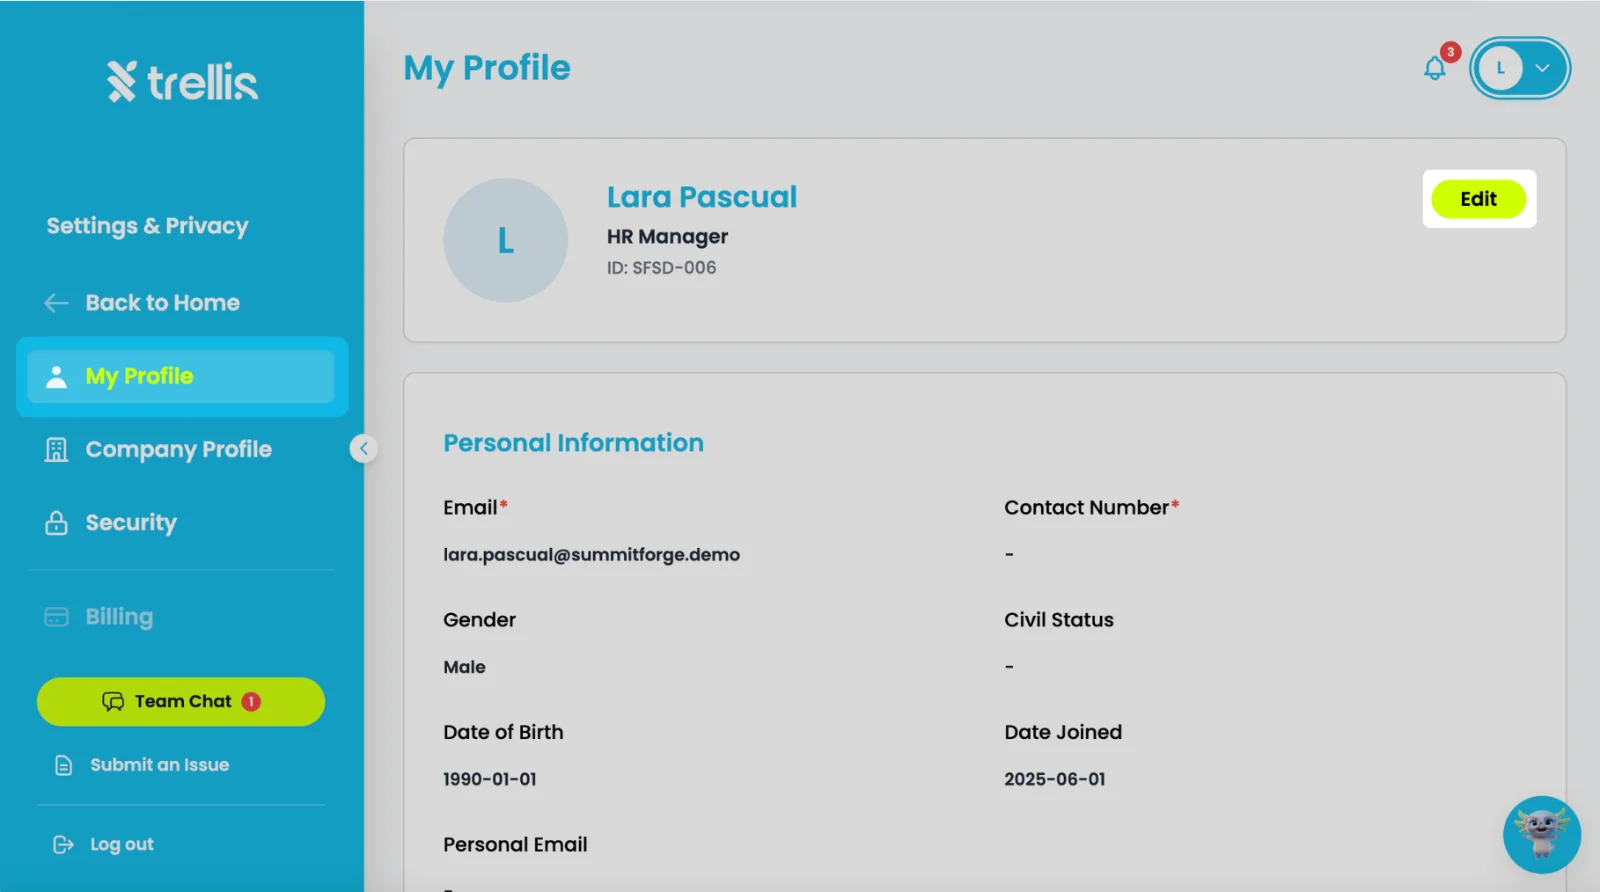
On the My Profile page, click "Edit" to enable profile editing.
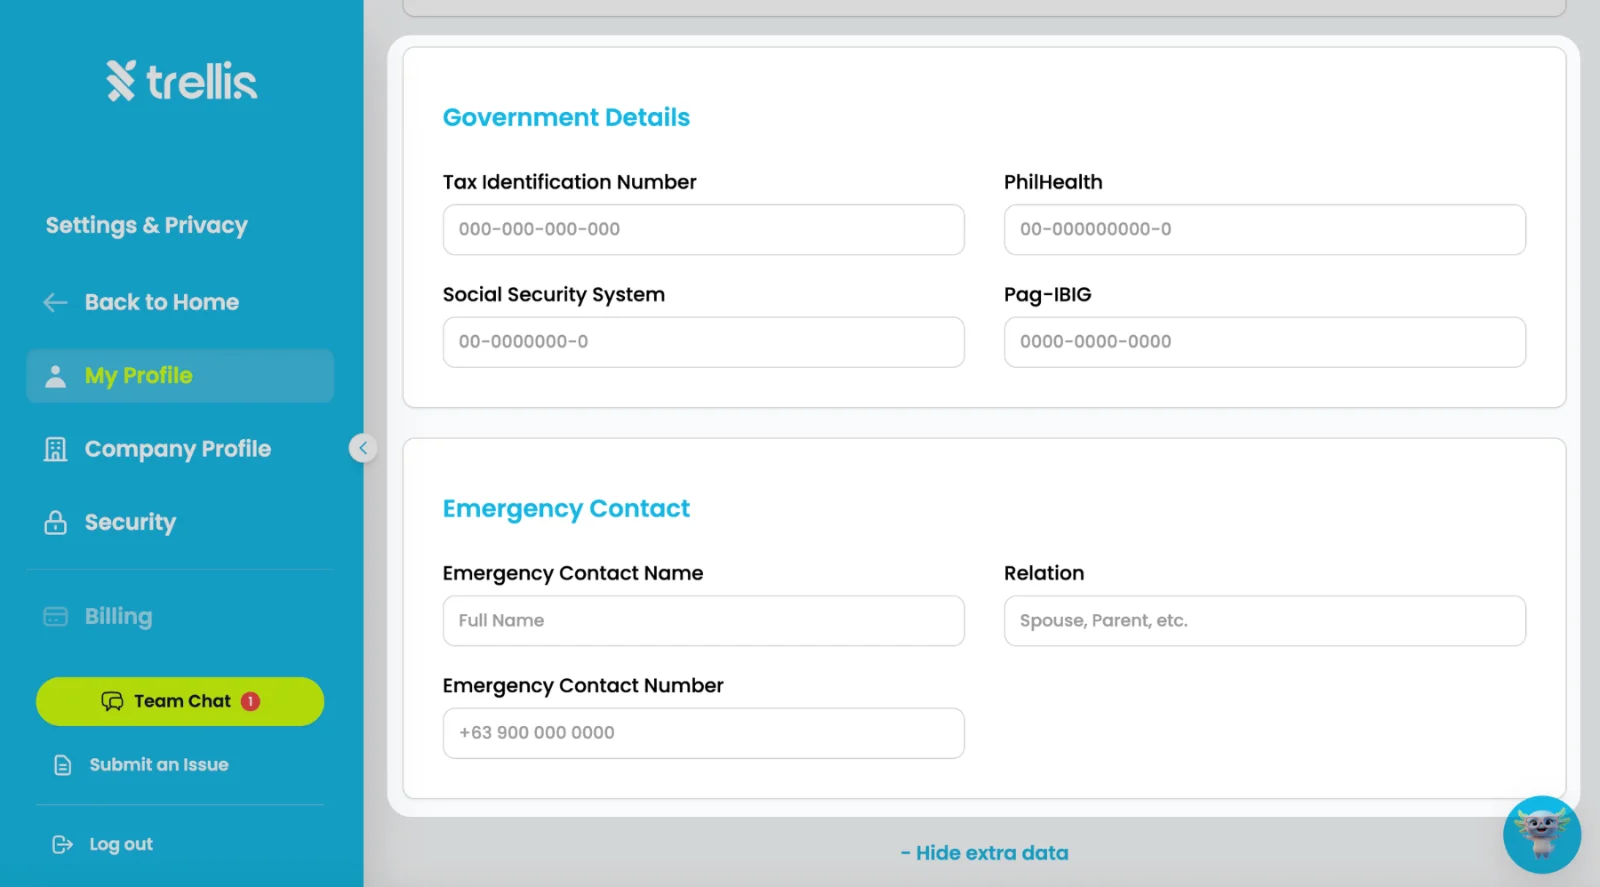
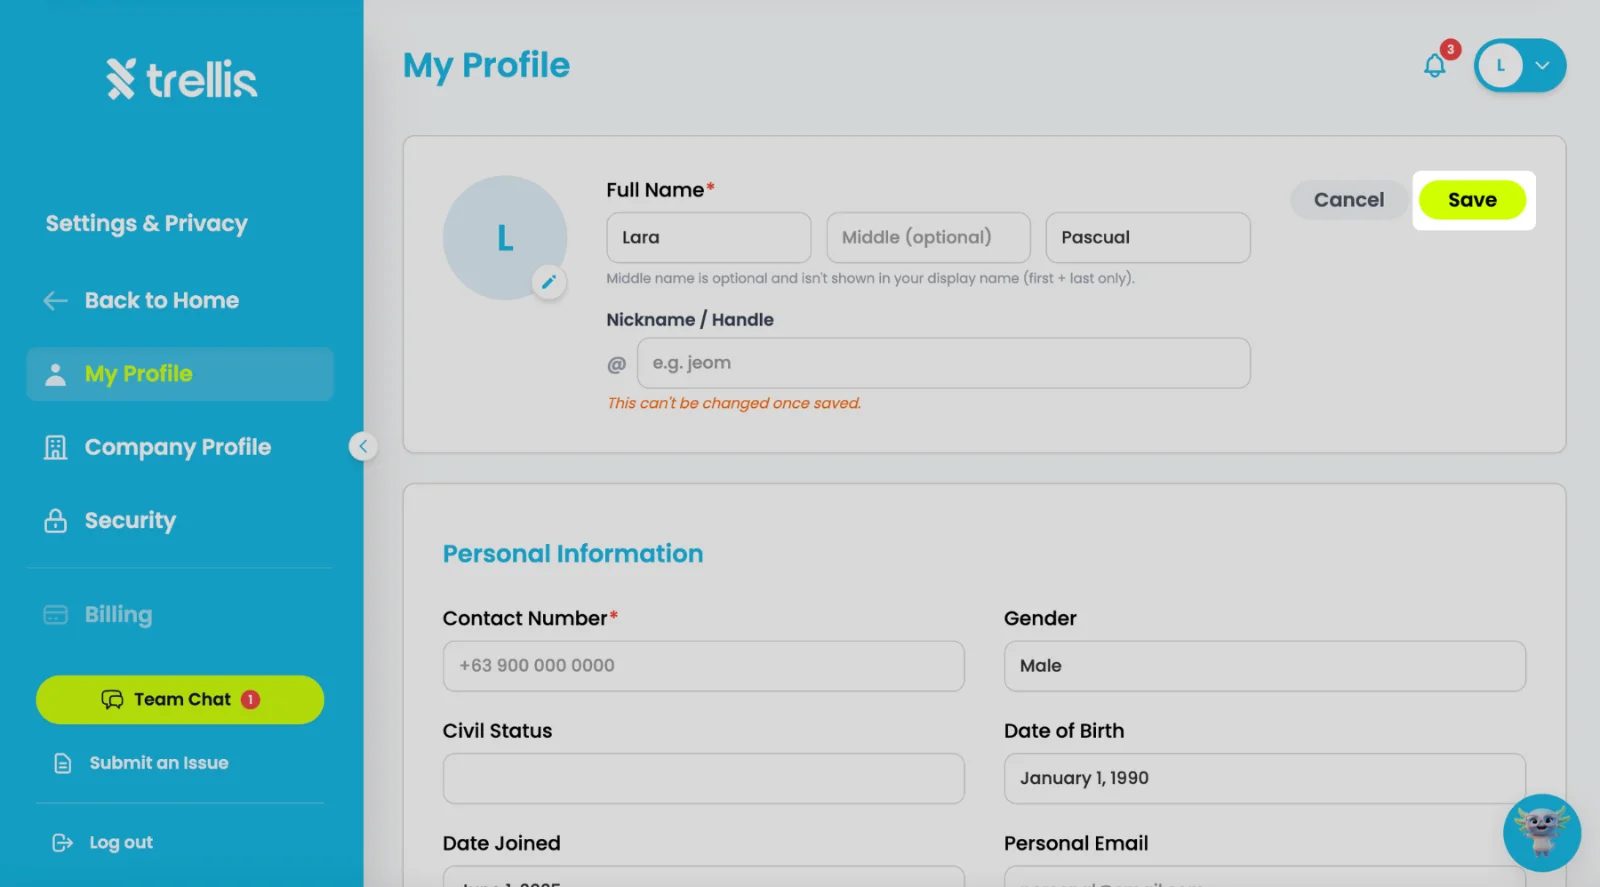
Scroll down to the Government Details and Emergency Contact sections, update the necessary information, then click "Save" to apply your changes.
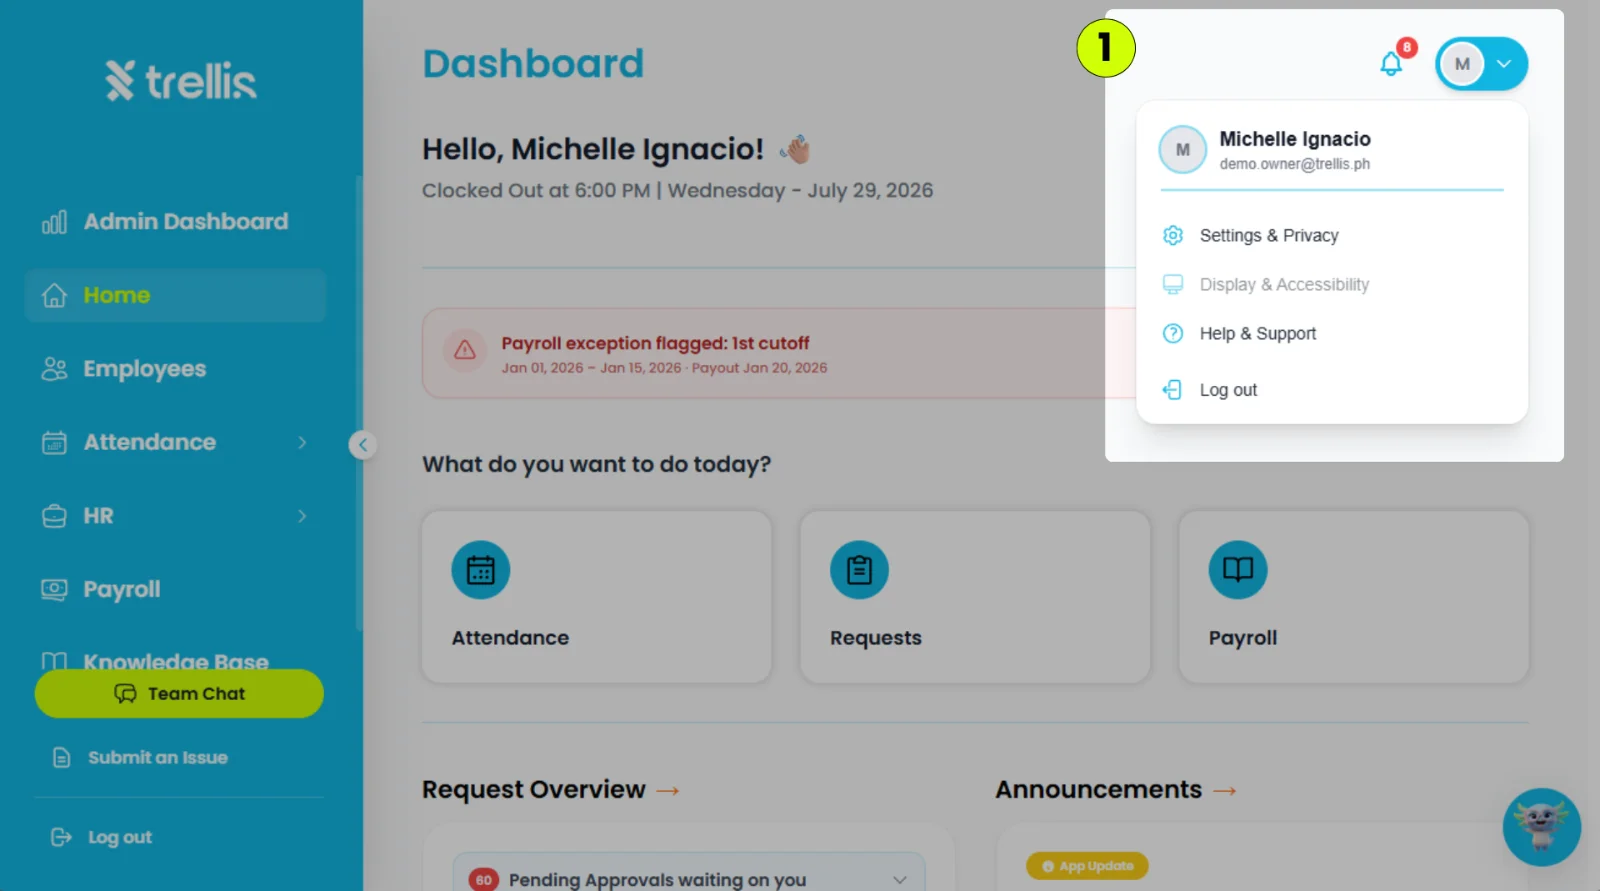
Click your profile icon in the top-right corner, then select "Settings & Privacy."
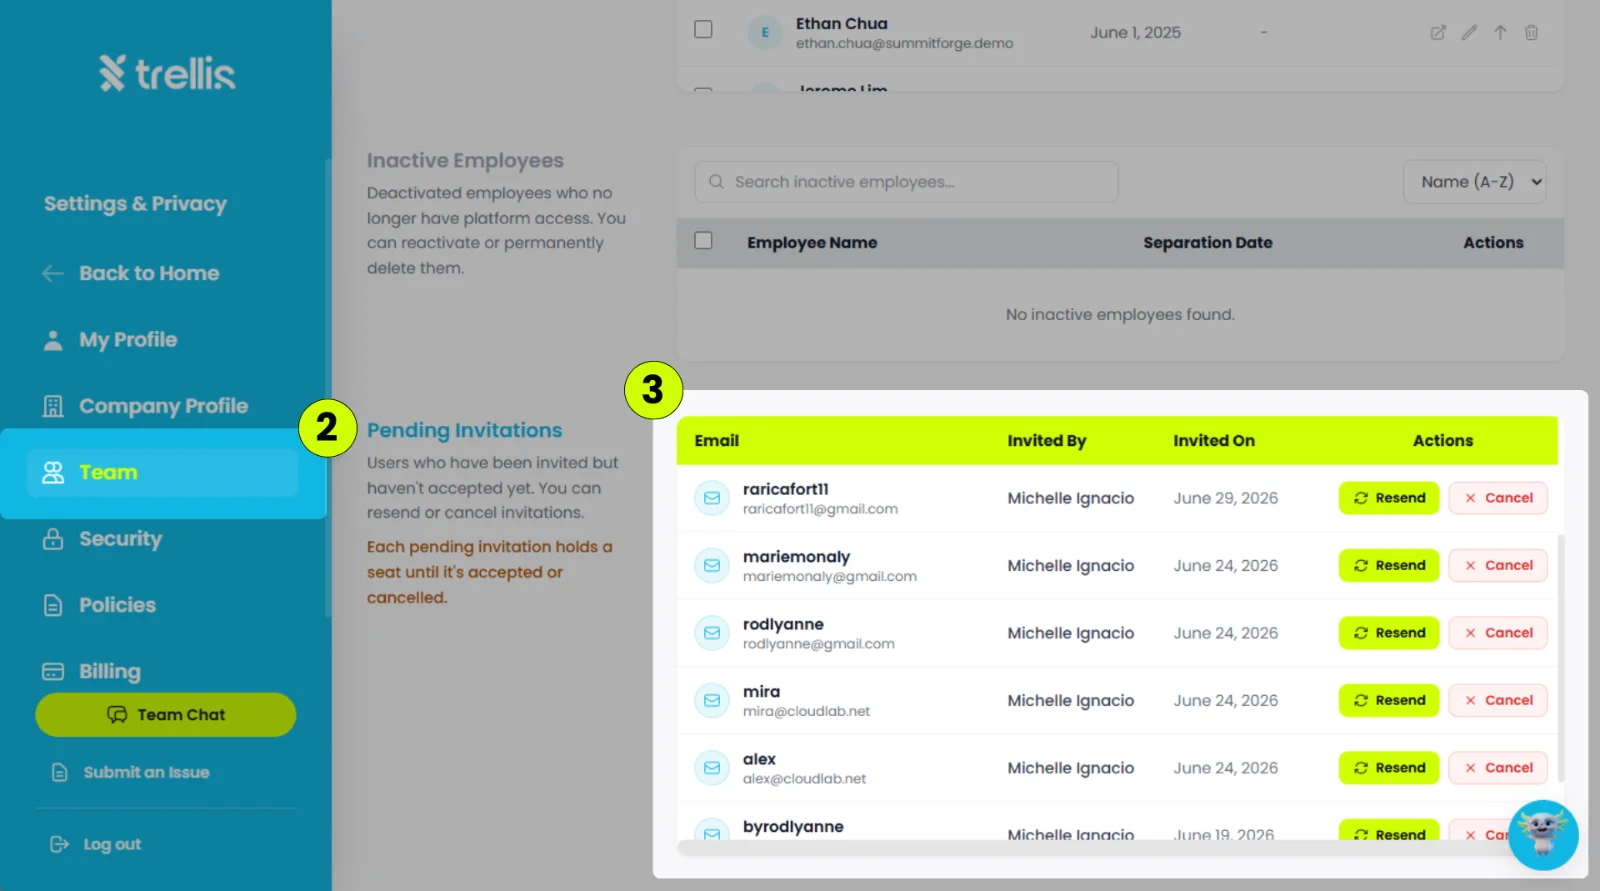
Click the "Team" in menu tab.
Scroll down to the Pending Invitations section, then click "Resend" beside the employee's name.
 Read the full guide →
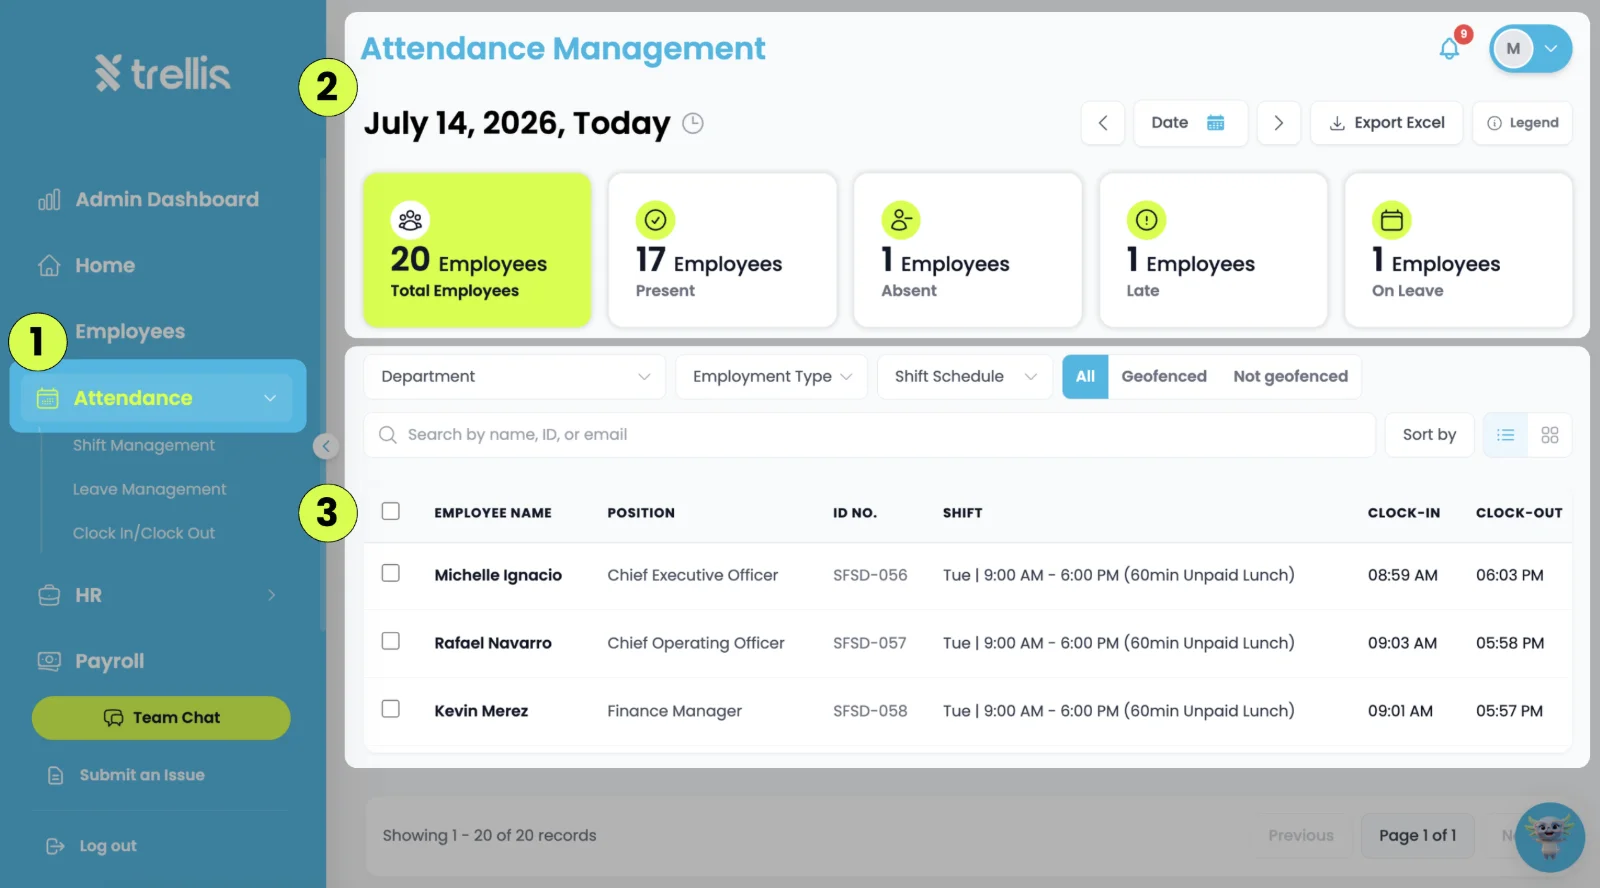
From the sidebar, click "Attendance."
On the Attendance Management page, click a summary card (Employees, Present, Absent, Late, or On Leave) to filter the employee list.
Review the employee list below to view each employee's attendance and leave records.
 Read the full guide →
Add the employee first, then give them a login so they can sign in to Trellis.
A new employee has no login yet, so they are listed under the "Not Activated" status filter, not the default "Active" view.
An email address that already has a Trellis account can't be used to activate a login. Use a different email address for that person.
Read the full guide →An employee signs in to Trellis with their login email. You can change it from their profile, and they keep the same password.
The change can take a minute or two. A progress line shows while it runs, and you can leave the page in the meantime. When it finishes, the employee is signed out and signs in again with the new address and the same password.
Only admins see this option, and you can't change your own login email here.
Read the full guide →An employee who can't sign in yet is marked "Not Activated." Activating their login sends them an email to set a password. The email you enter becomes their login and their Company Email, so use the address they will sign in with.
Each person gets an email to set a password and sign in. Activating doesn't use extra seats. An email address that already has a Trellis account can't be used, so choose a different address for that person.
You can't type into the Company Email field on the profile, because it is the login. To change it for someone who already signs in, see How to Change an Employee Login Email.
Read the full guide →Everyone on your team takes a seat: active employees, deactivated employees, and invitations that have not been accepted yet. A deactivated employee keeps their seat for 3 months so you can bring them back, and is then removed automatically.
Click your profile icon at the top right, then select "Settings & Privacy."
From the sidebar, click "Team."
To free the seat of someone you will not bring back, scroll to "Inactive Employees" and press "Delete" on their row.
To free the seat of an invitation nobody will accept, scroll to "Pending Invitations" and press "Cancel."
Note: You cannot bring back someone you deleted yourself, but their payslips and government forms stay in your records. To keep a deactivated employee past the 3 months, turn on "Keep" on their row instead. They still take a seat.
Read the full guide →You can keep an employee's files, such as an employment contract or an NBI clearance, on an HR note in their profile.
Note: You need HR access to see the HR Notes tab. You can attach PDFs, photos, and Word or Excel files, and only your HR team can open them.
Read the full guide →No articles match your search.
Reach out to our support team and we'll guide you through it.
Contact Support