
Powerful tools to manage your team's time and attendance efficiently
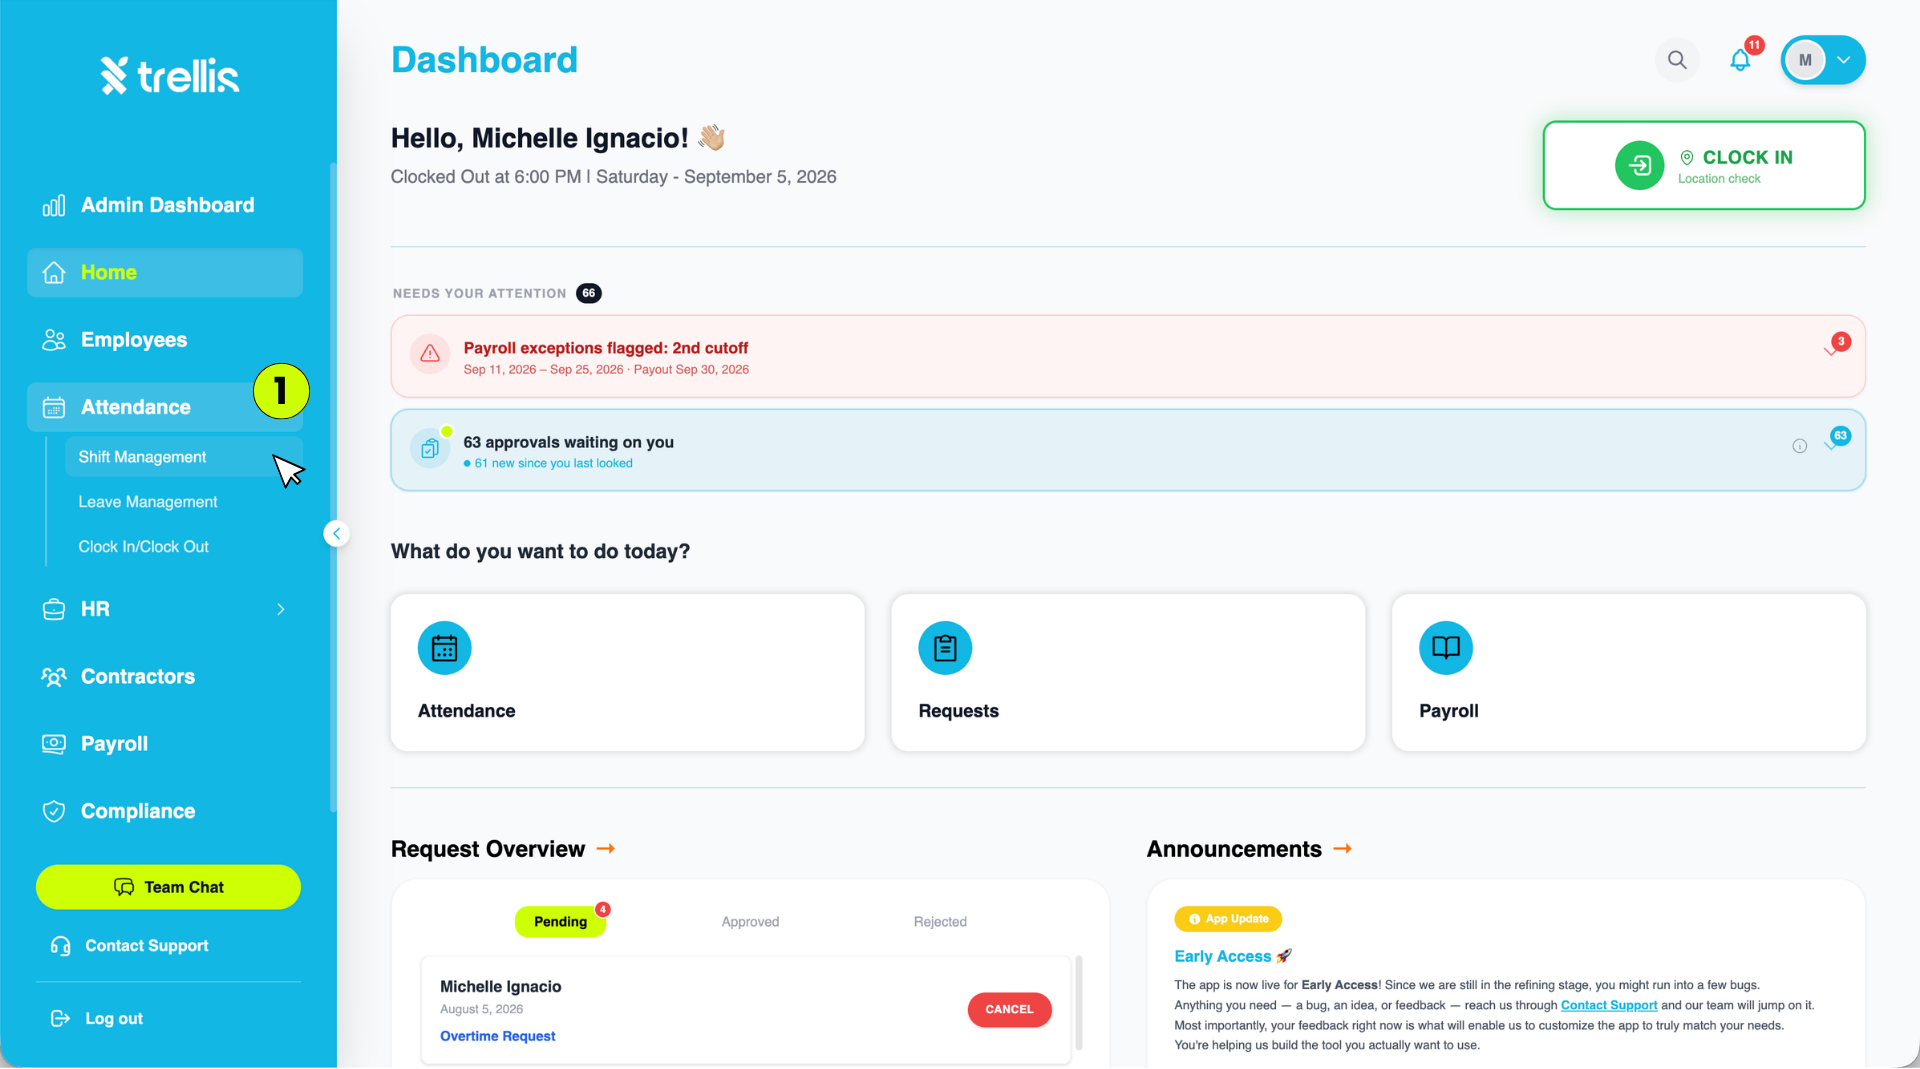
From the sidebar, click “Attendance” to expand the menu, then select “Shift Management”.
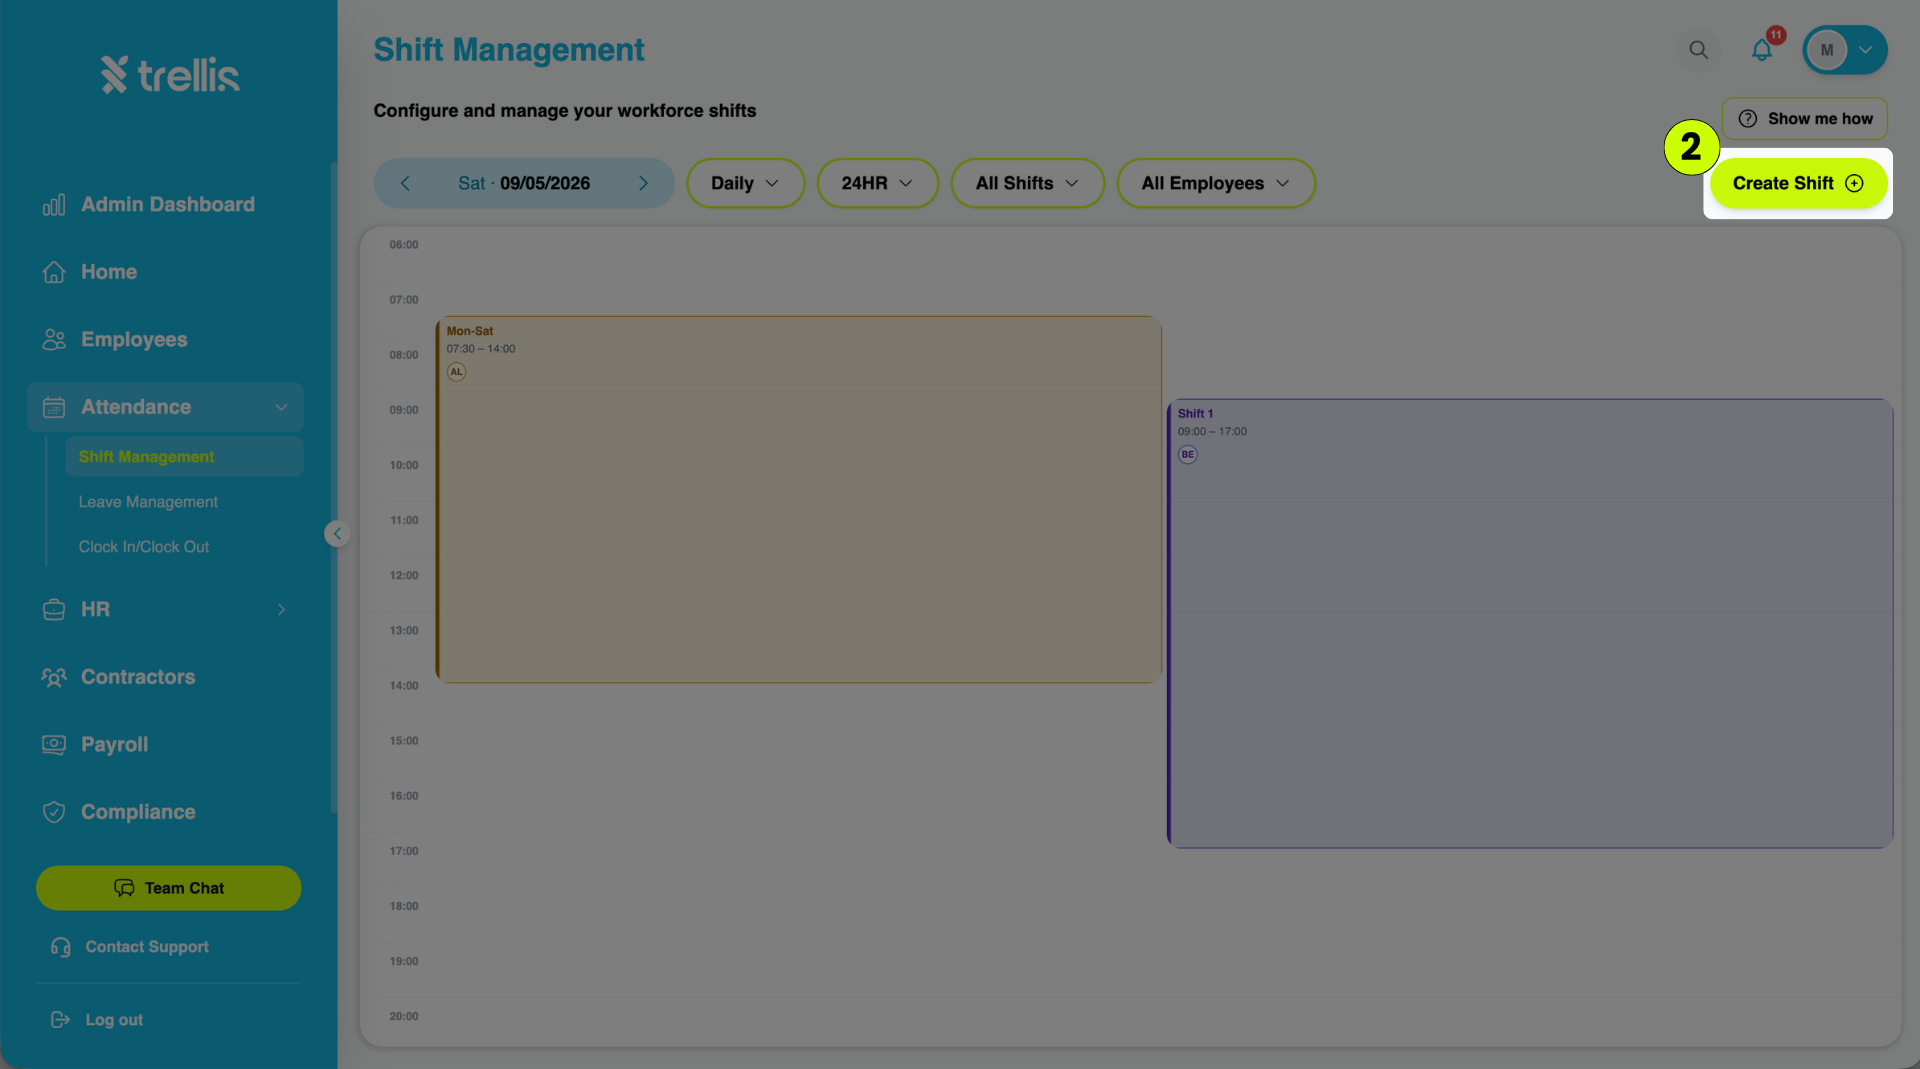
On the Shift Management page, click the “Create Shift” button at the top-right corner.
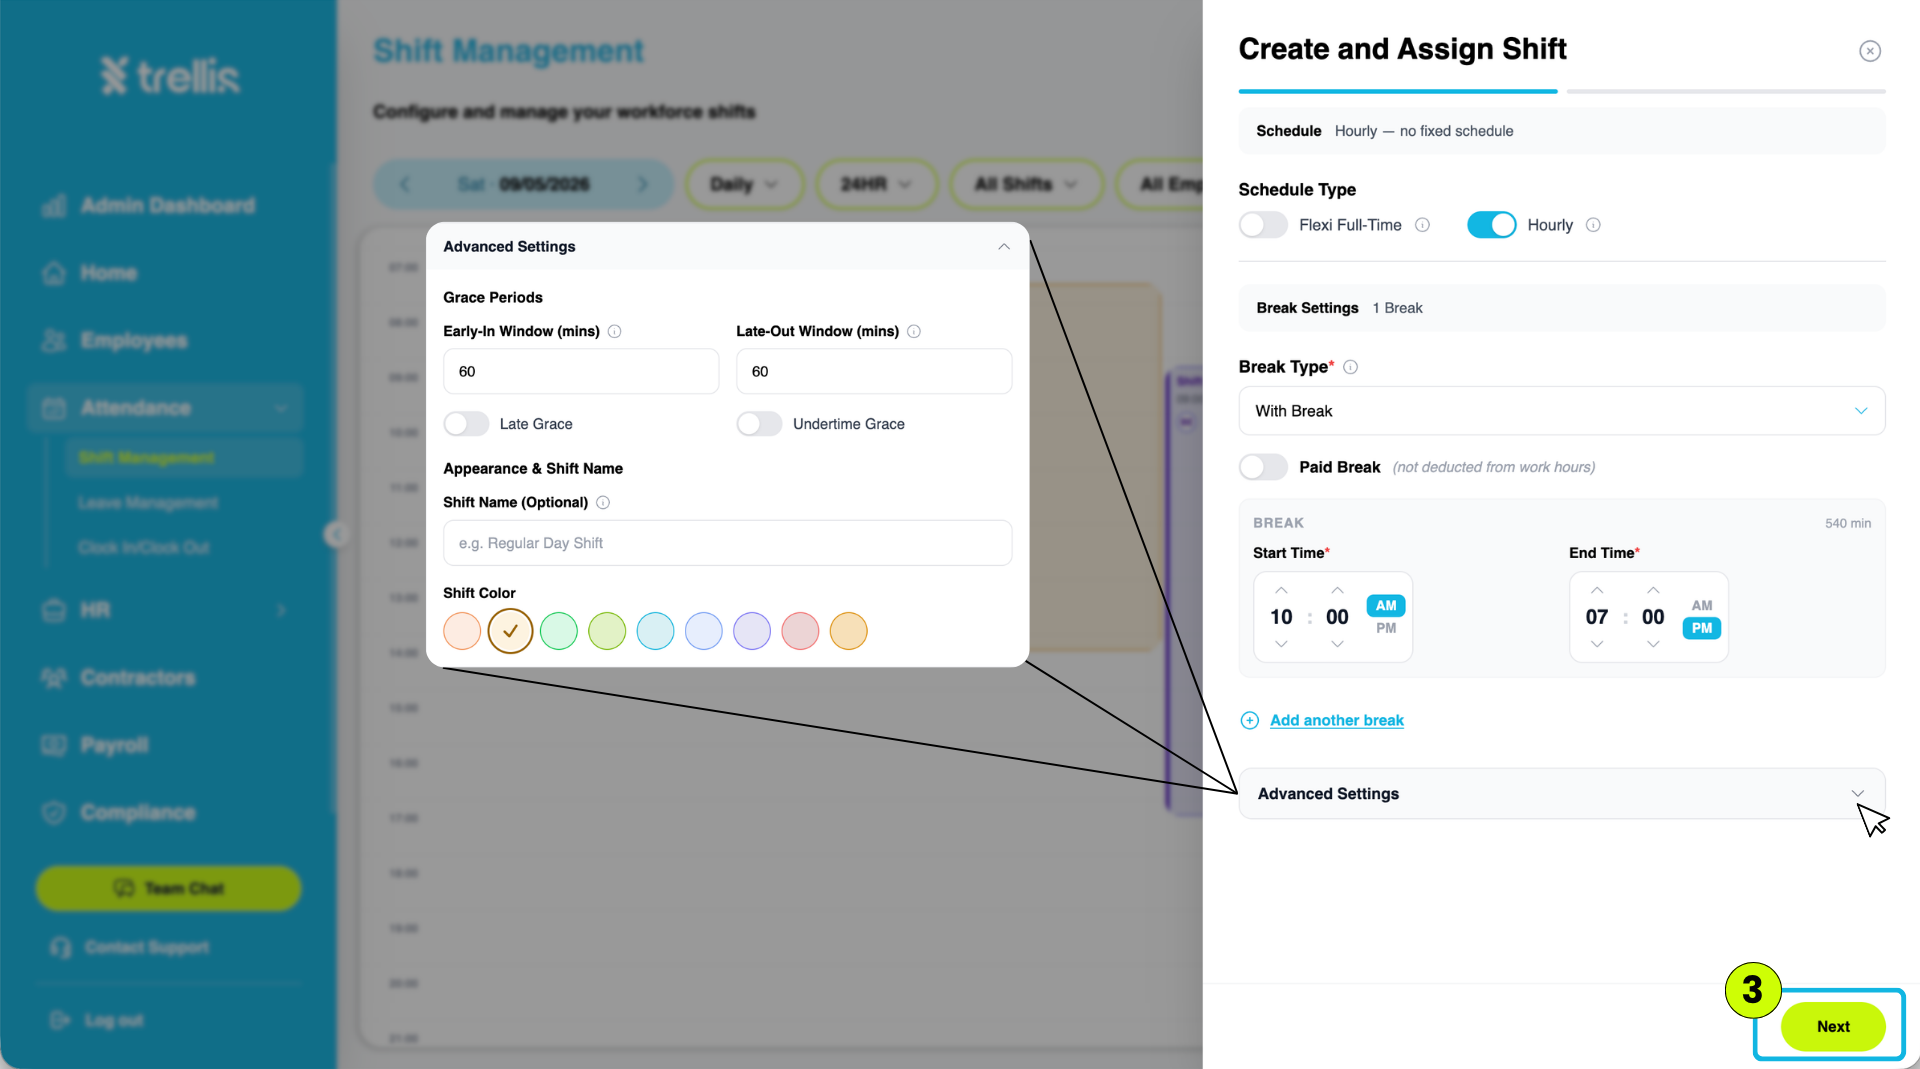
The “Create and Assign Shift” window will appear. Configure the shift details, including the schedule type, break settings, and advanced settings. Once finished, click “Next”.
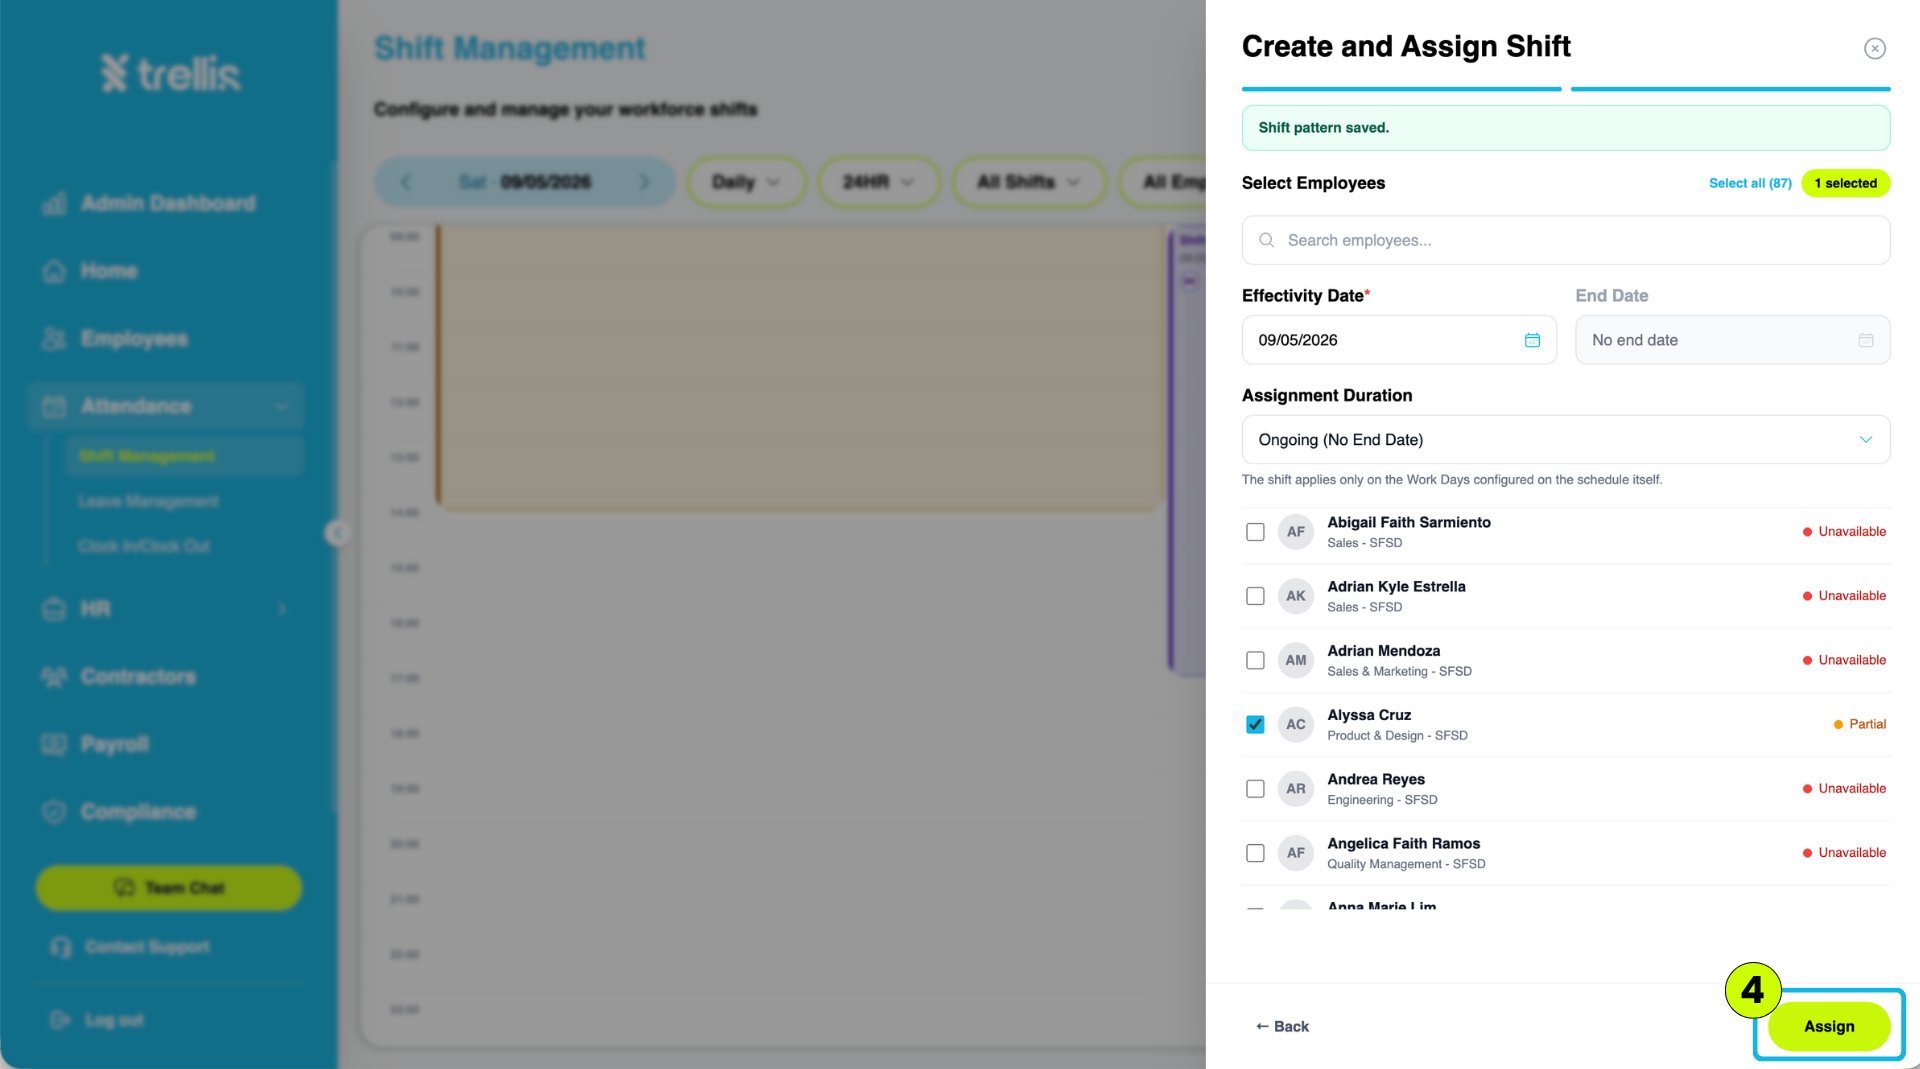
Select the employee(s) who will be assigned to the shift. Set the Effectivity Date and Assignment Duration, then click “Assign”.
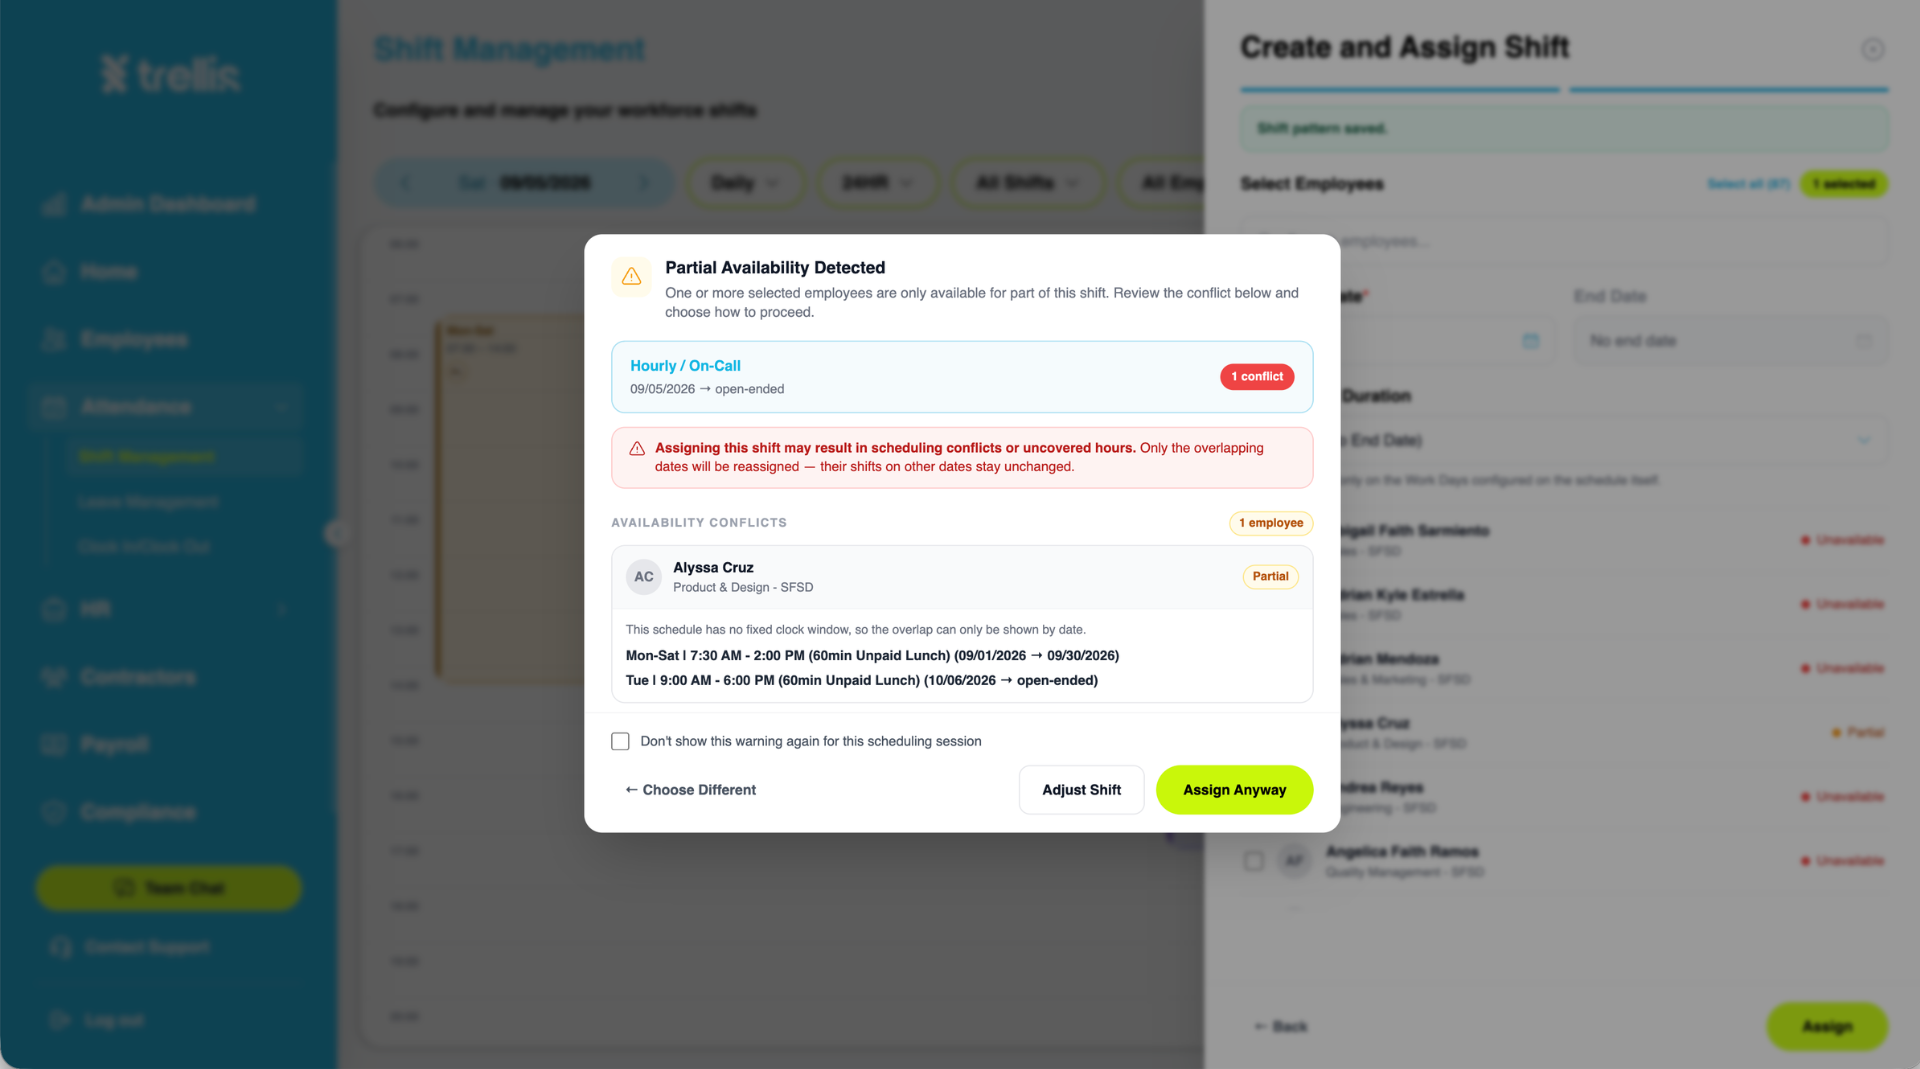
If an availability conflict is detected, a warning will appear. Review the conflict and choose “Adjust Shift” to make changes or “Assign Anyway” to proceed with the assignment.
 Read the full guide →
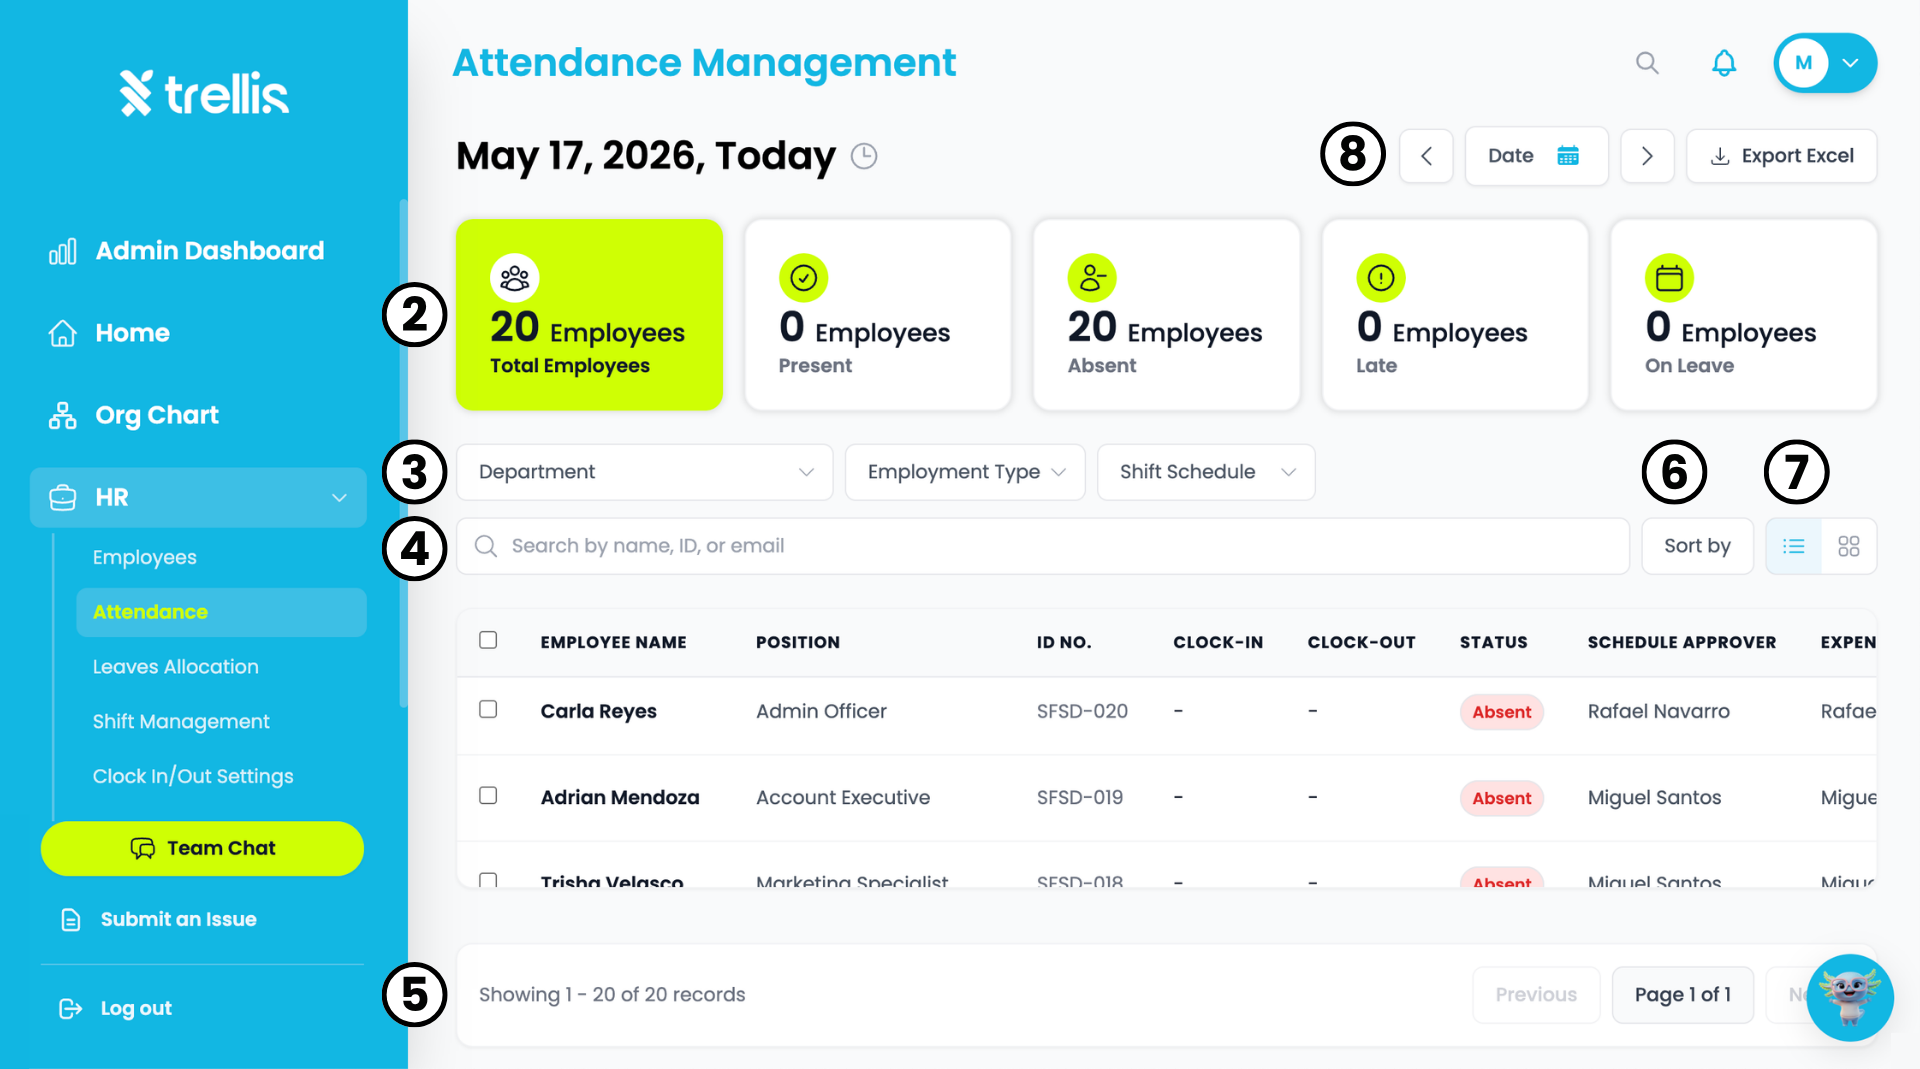
From the sidebar, click "HR" to expand the menu, then select "Attendance."
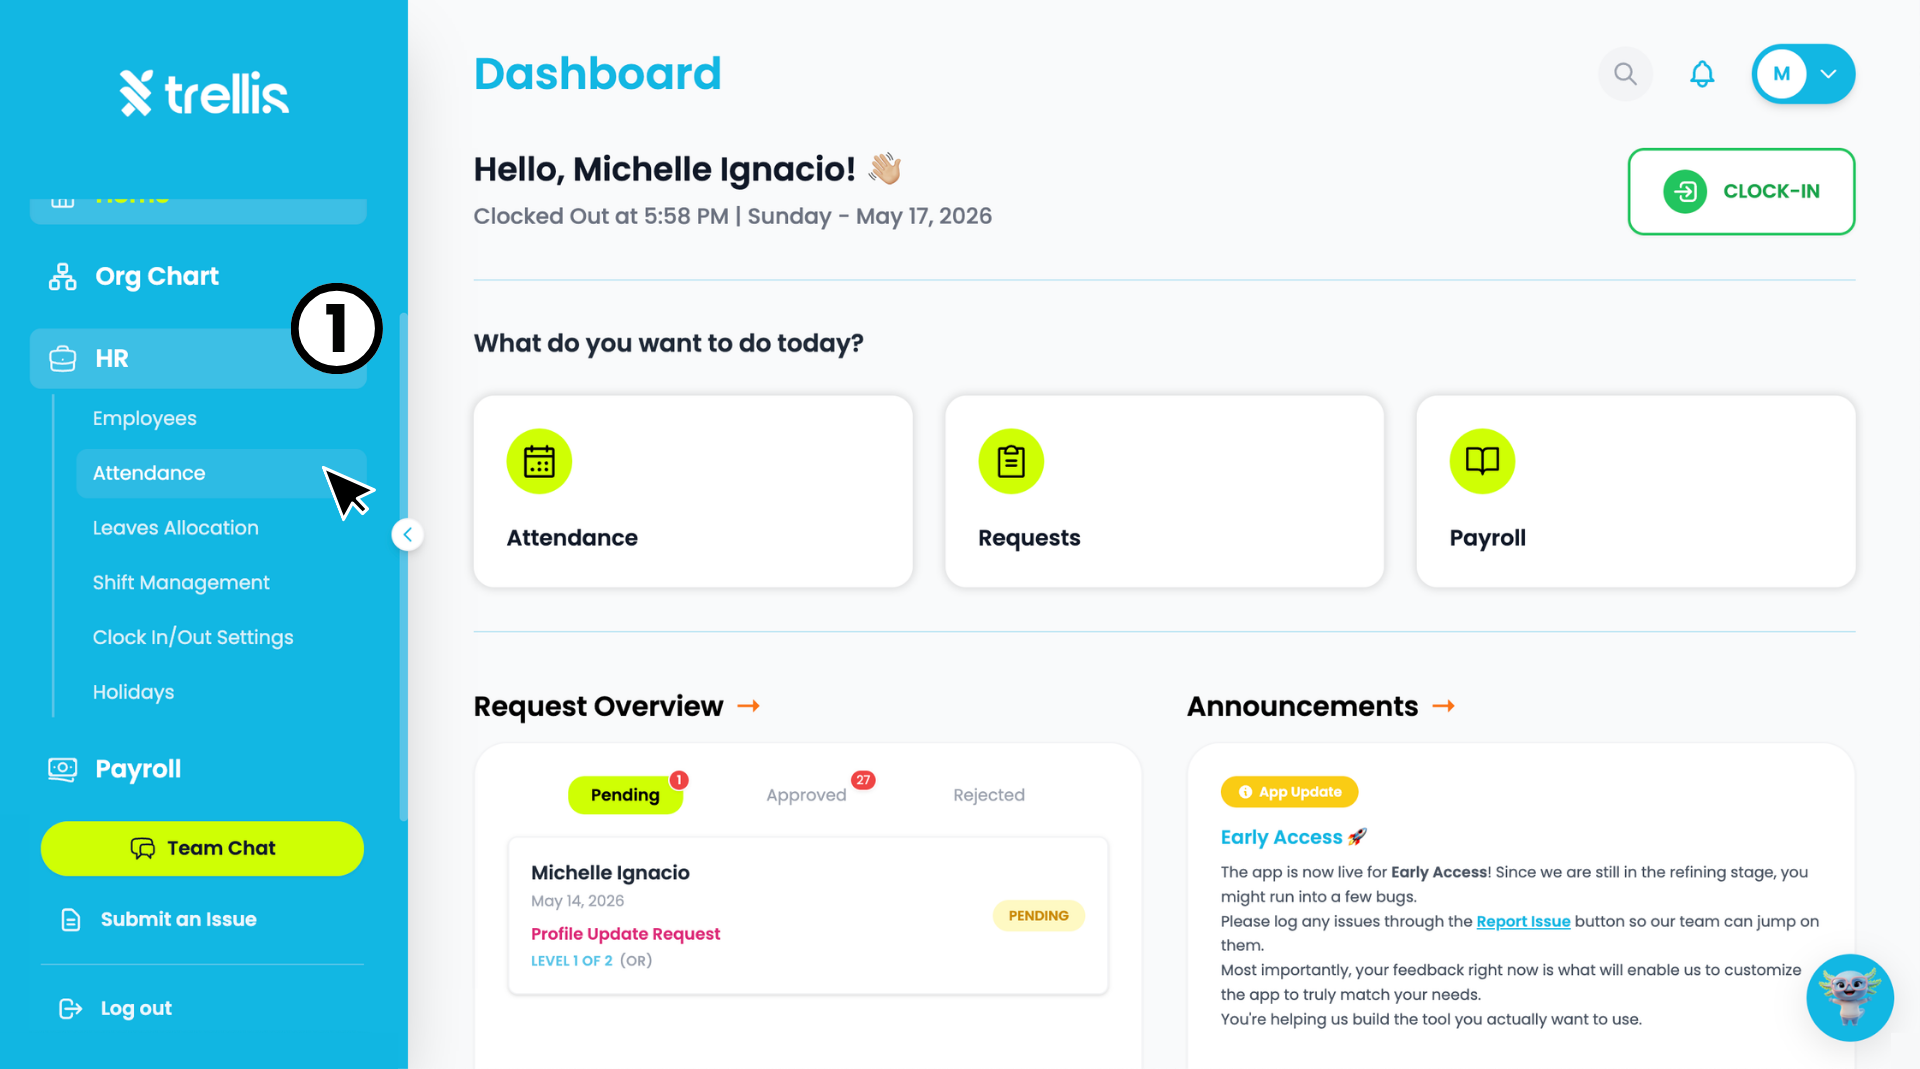
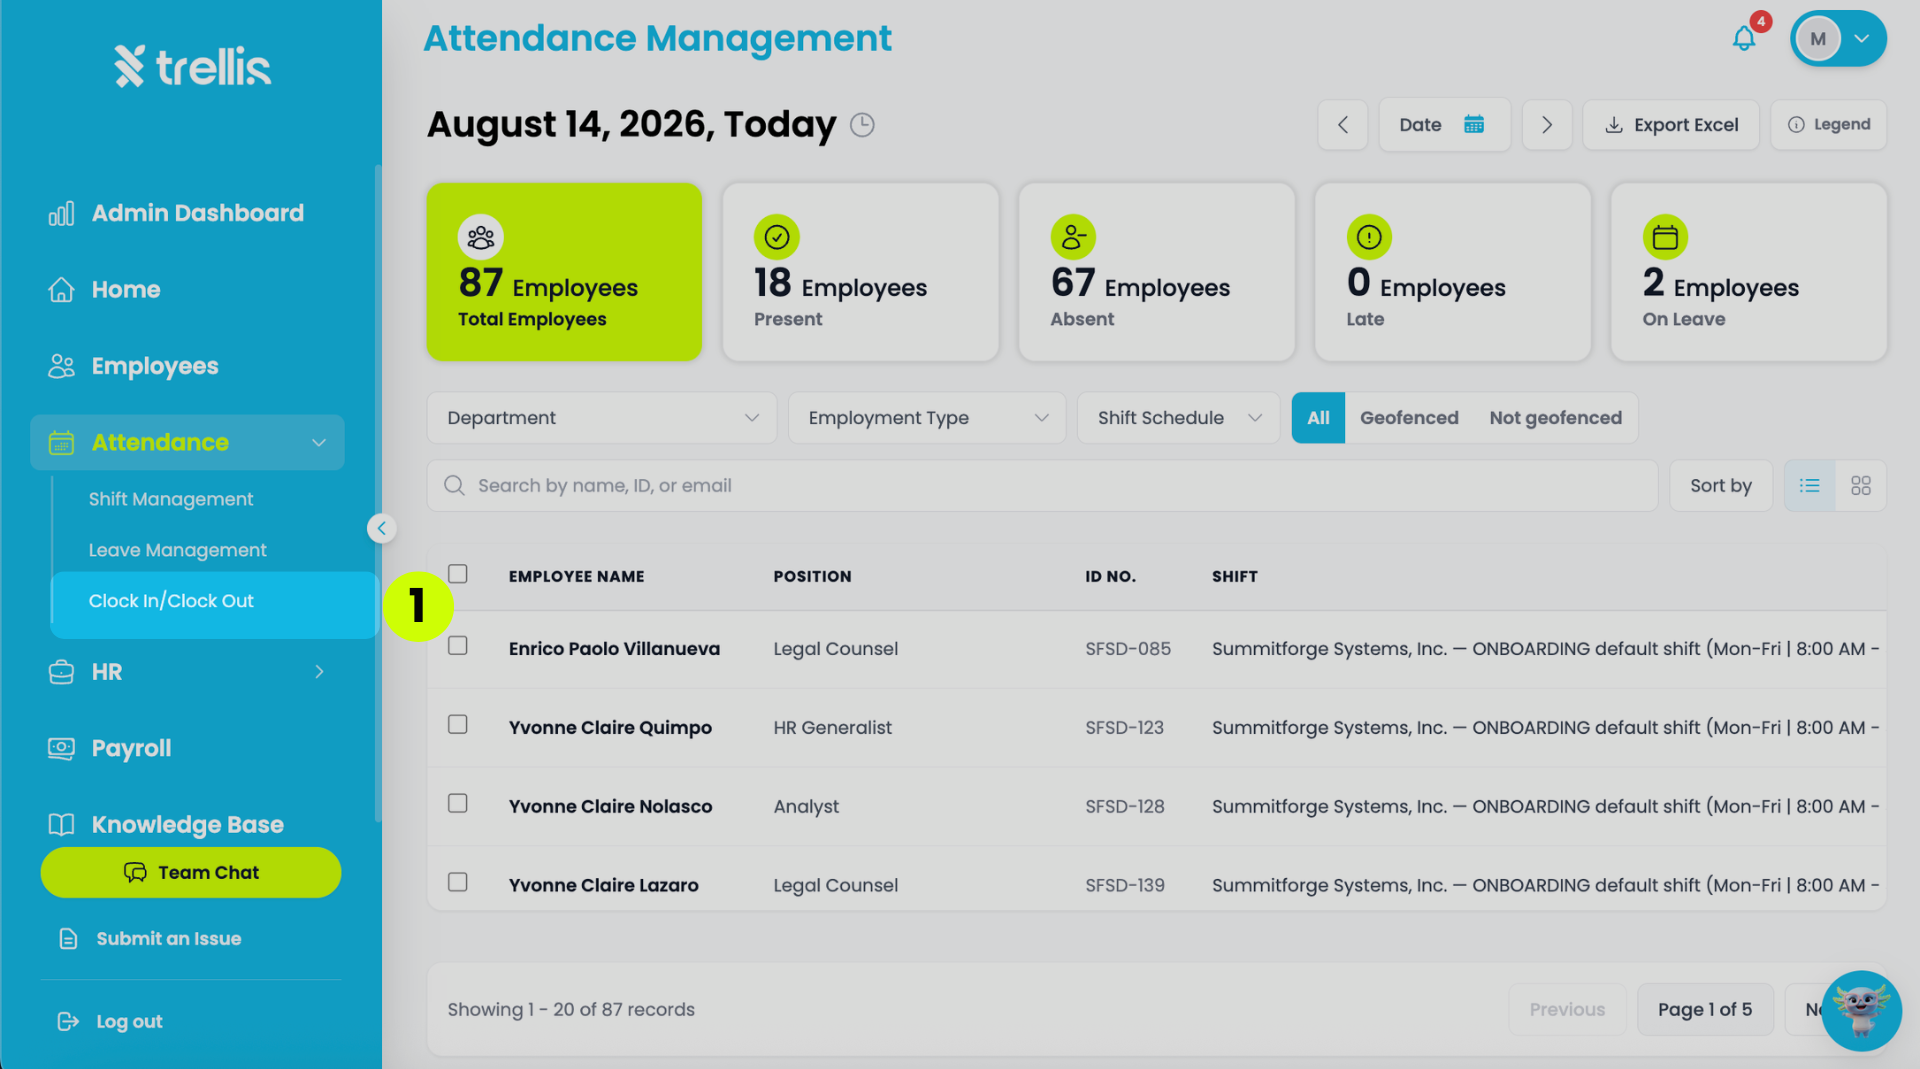
You will be directed to the "Attendance Management" page. At the top you will see a summary of your team's attendance status including "Total Employees", "Present", "Absent", "Late", and "On Leave".
Use the "Department", "Employment Type", and "Shift Schedule" filters to narrow down the attendance list.
Use the "Search bar" to look up a specific employee by name, ID, or email.
The table below shows all employee attendance records. Use the pagination at the bottom to navigate through pages.
Use "Sort by" to reorder the list based on your preference.
Toggle between list view and grid view using the view icons beside the sort button.
Use the date navigation arrows to browse attendance by date, or click "Export Excel" to download the records.
 Read the full guide →
From the sidebar, click "Attendance," then select "Shift Management."
The Shift Management page will open, where you can view the list of shifts, assigned employees, shift schedules, and working hours.
648e0c.png) Read the full guide →
Read the full guide →
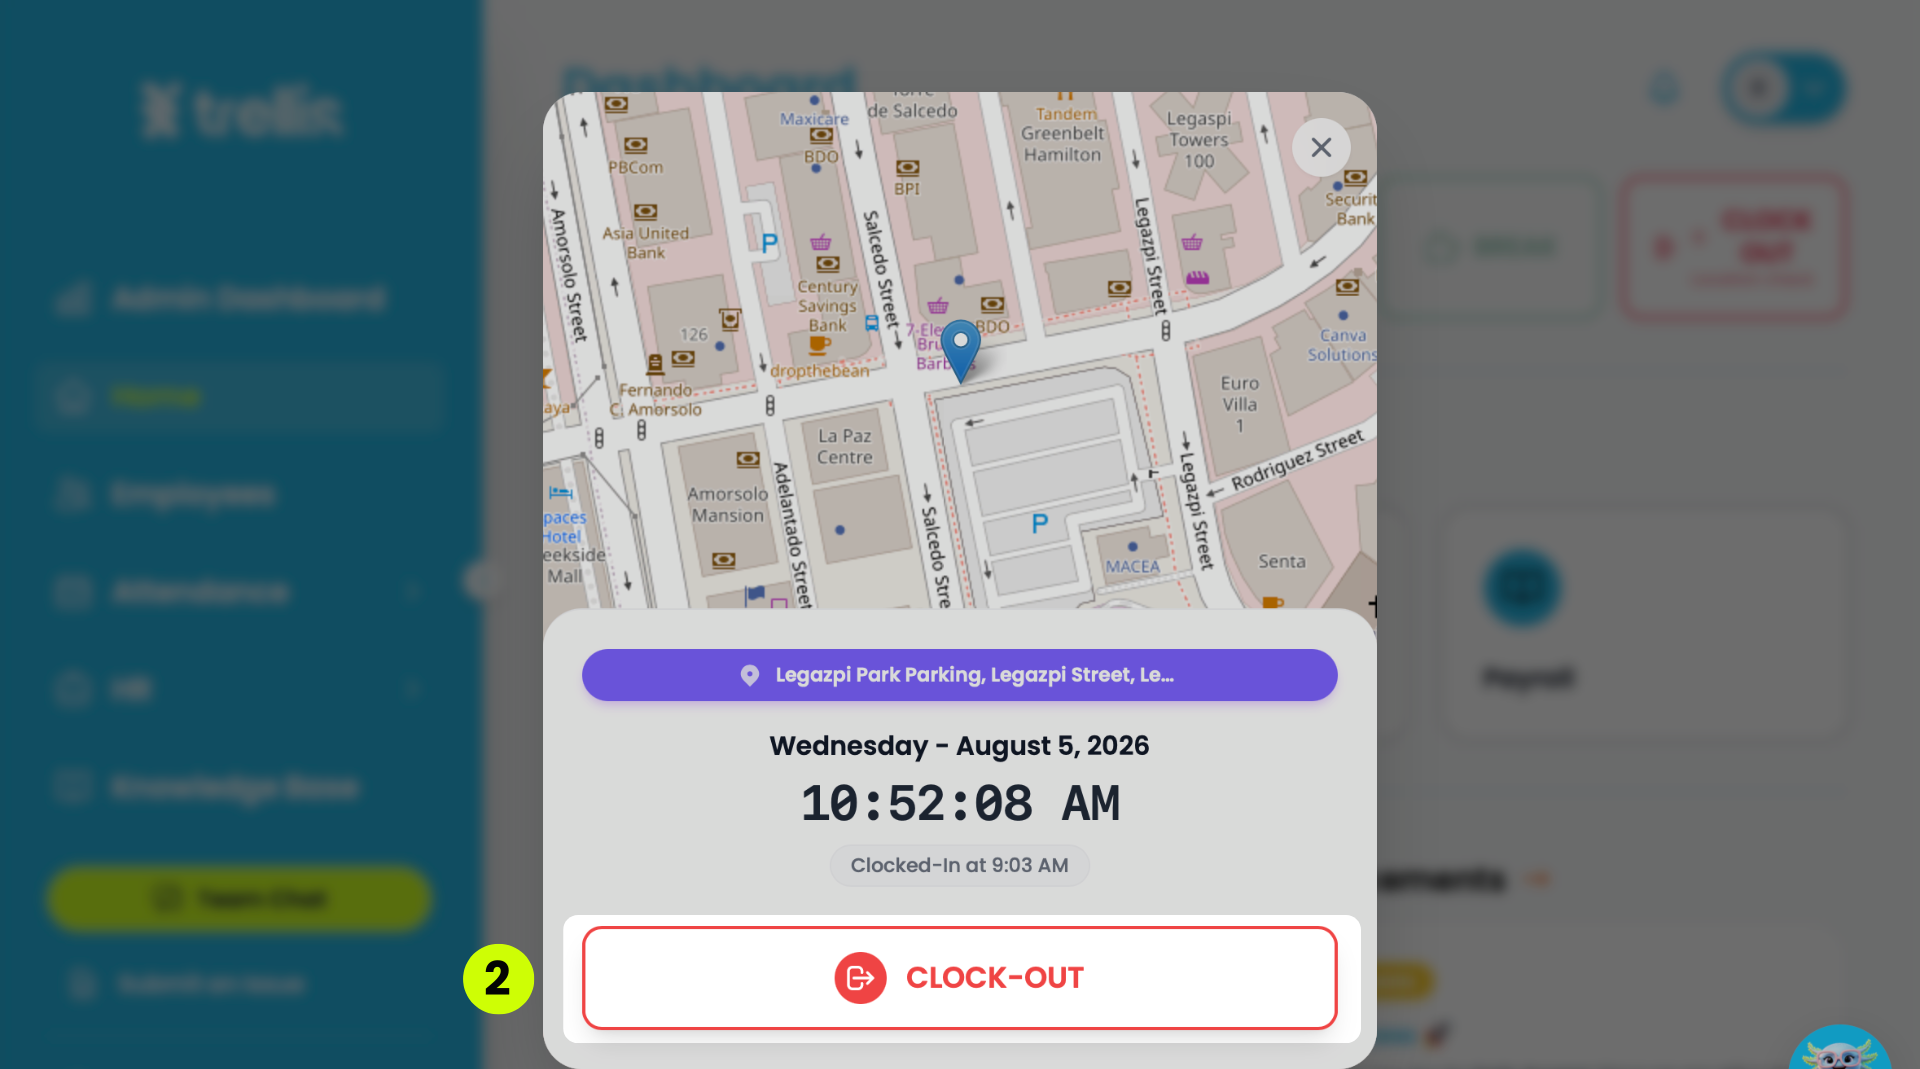
From the Dashboard, click the "Clock Out" button in the top right corner.
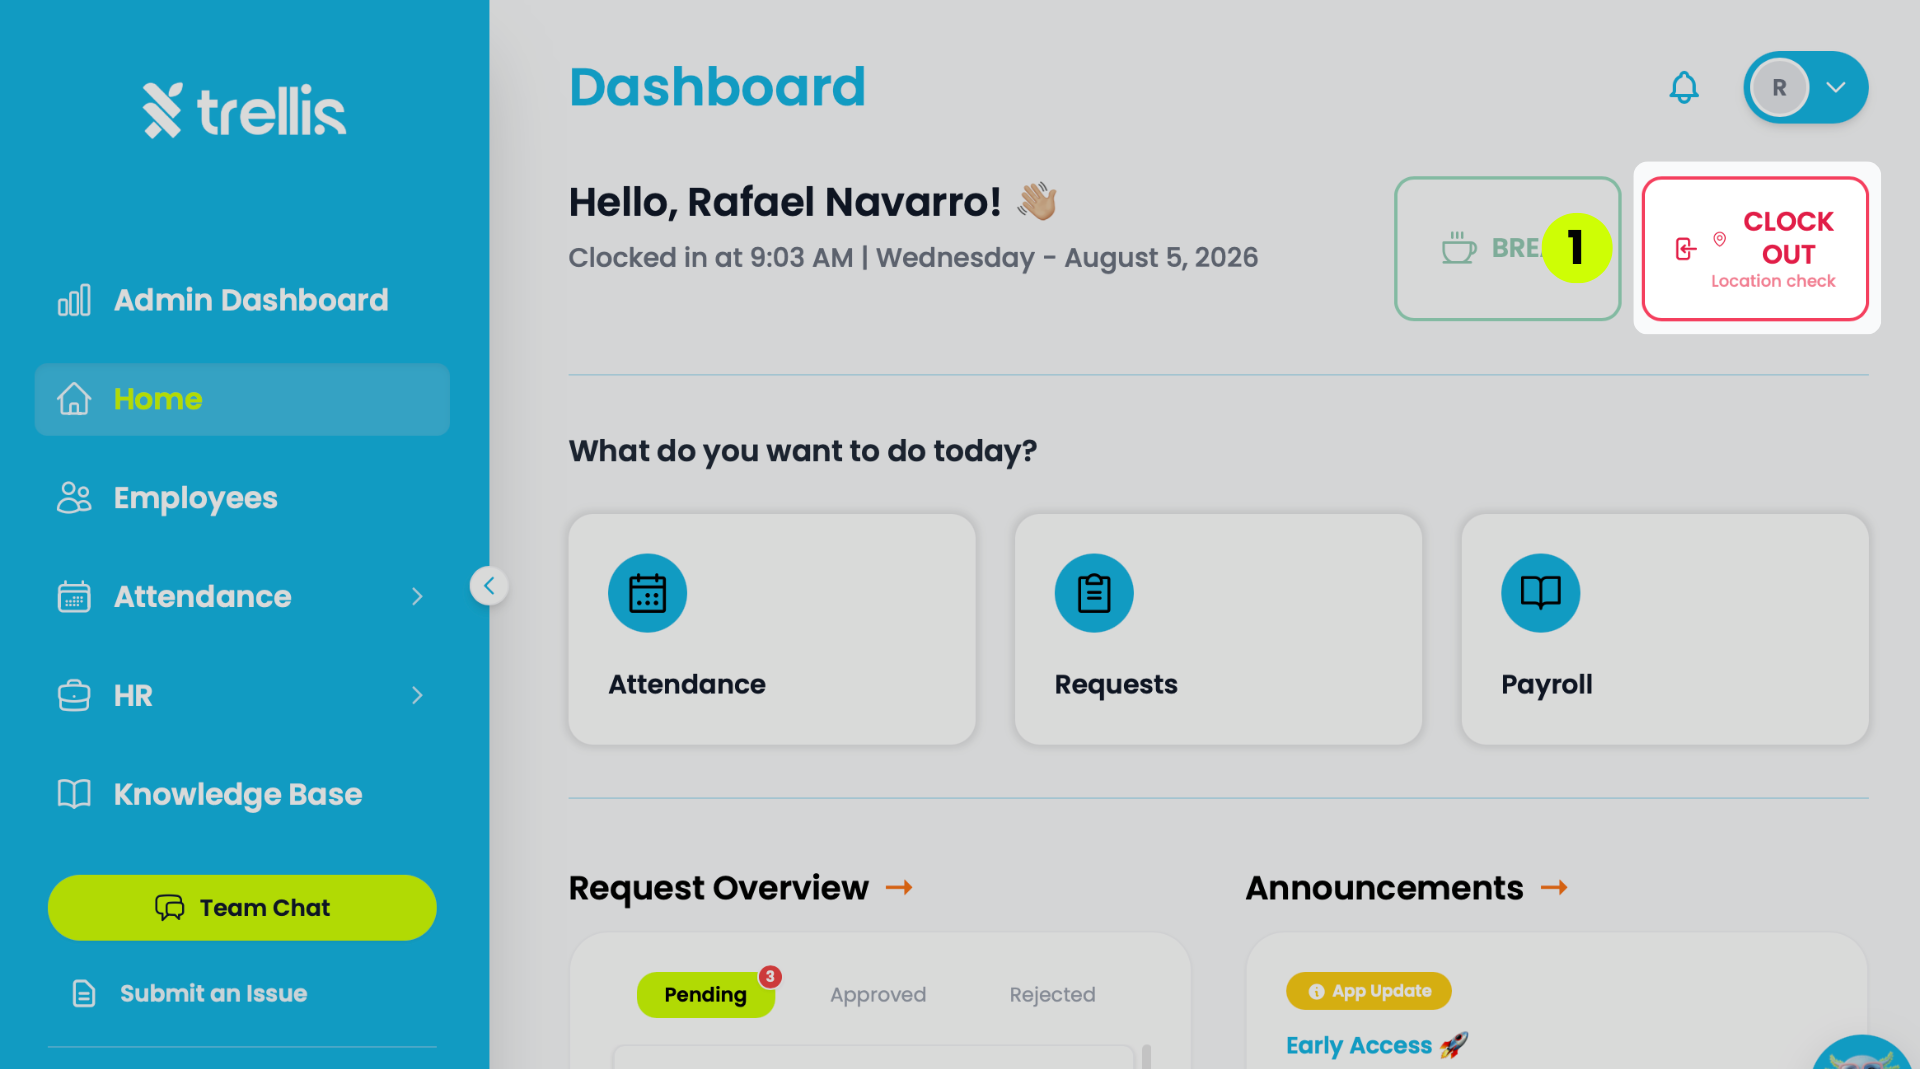
A dialog will appear showing your current location on the map and your clock-in time. Click "Clock-Out" to confirm.
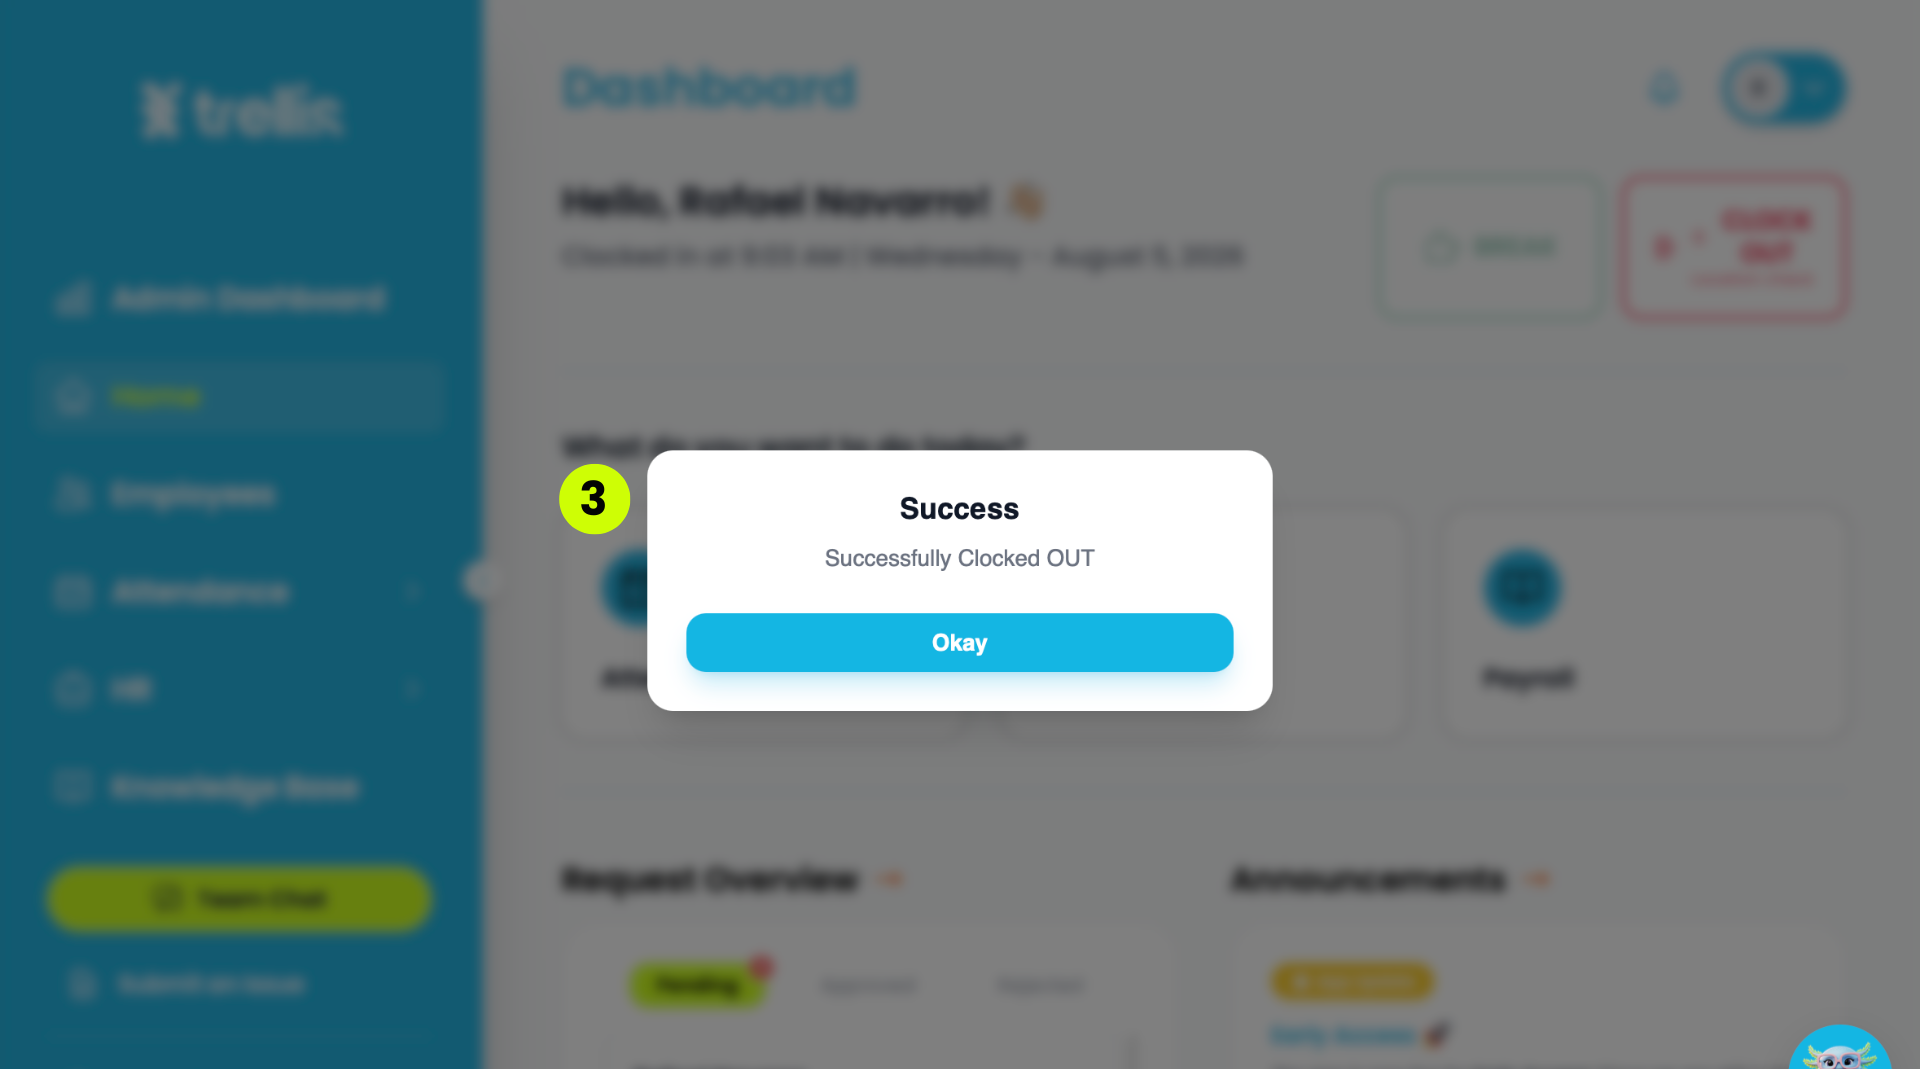
A success message will confirm that you have successfully clocked out. Click "Okay" to close.
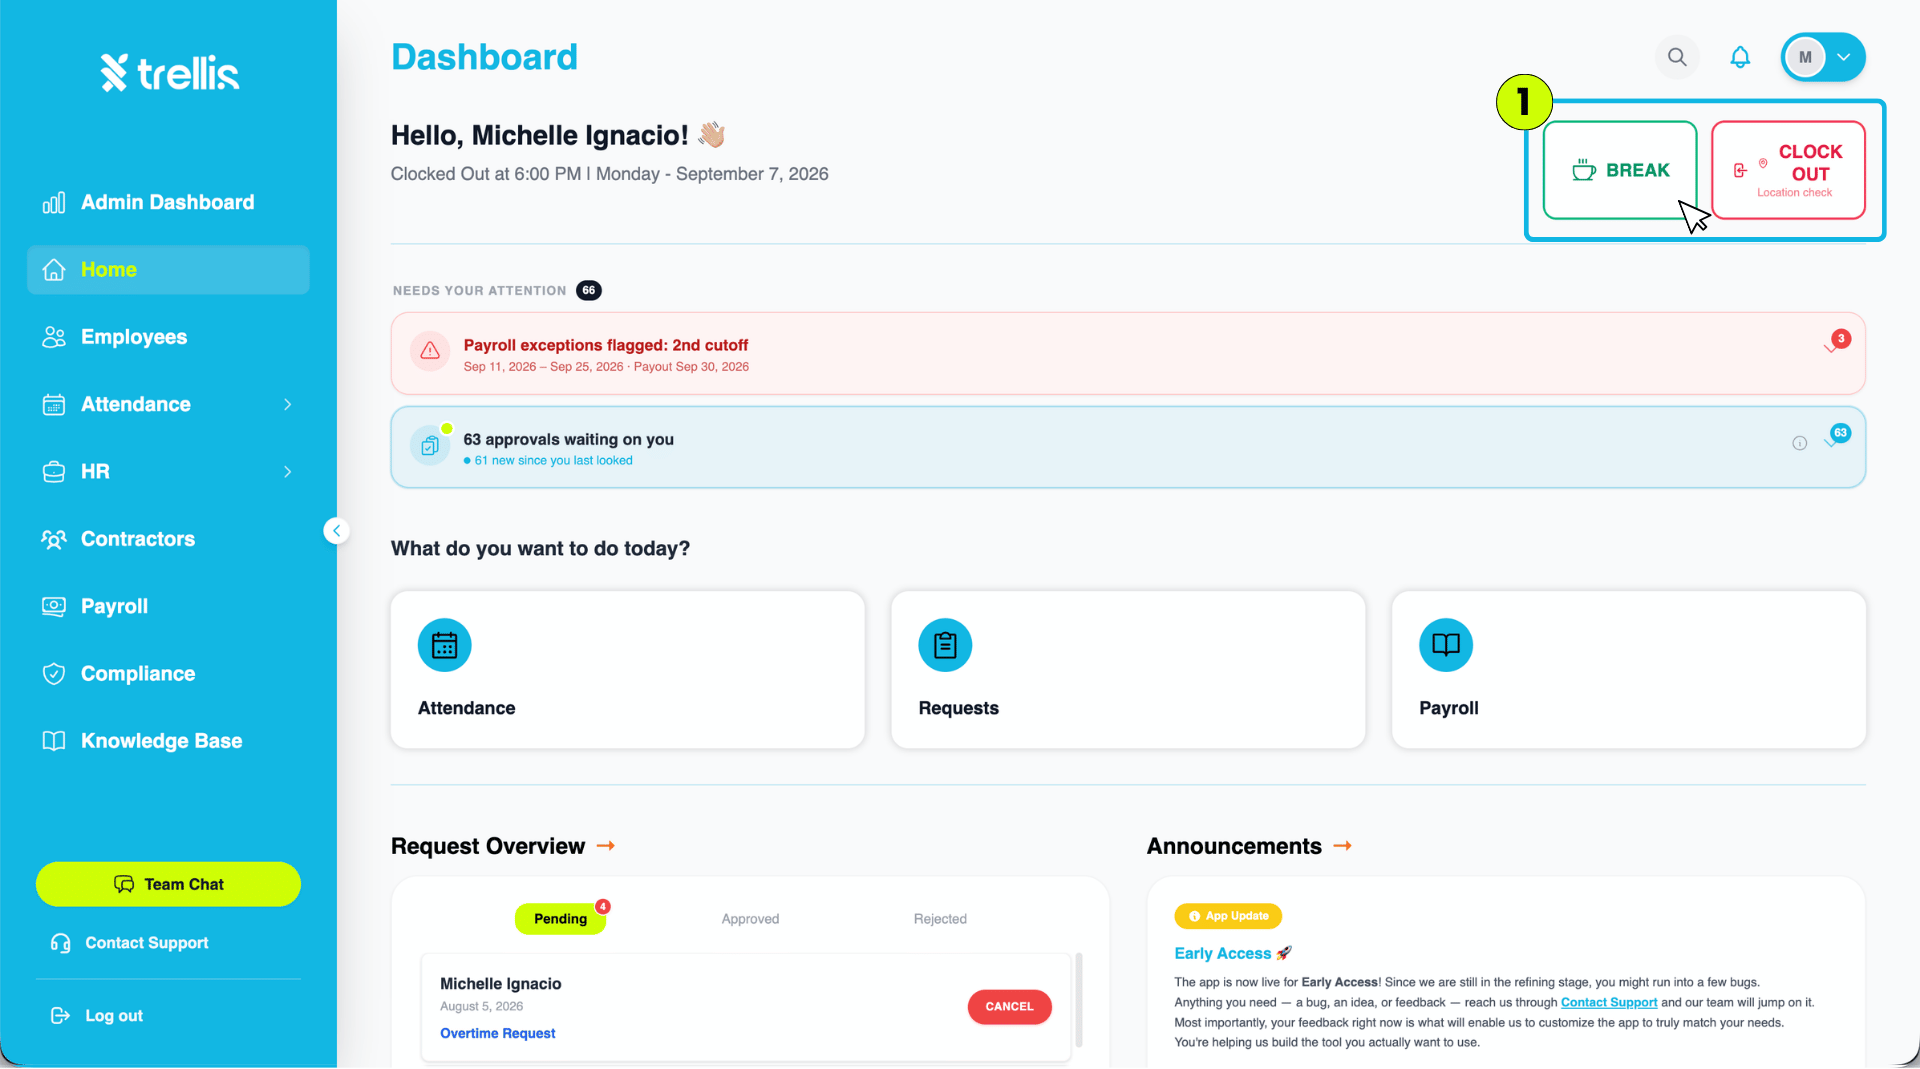
When your break time is near, click the "Break" button in the top-right corner of the Dashboard.
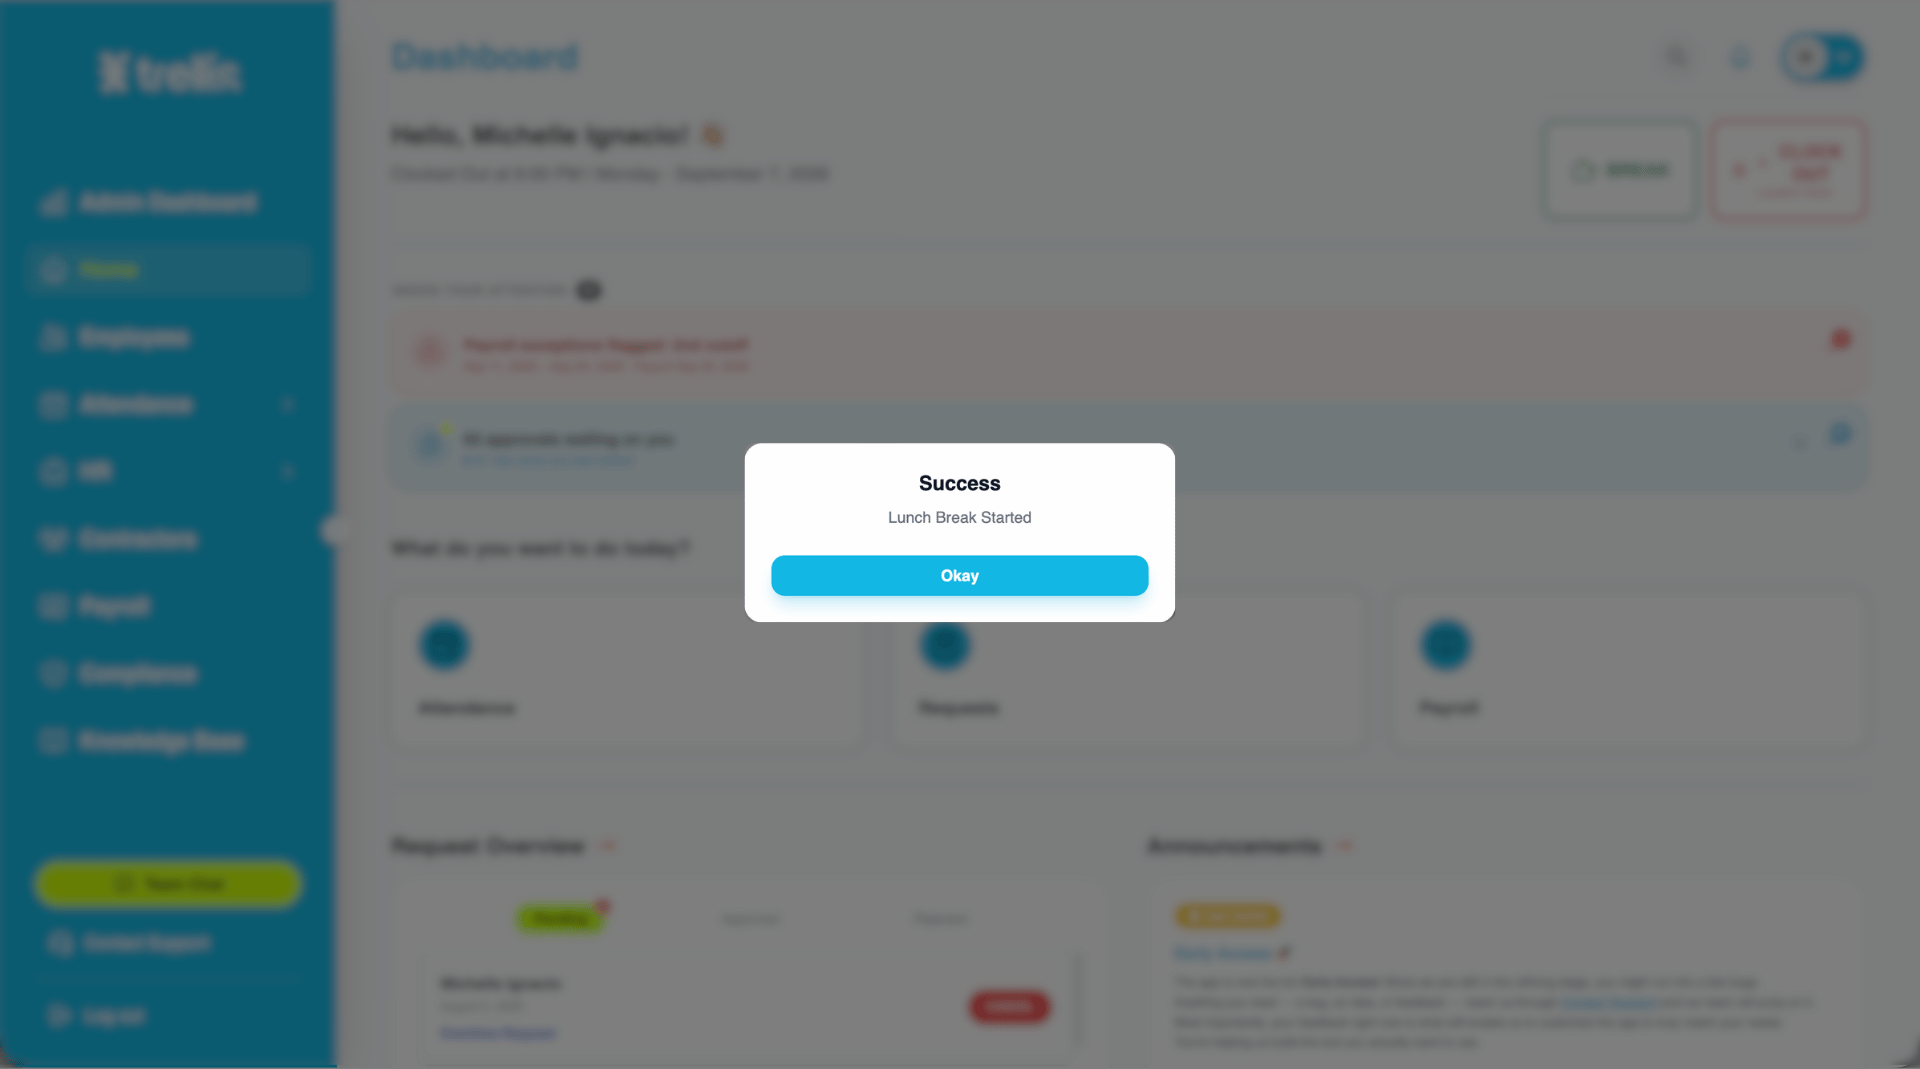
A success message will confirm that your lunch break has started. Click "Okay" to close the message.
The Dashboard will update to show that you are on break. When you are ready to return to work, click "End Break."
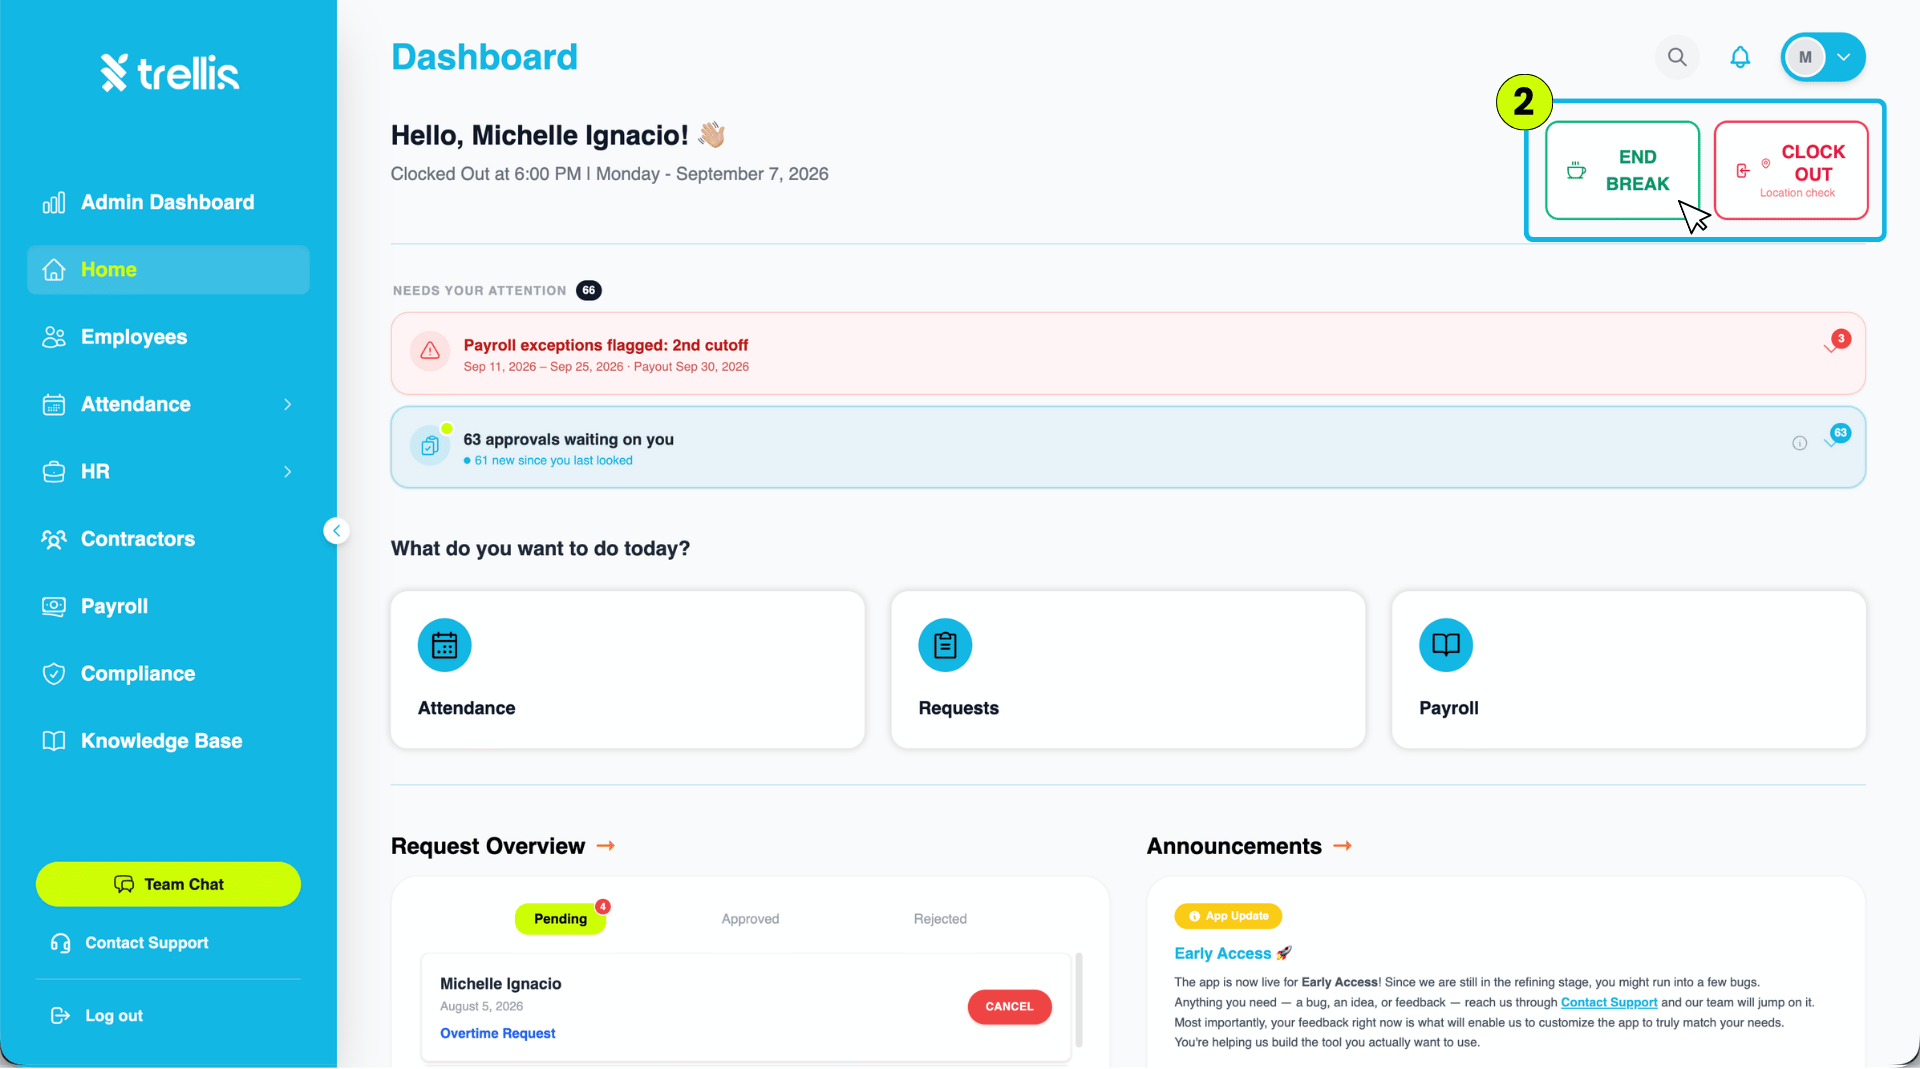
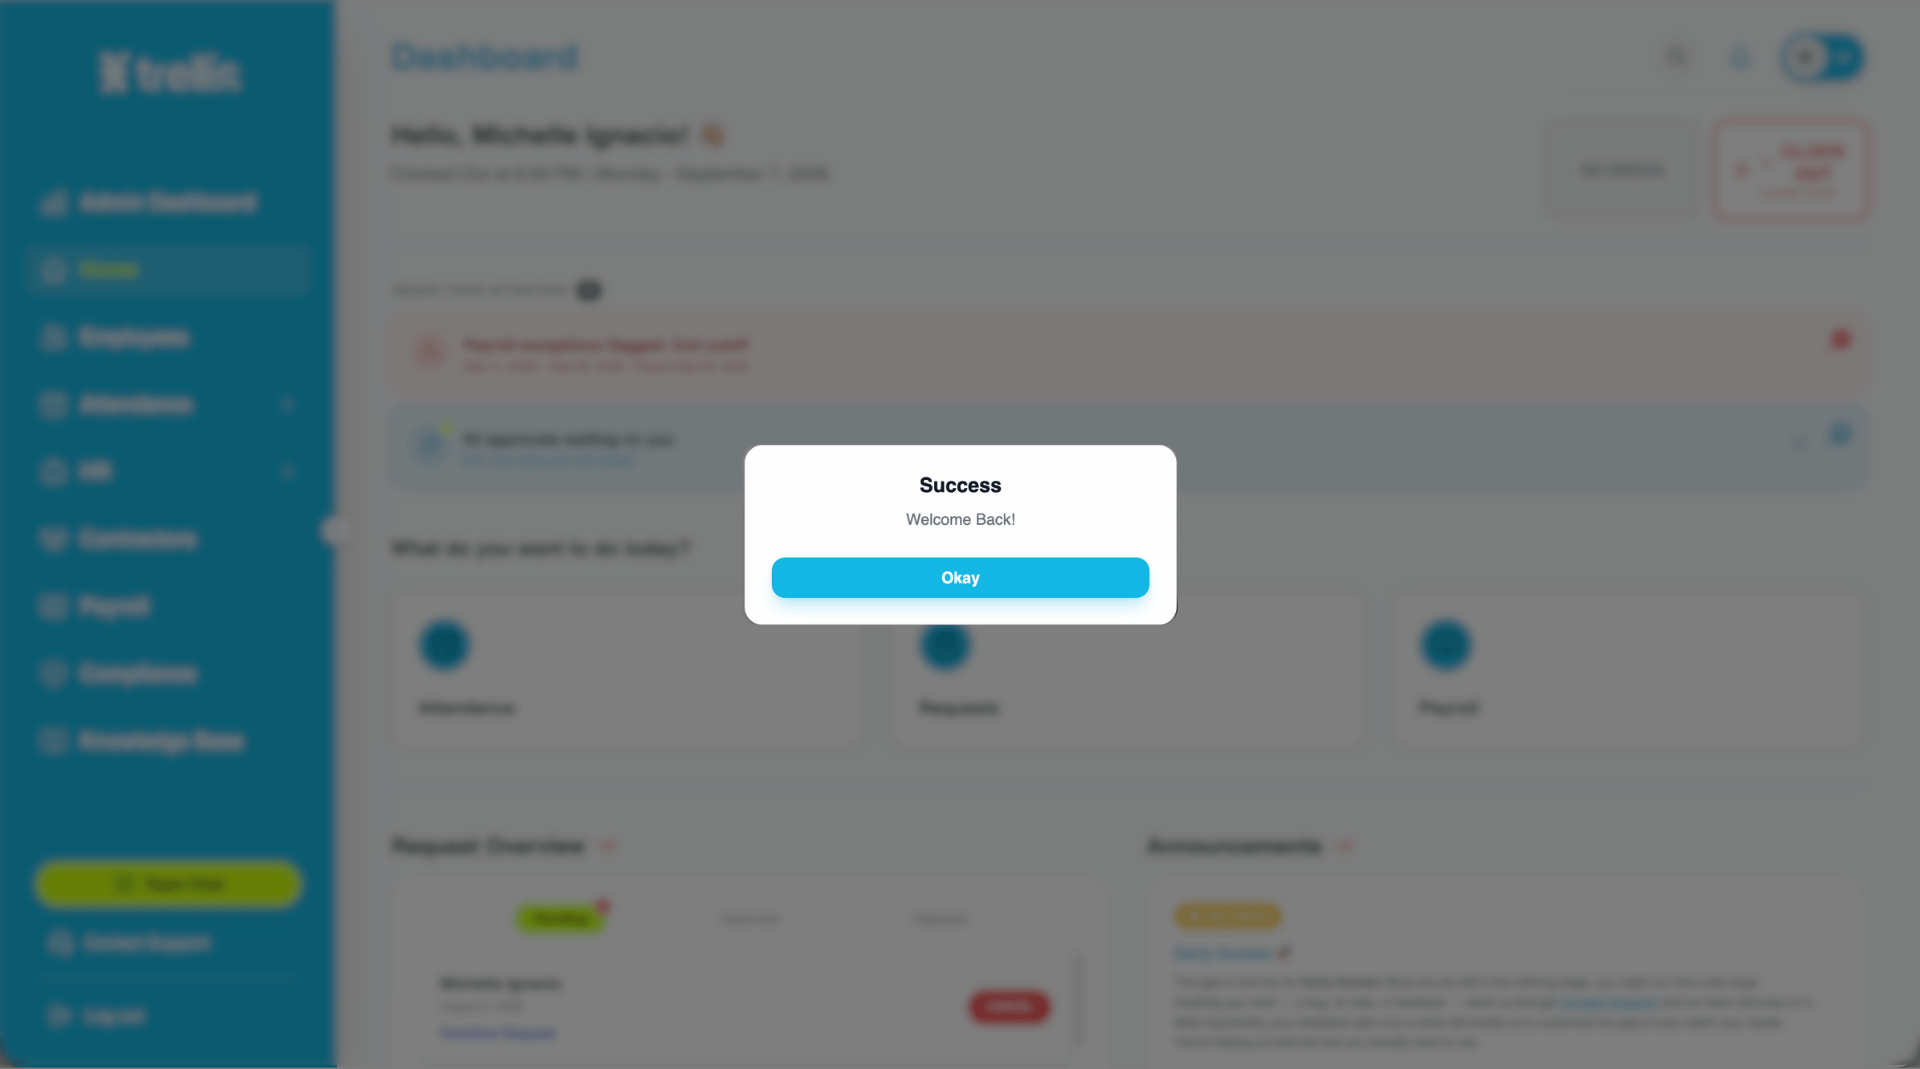
A success message will appear confirming that you are back. Click "Okay" to close the message.
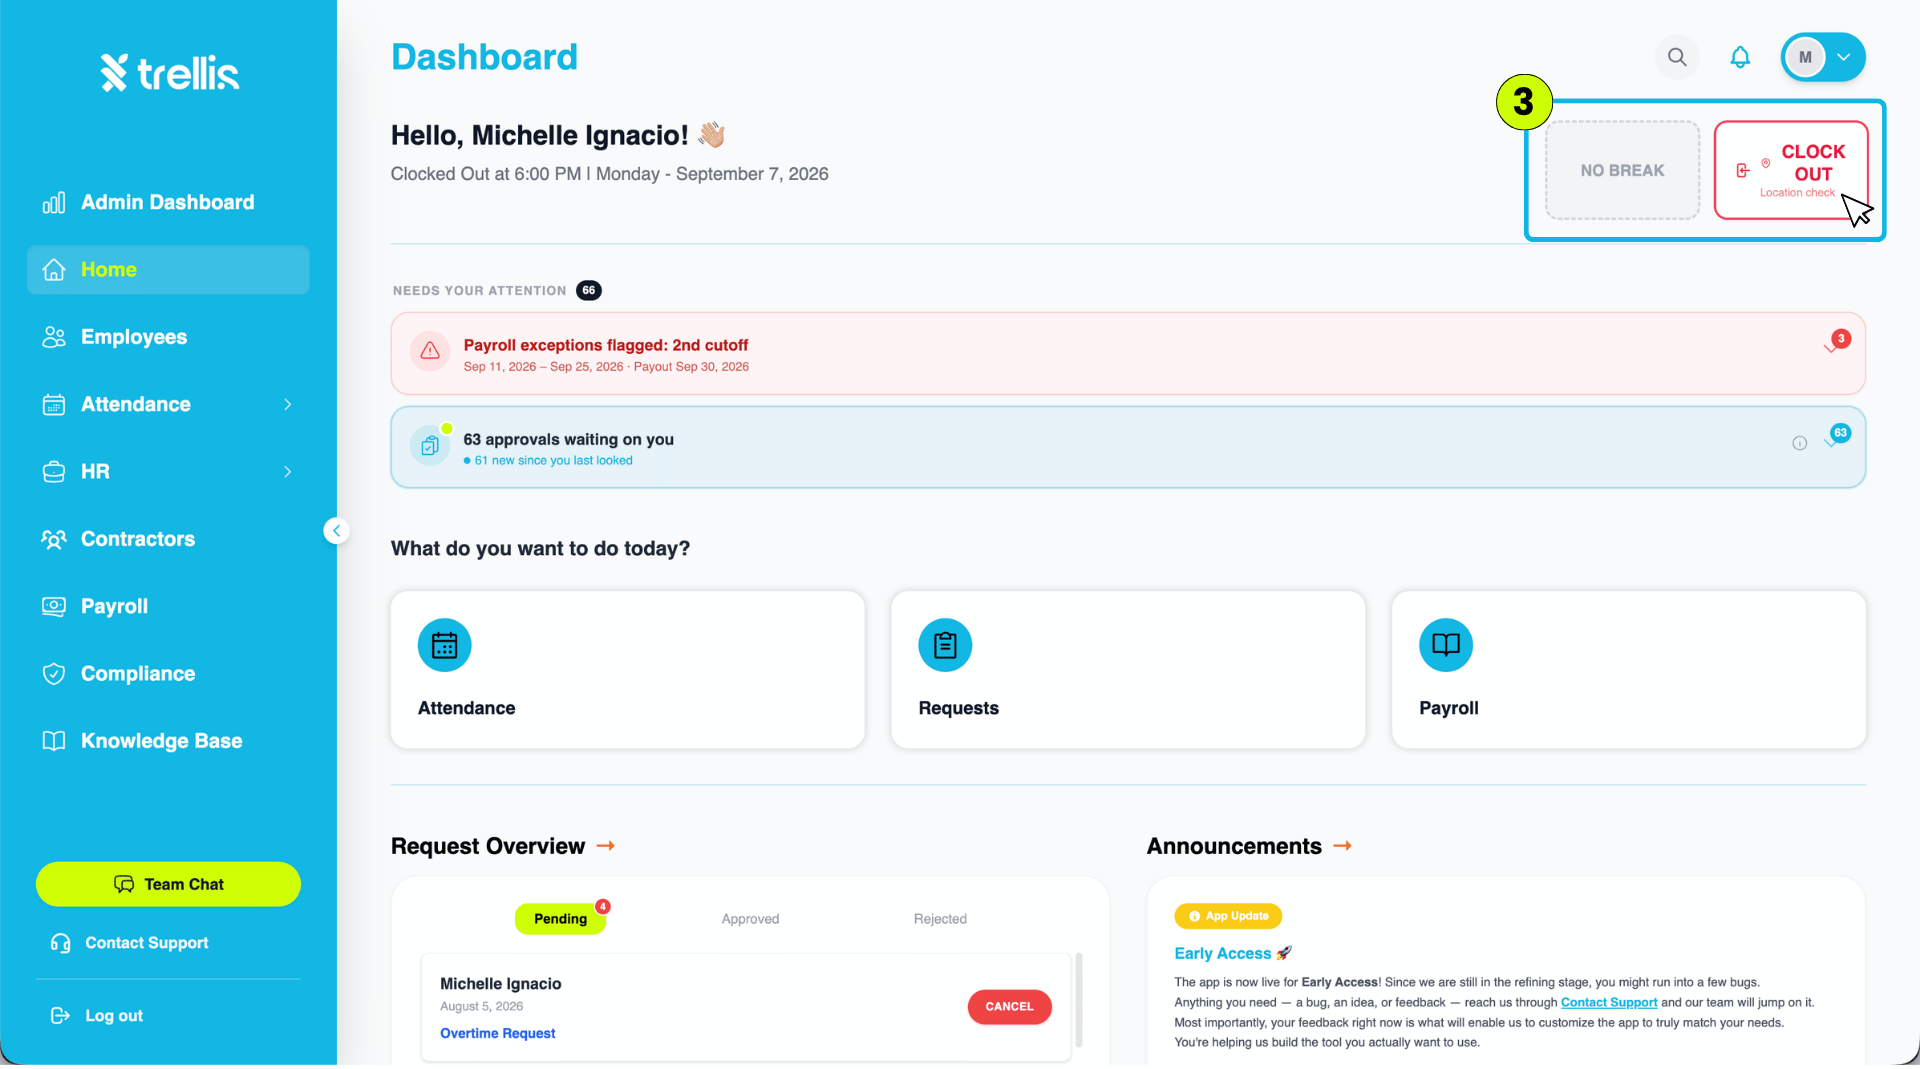
You are now clocked back in and the Dashboard returns to your active session, with the "Clock Out" button available.
 Read the full guide →
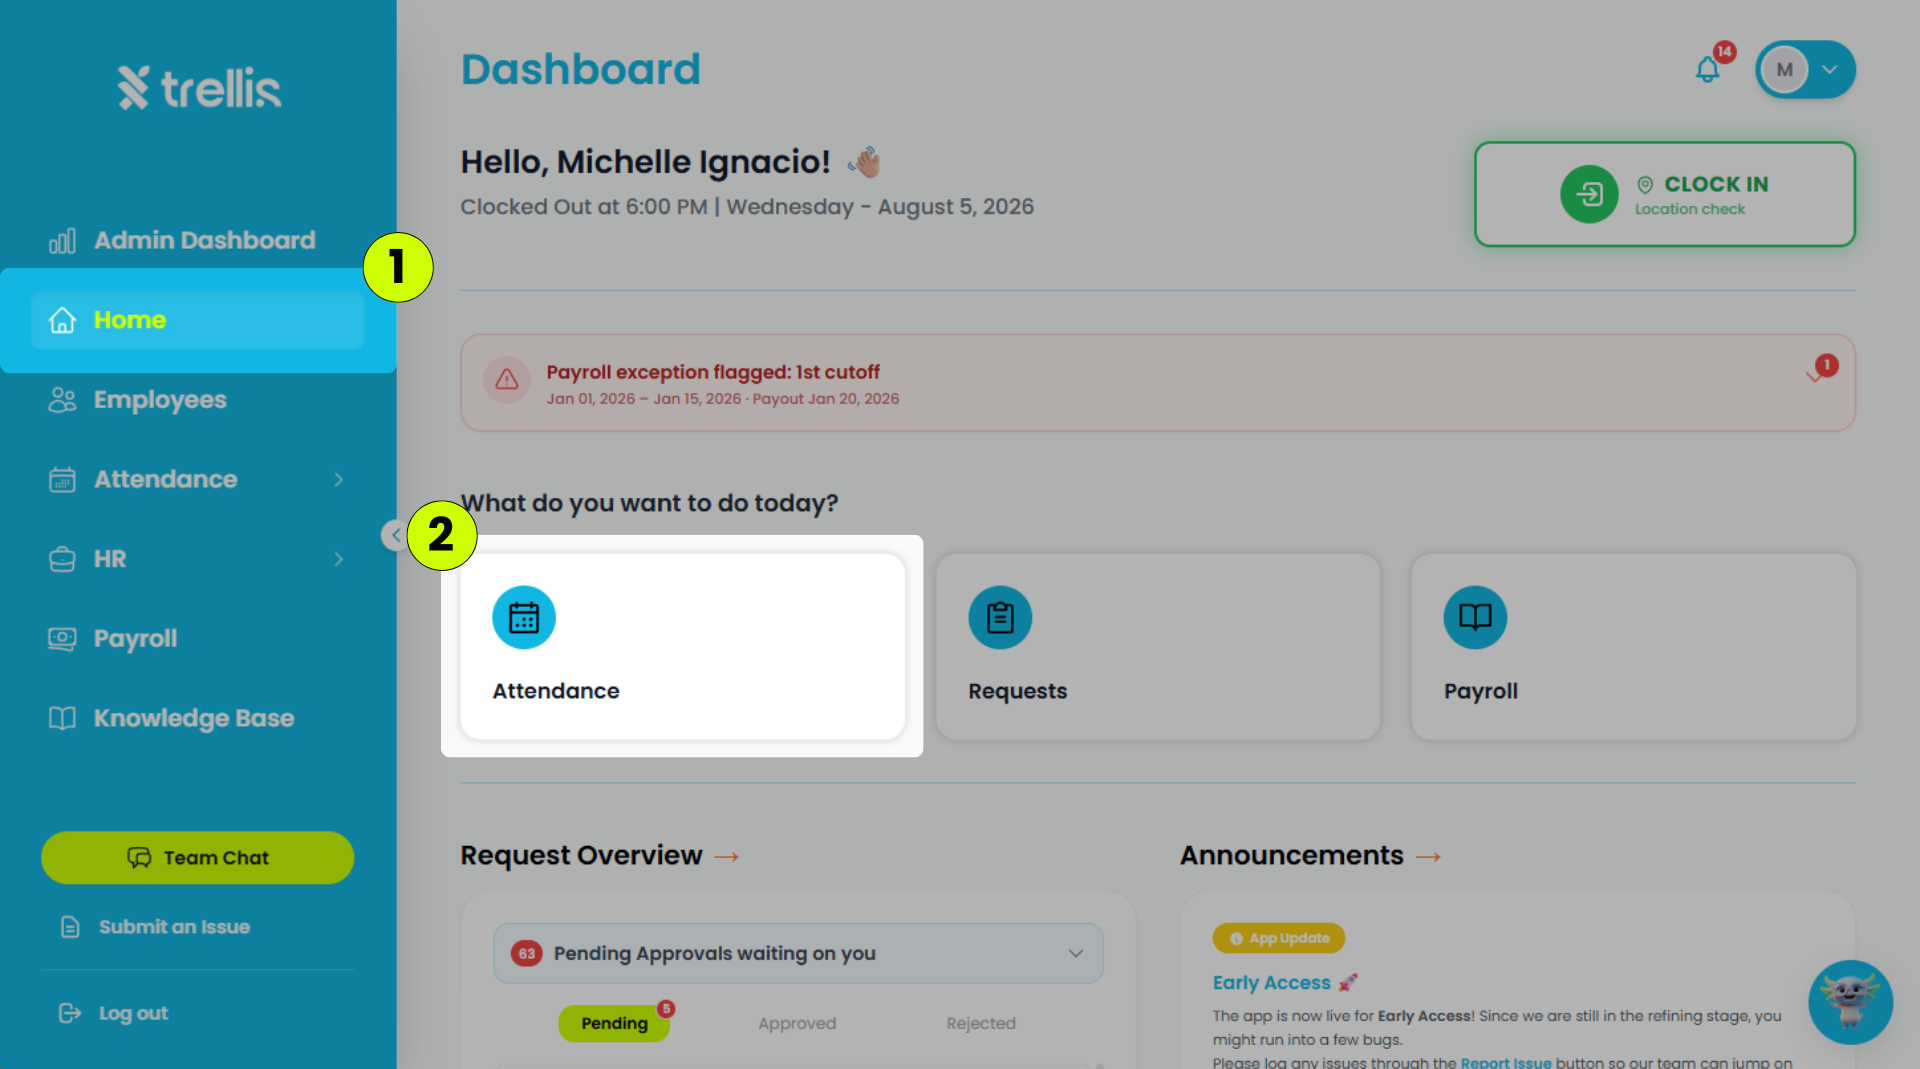
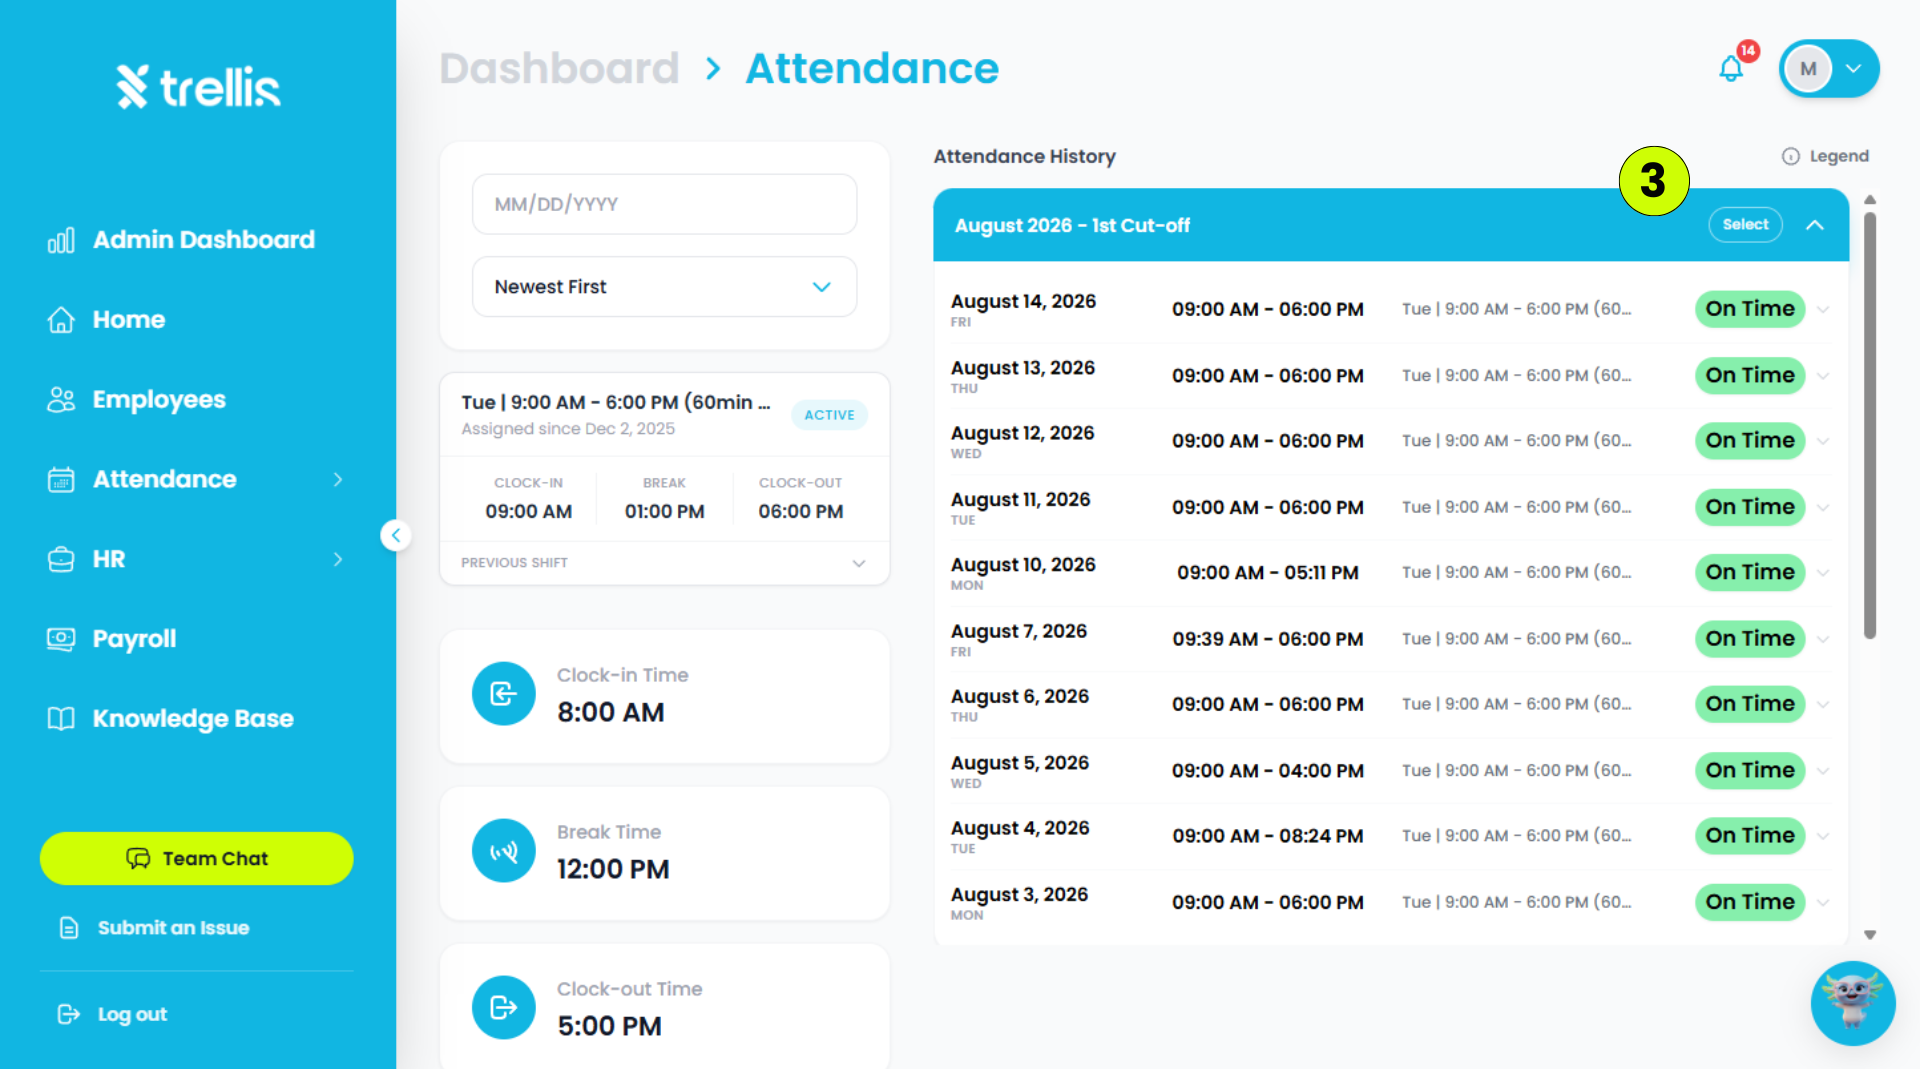
From the sidebar, click "Home."
On the Home page, click "Attendance."
Your Attendance Report page will open, where you can view your attendance history.
 Read the full guide →
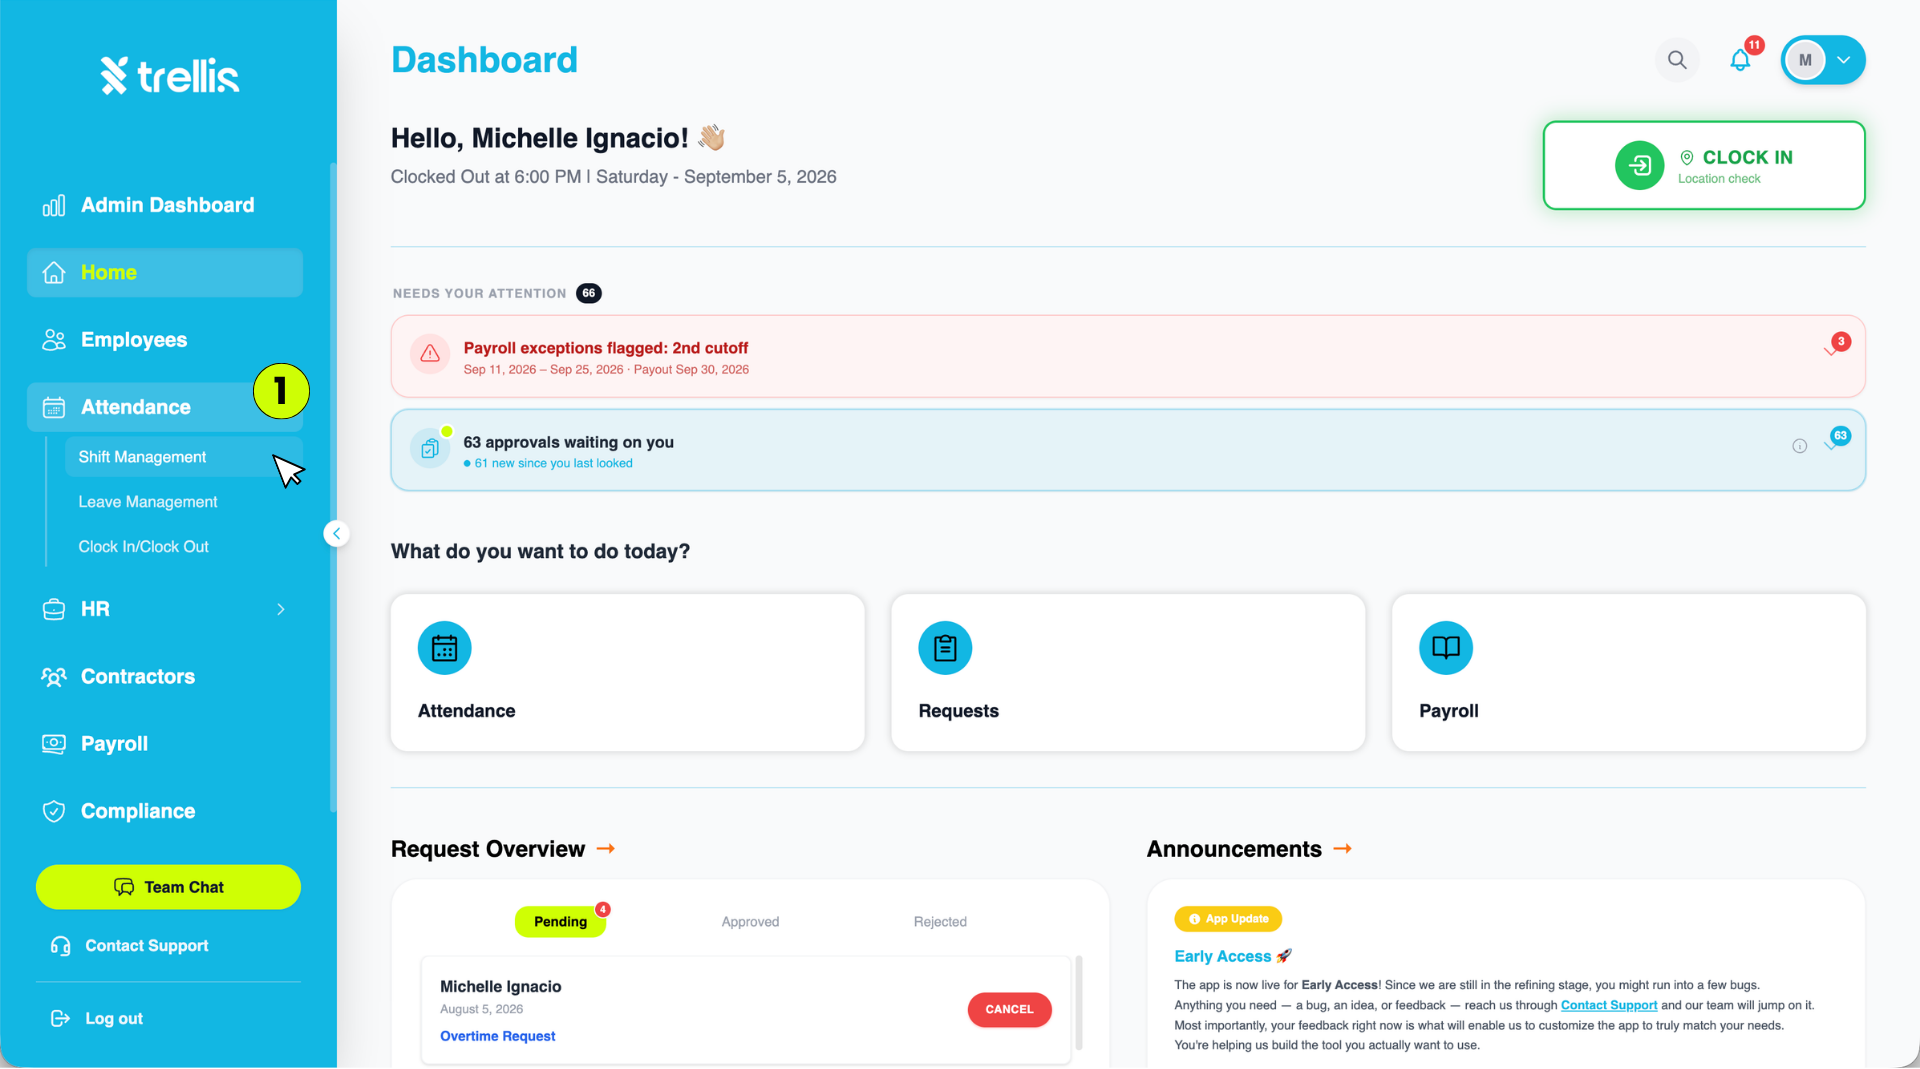
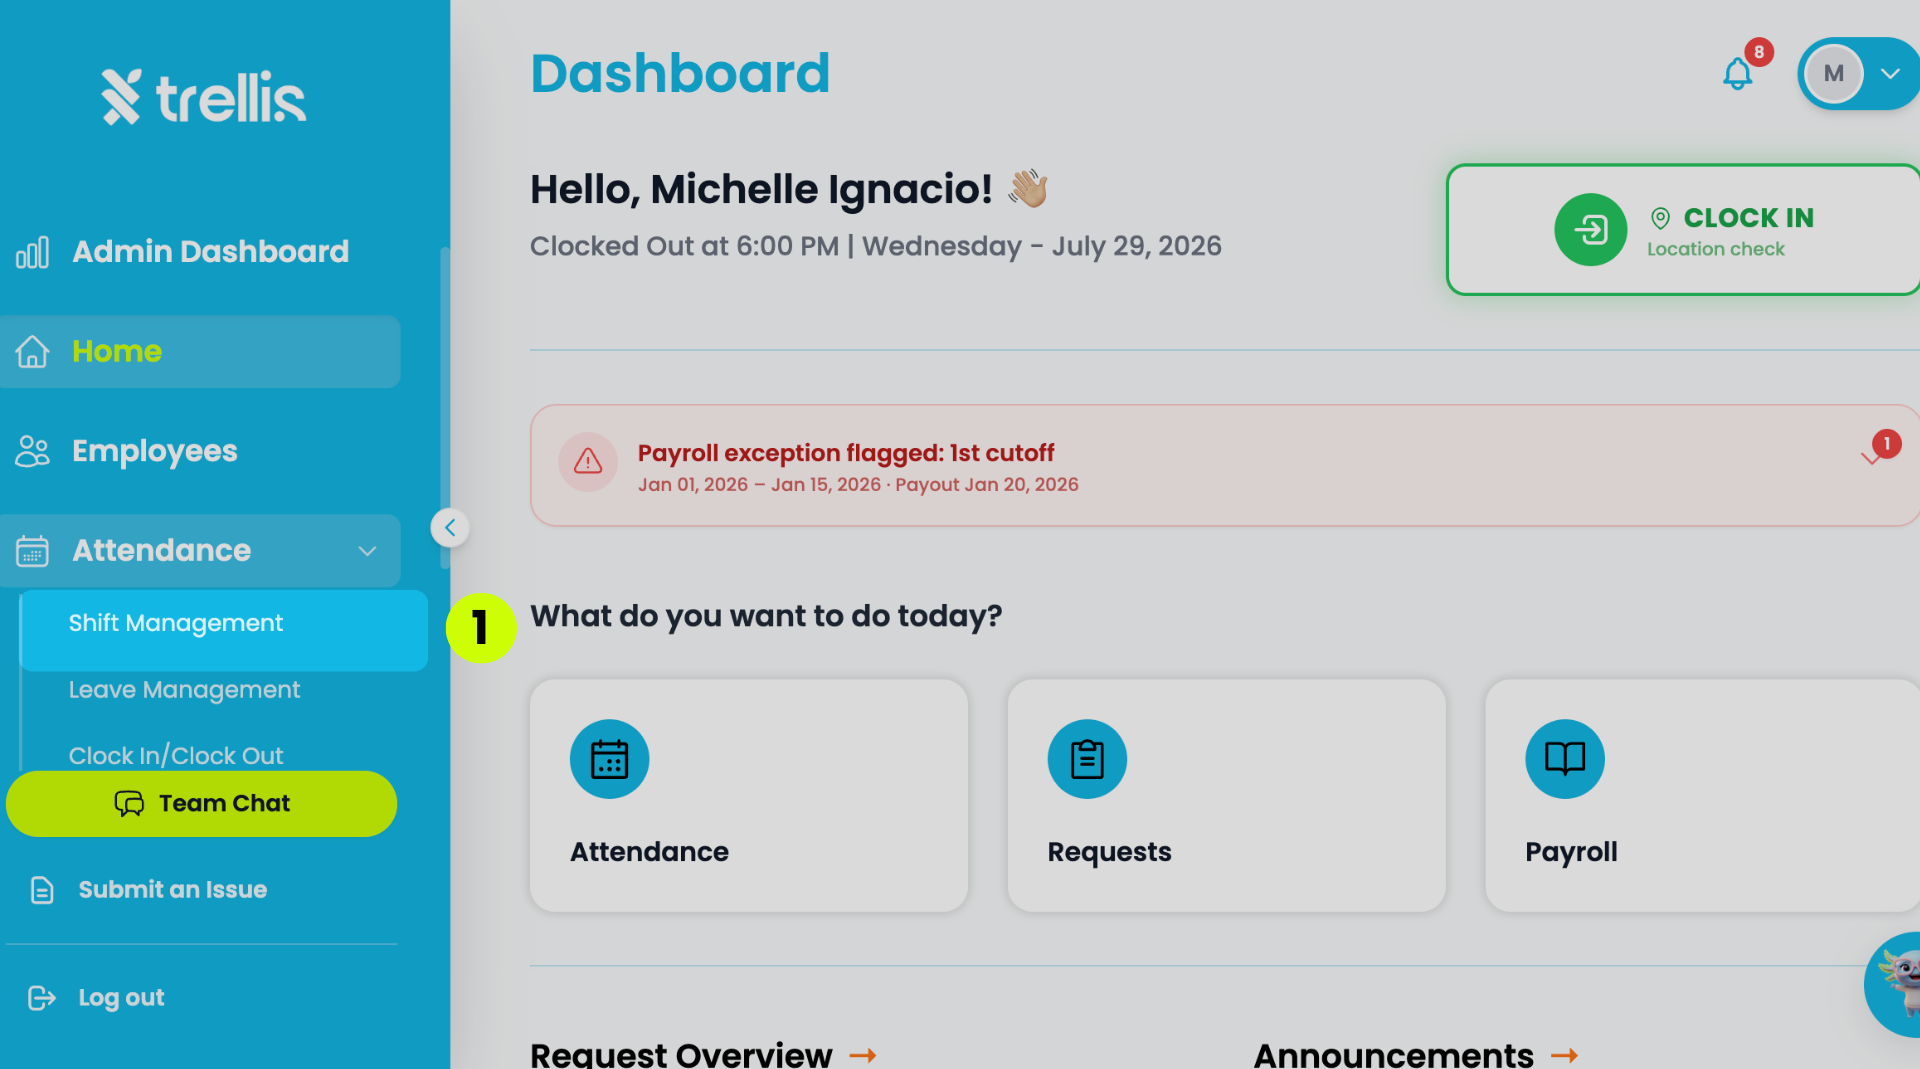
From the sidebar, click "Attendance" to expand the menu, then select "Shift Management."
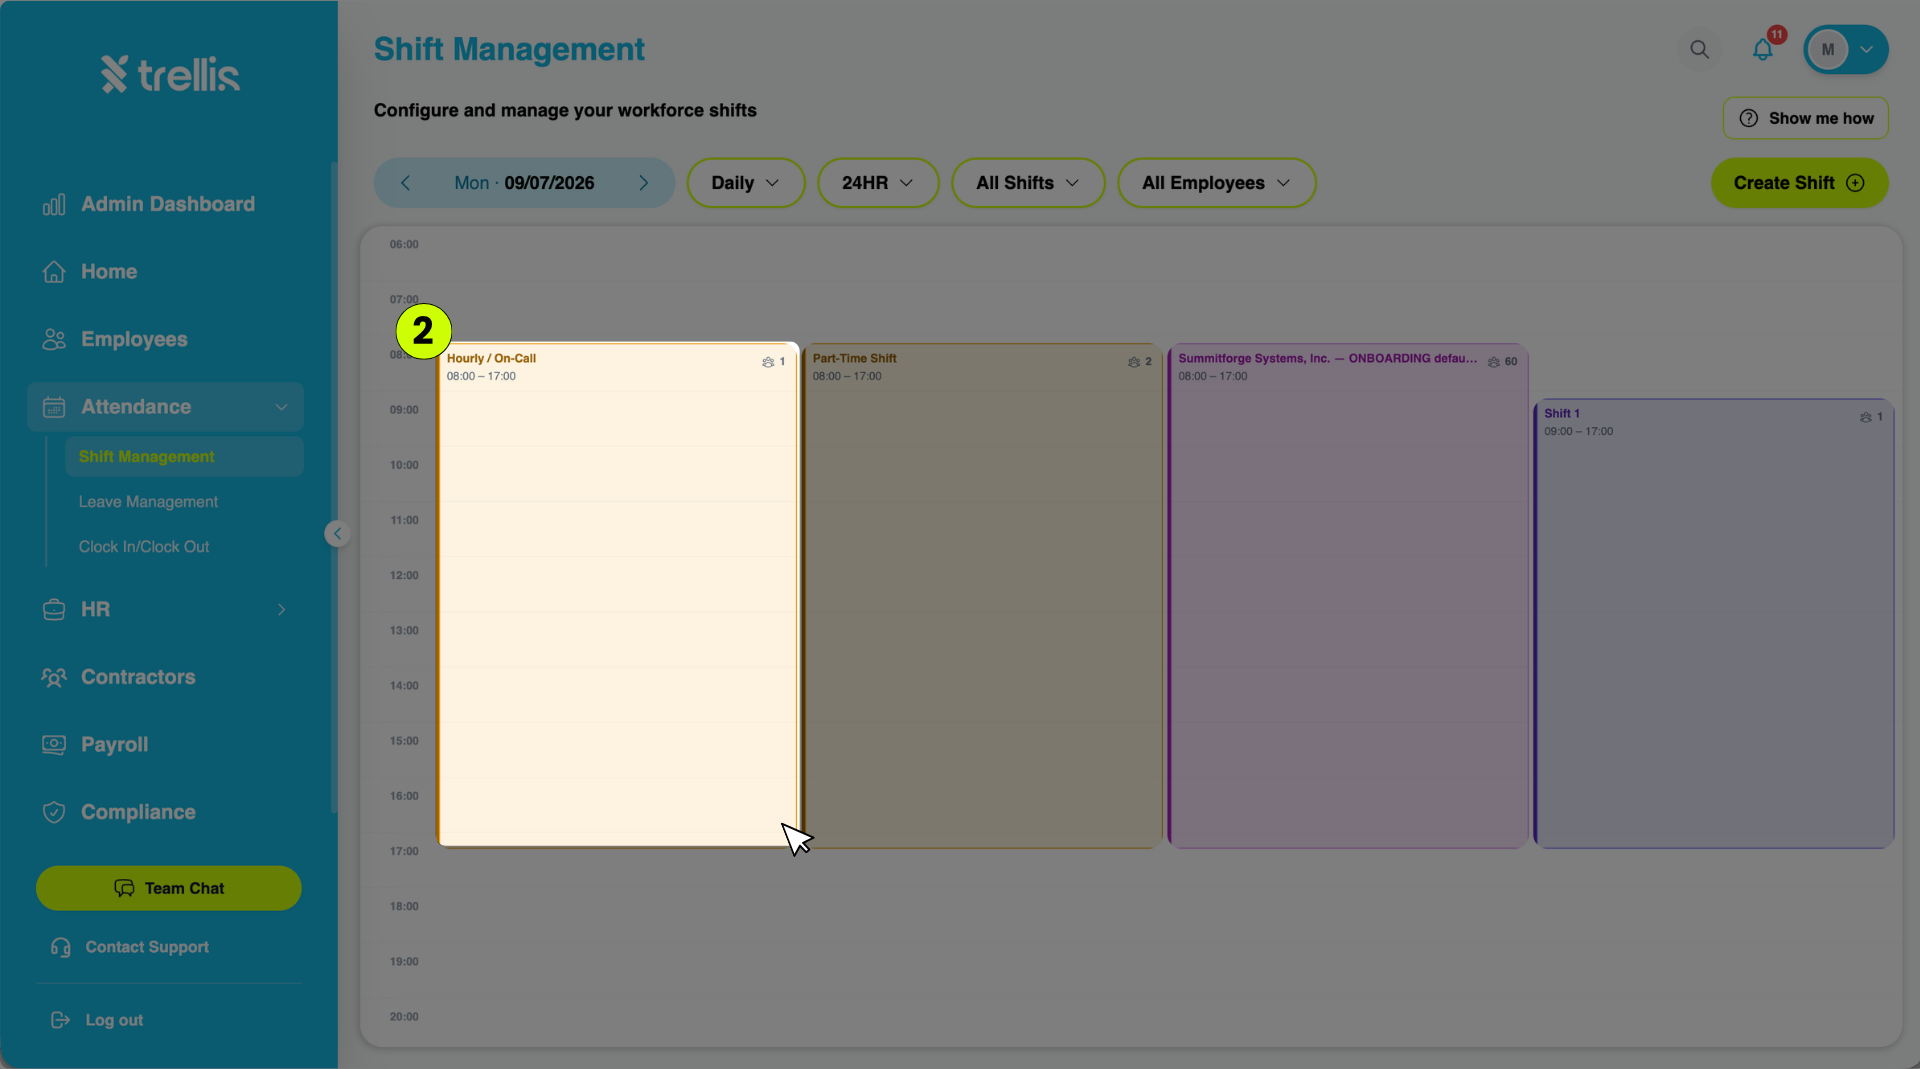
On the Shift Management page, click into the shift column you want to assign employees to (e.g., "Hourly / On-Call"). This opens a panel on the left showing that shift's details and current employees.
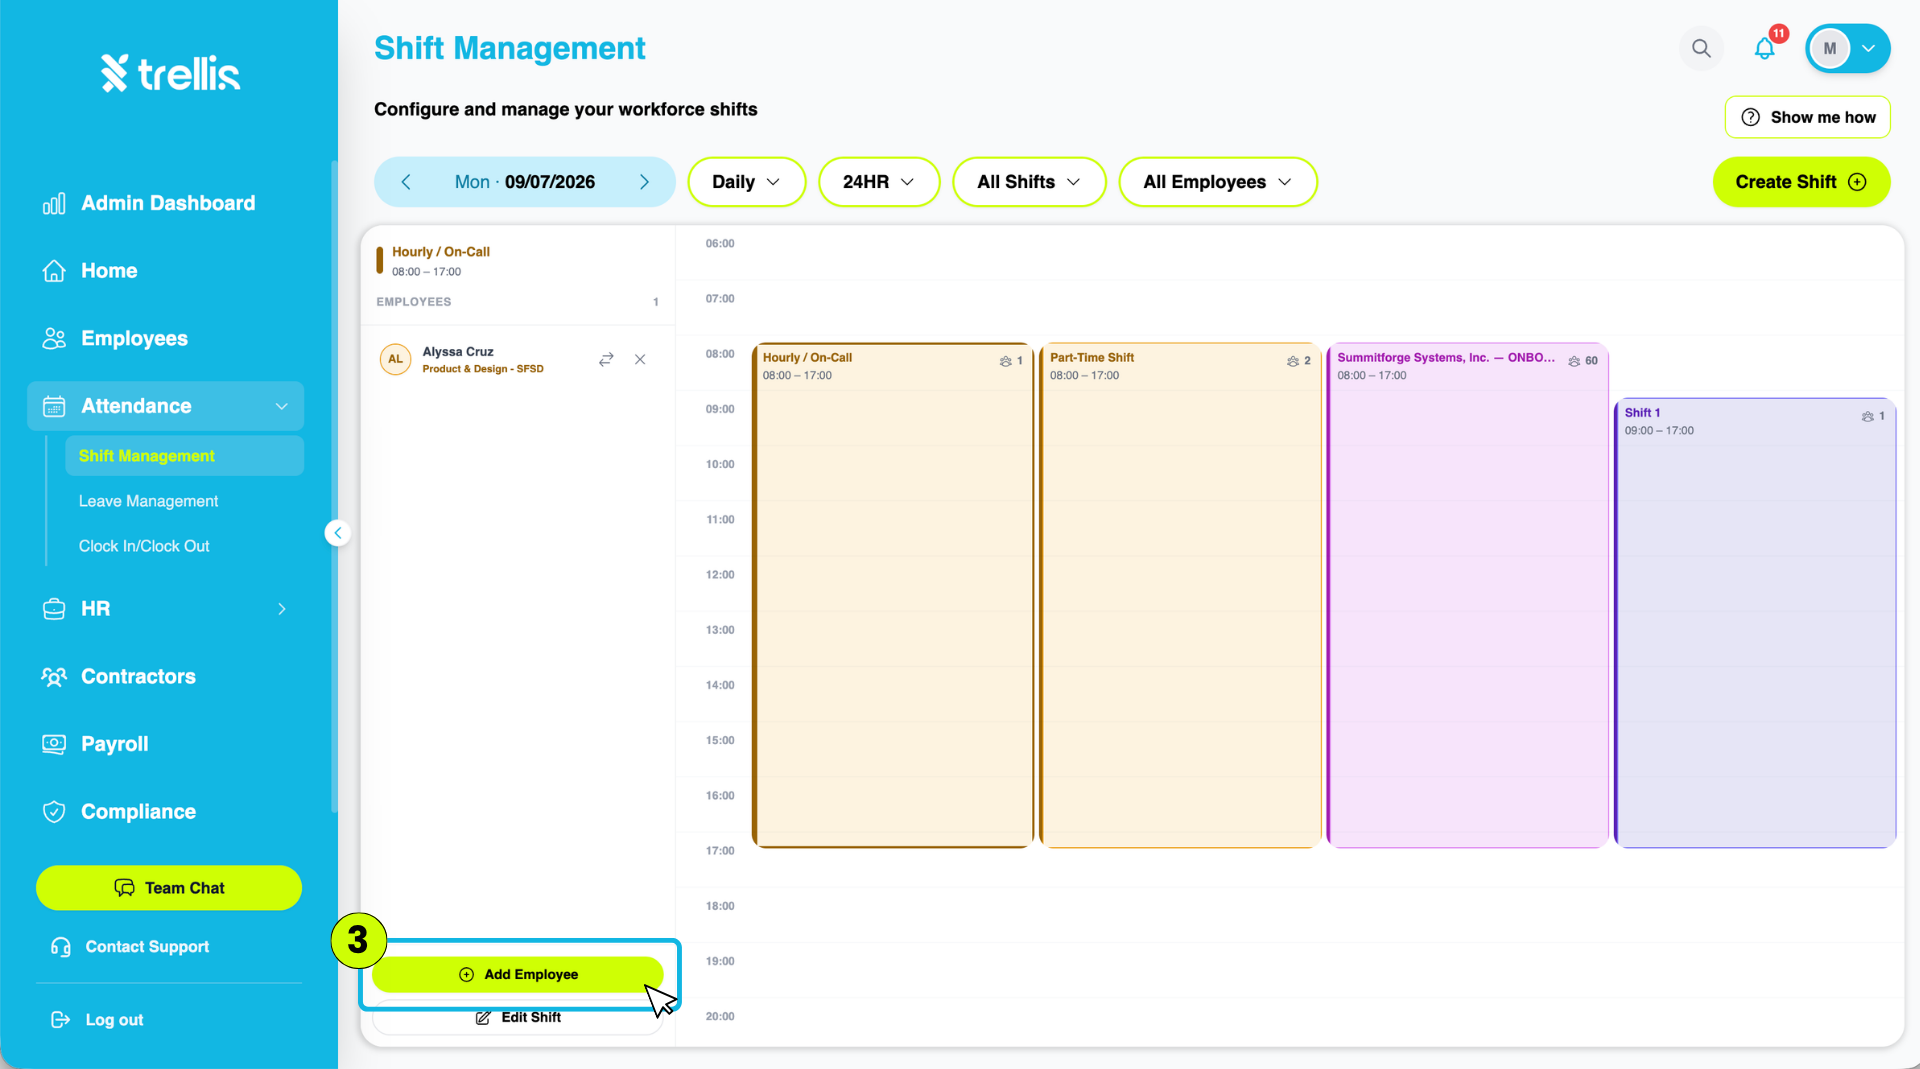
Click the "Add Employee" button at the bottom of that panel.
The "Assign Shift" window will appear on the right. Fill in the required details, then click "Assign."
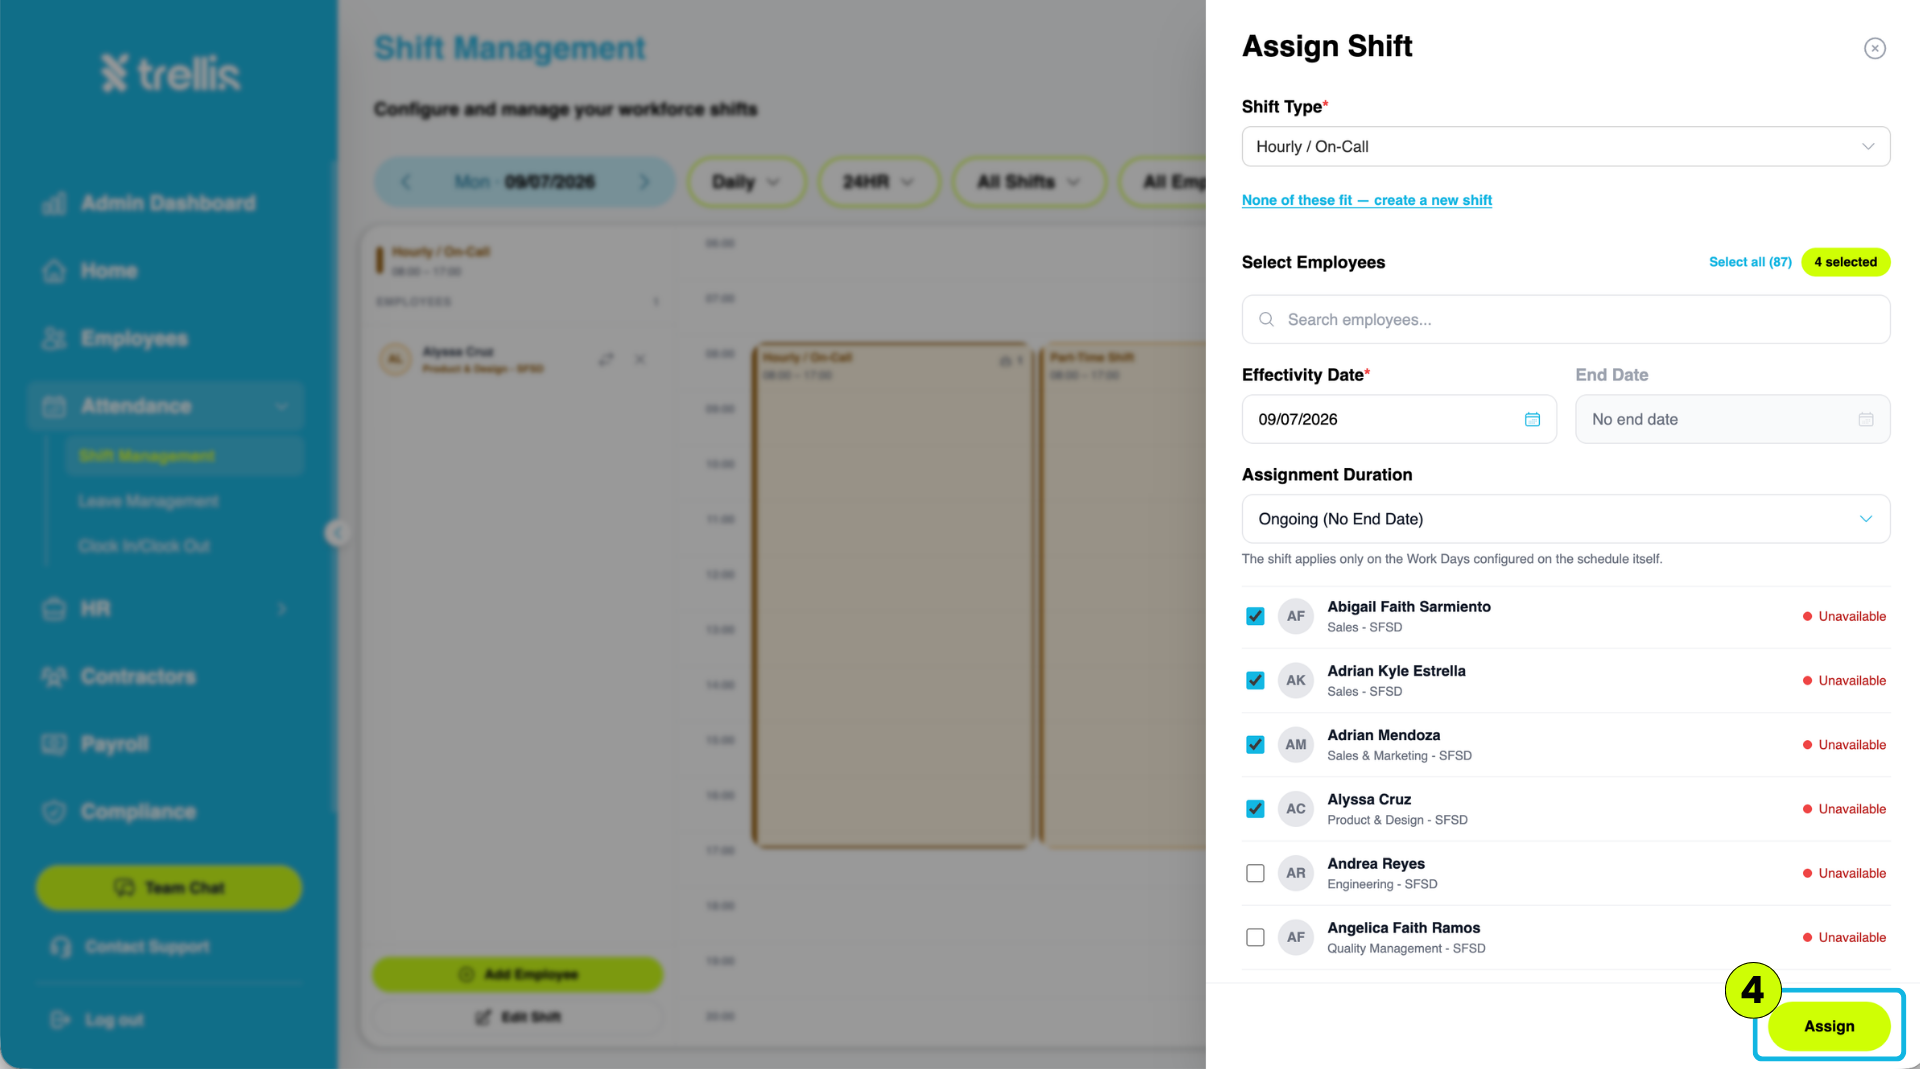
Shift Type — select the shift schedule from the dropdown (or click "None of these fit — create a new shift" if you need a new one)
Select Employees — search or check off the employee/s you want to assign to this shift; you can also click "Select all"
Effectivity Date — set the date the shift assignment begins
End Date — optional; leave as "No end date" if the assignment doesn't have a fixed end
Assignment Duration — defaults to "Ongoing (No End Date)." The shift will automatically apply only on the work days configured on the shift schedule itself.
From the sidebar, click "HR" to expand the menu, then select "Shift Management."
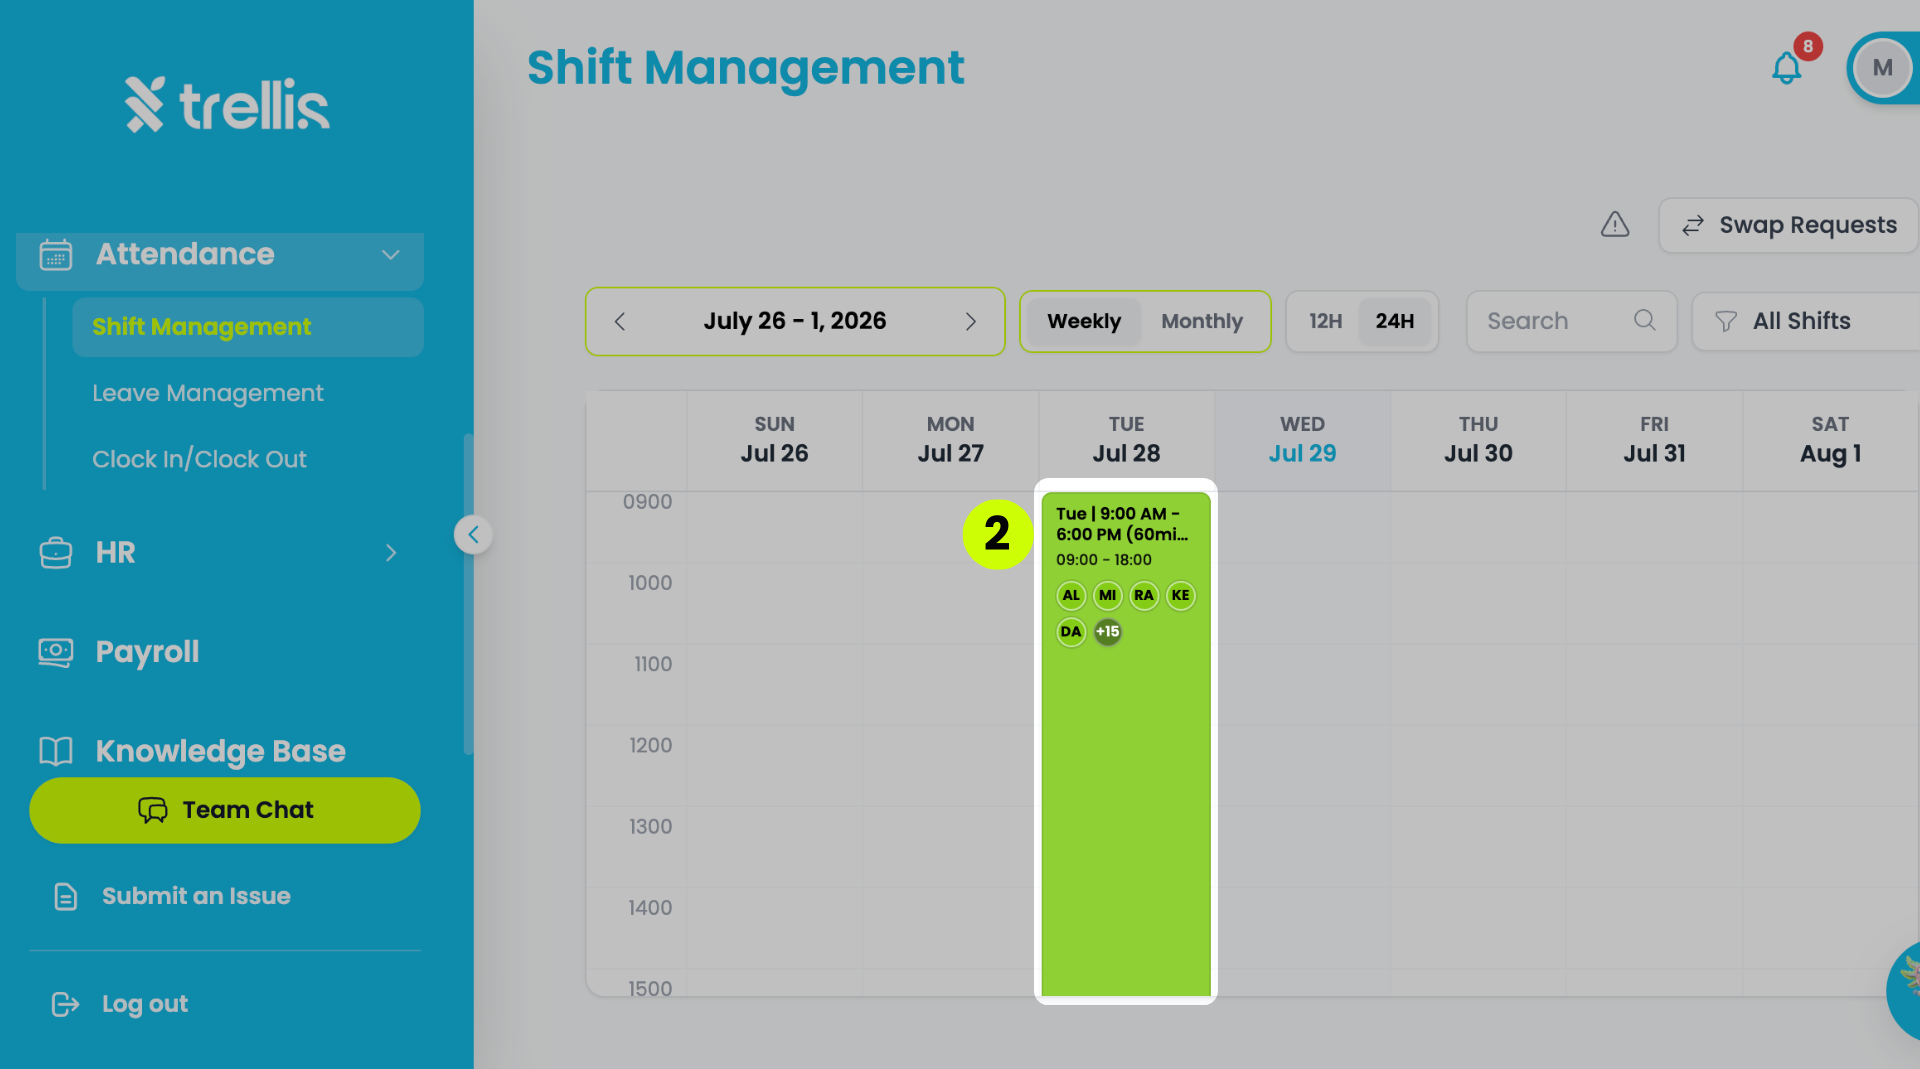
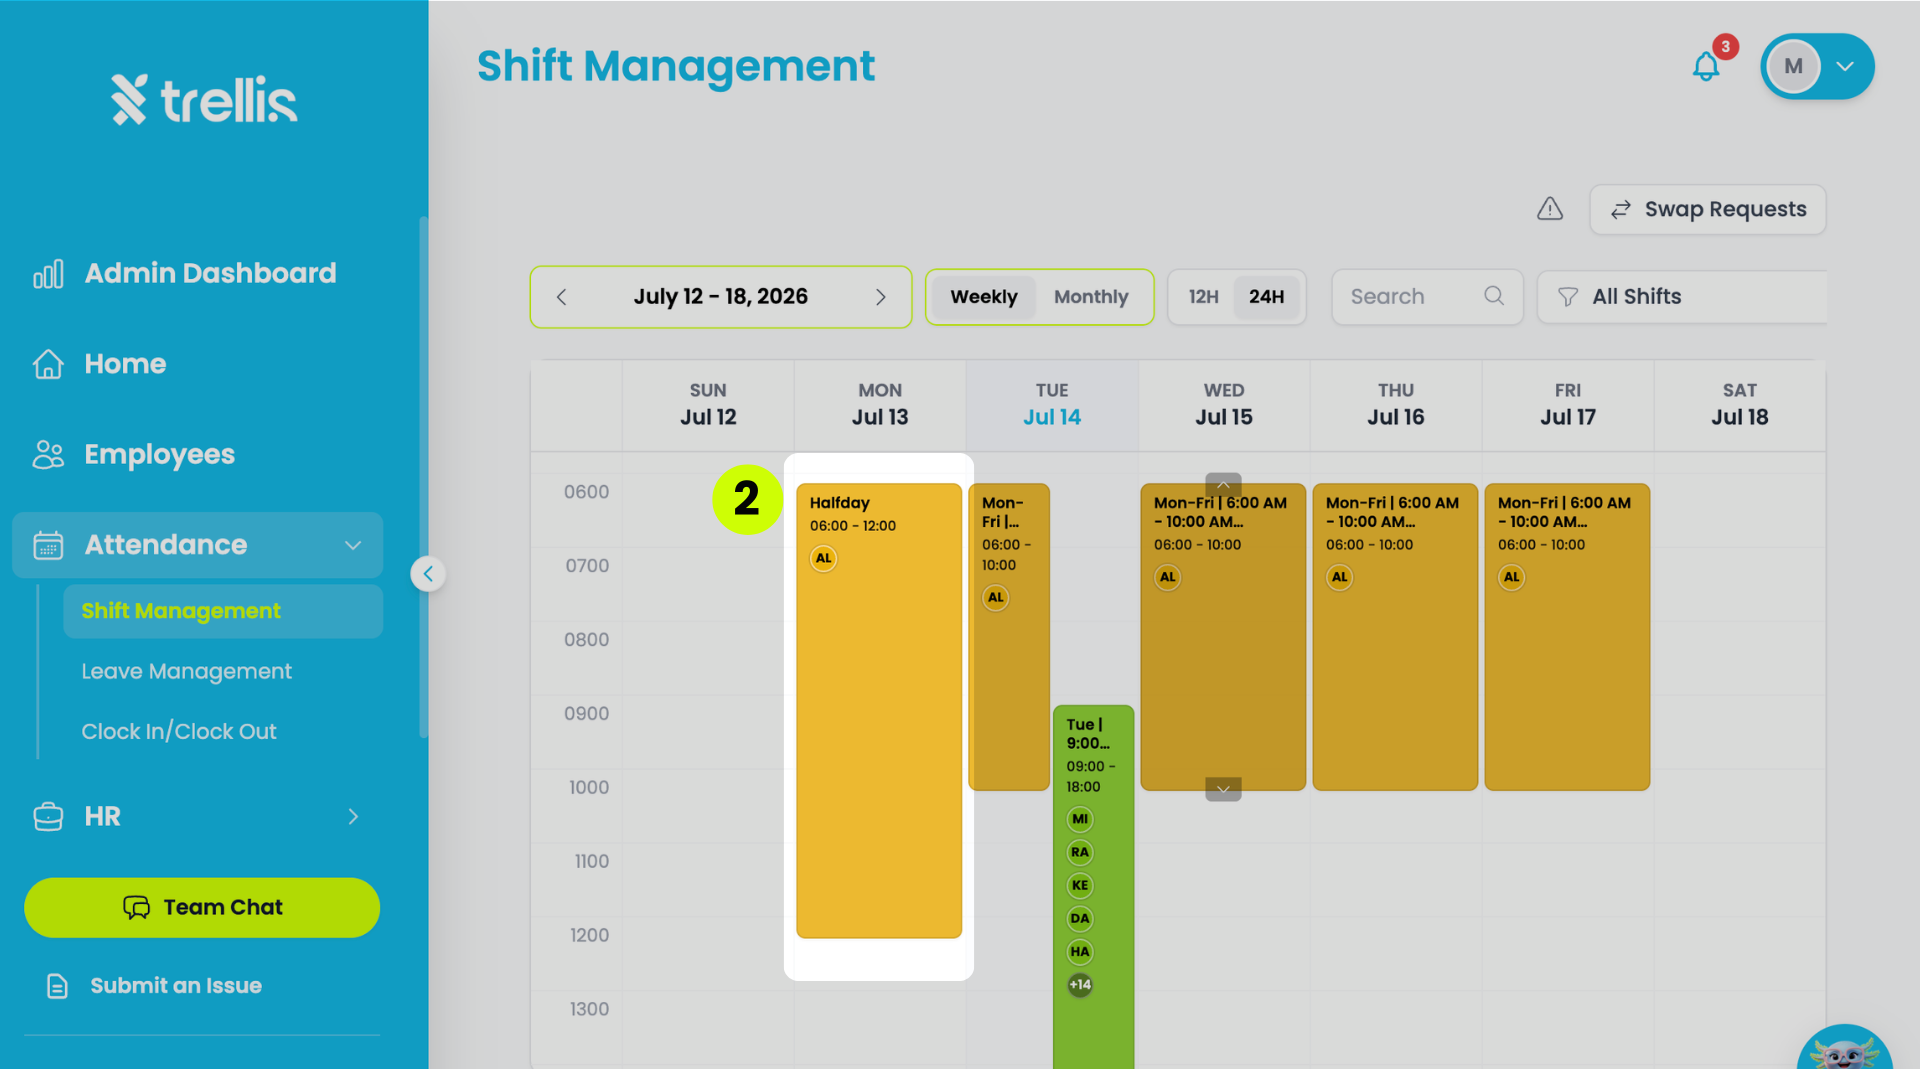
On the "Shift Management” page, click on the shift block you want to edit from the calendar.
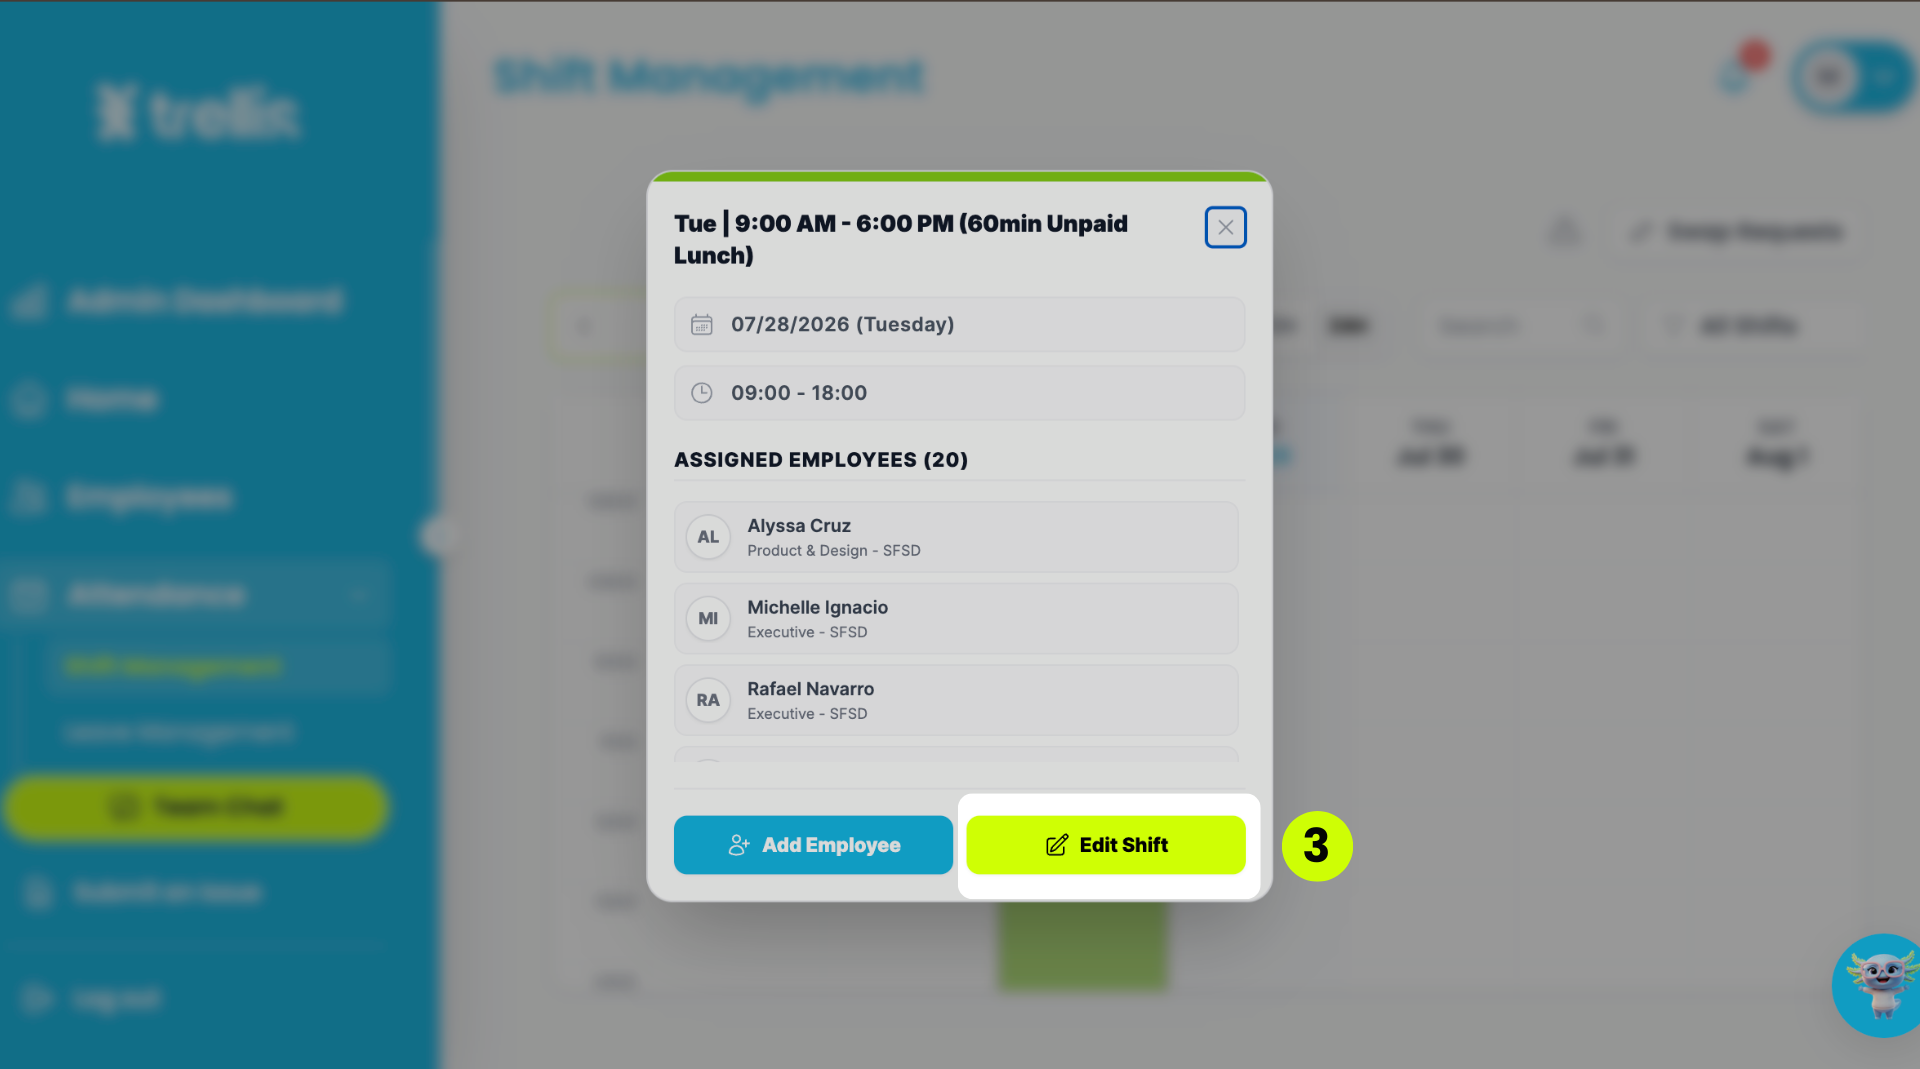
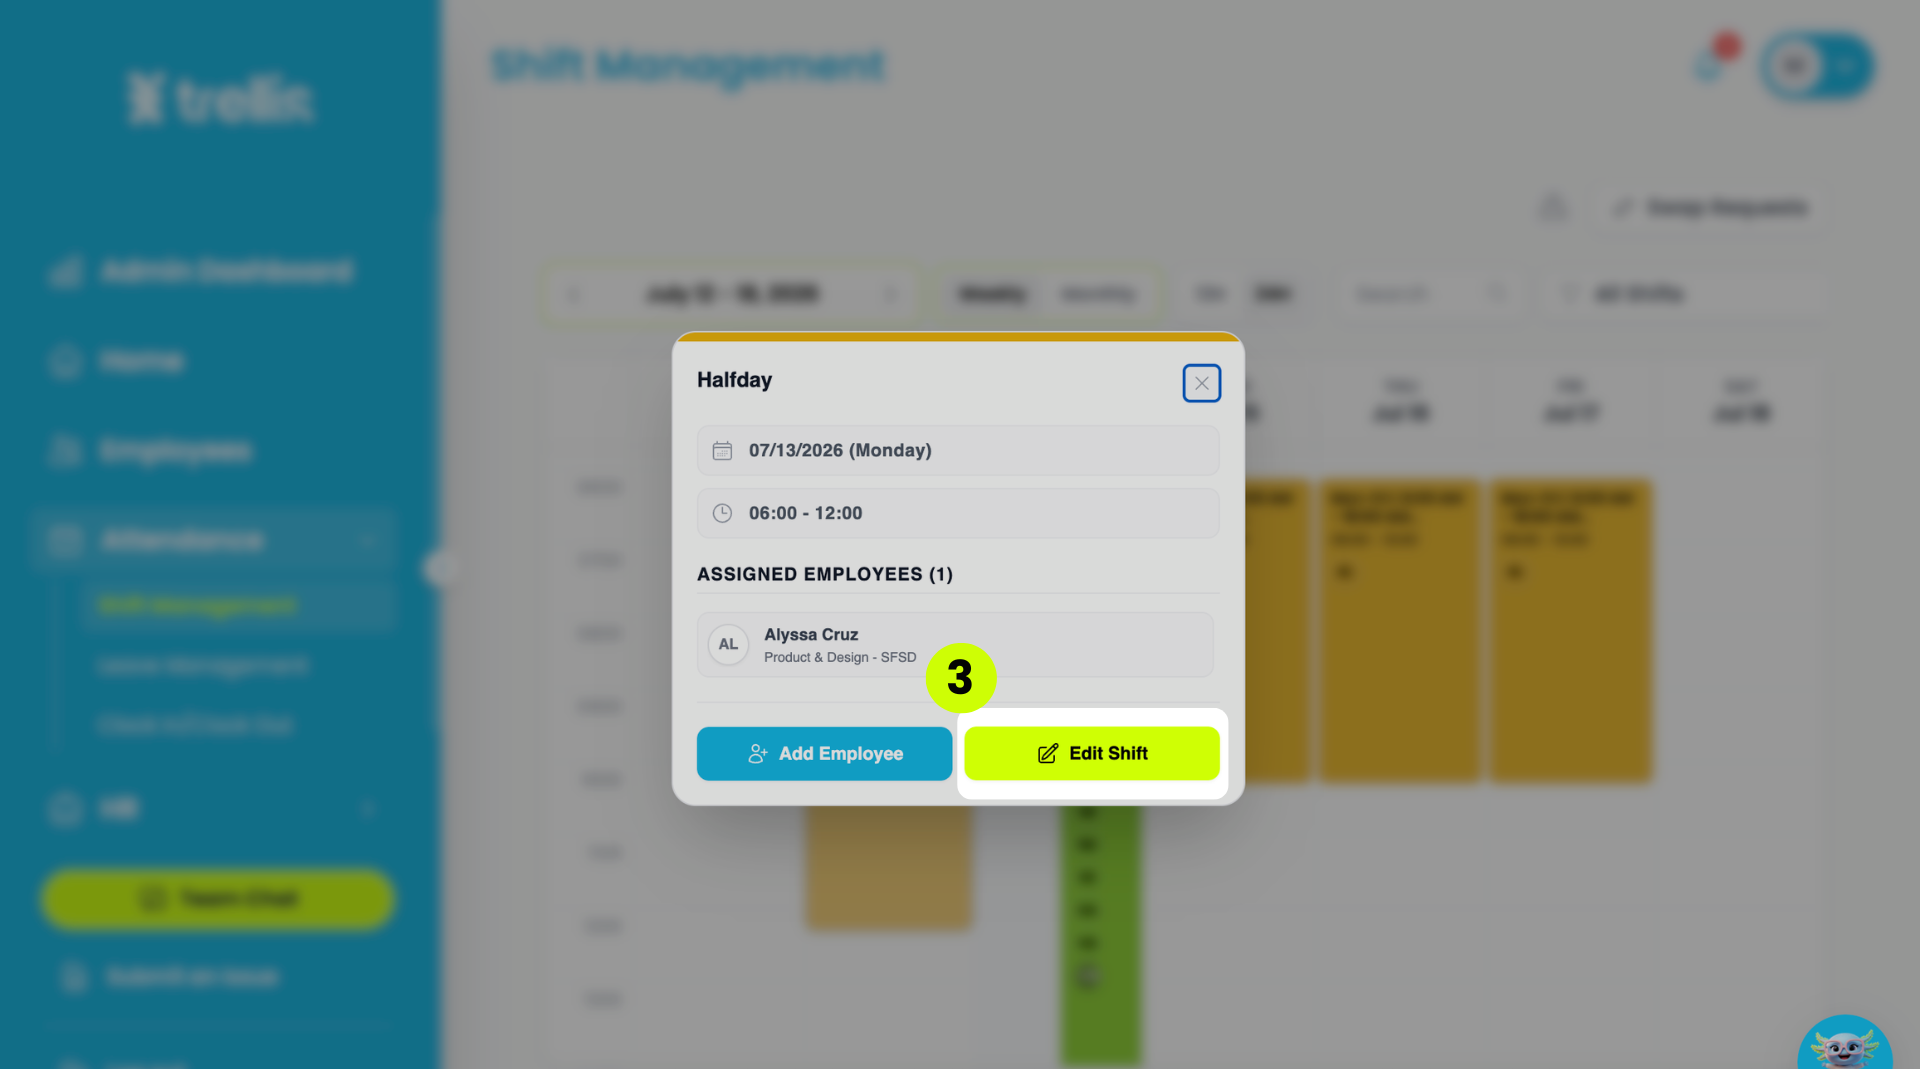
A popup will appear showing the shift details including the date, time, and list of "Assigned Employees”. Click "Edit Shift" to proceed.
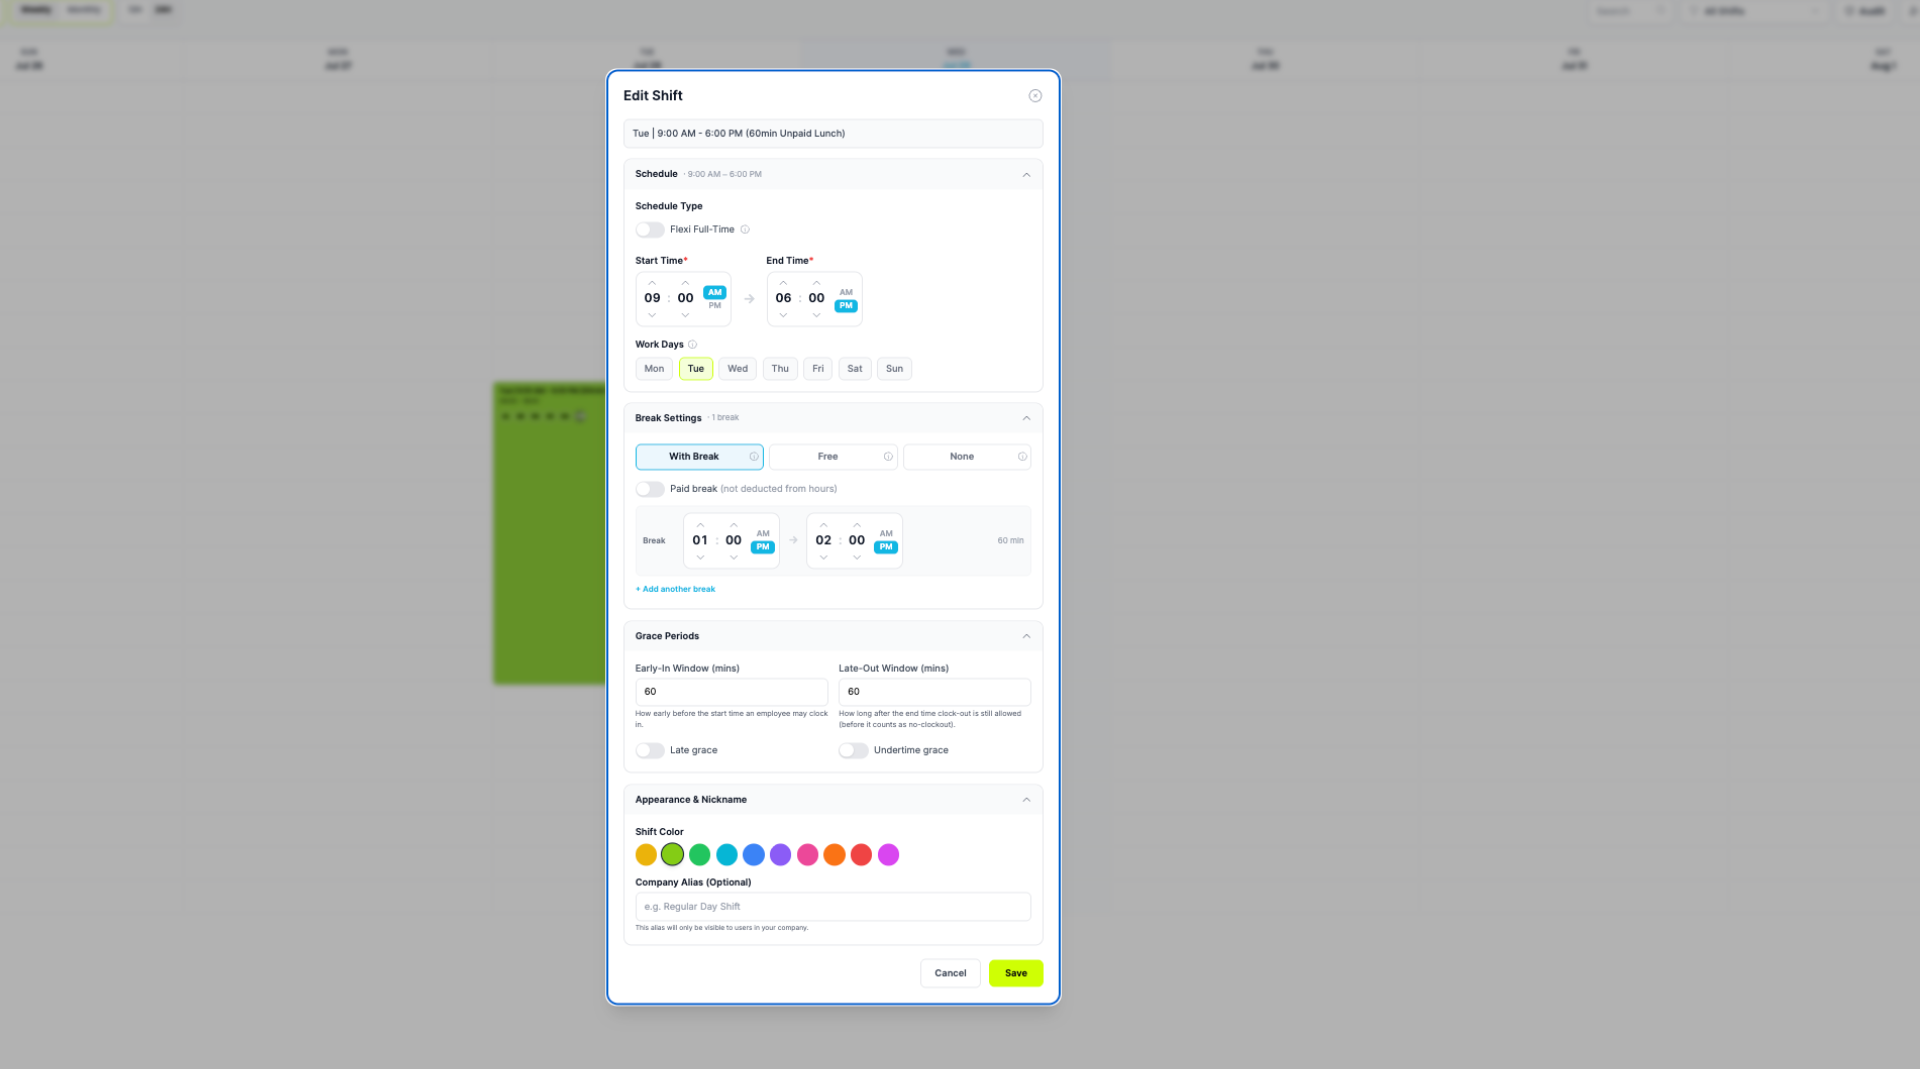
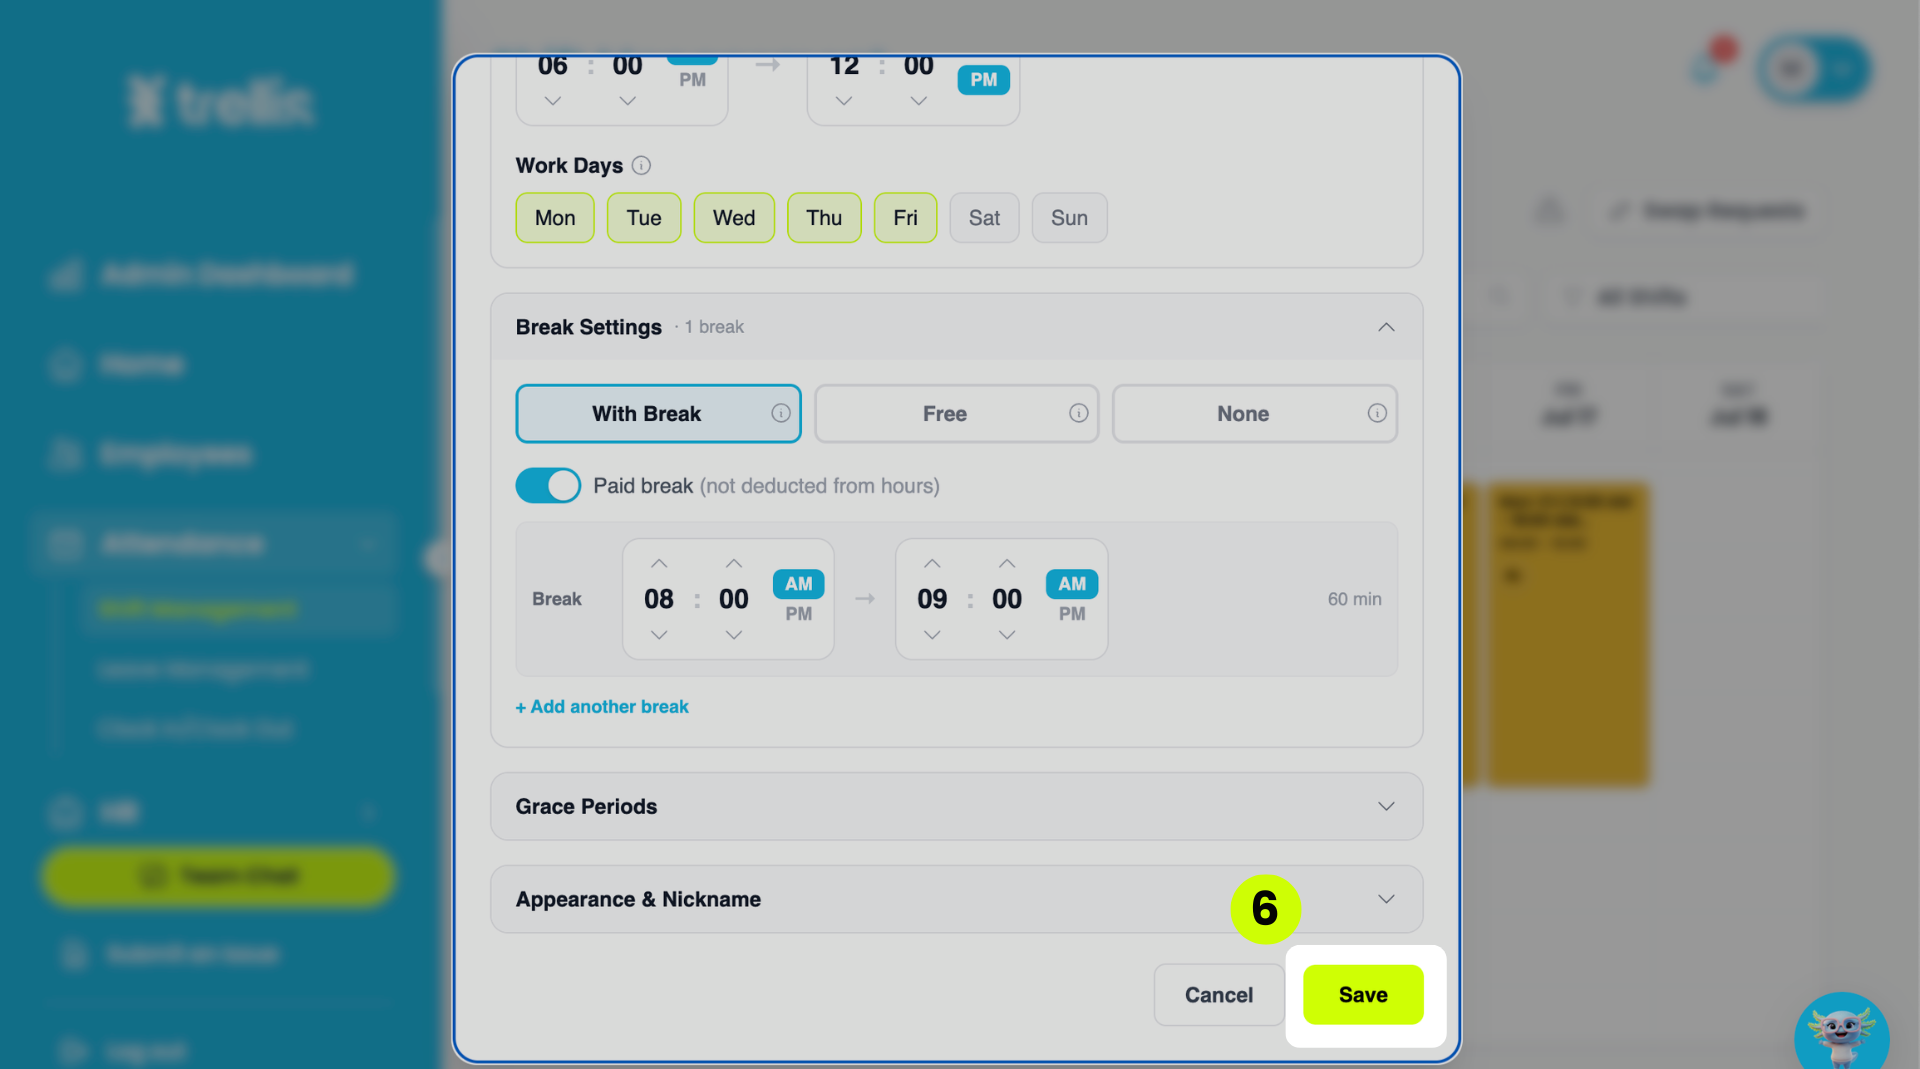
The “Edit Shift” window will appear. Update the fields as needed, then click “Save”.
Schedule Type & Flex Allowance — adjust if Flexi Full-Time applies
Start Time & End Time — update the shift hours
Work Days — update which days this shift applies to
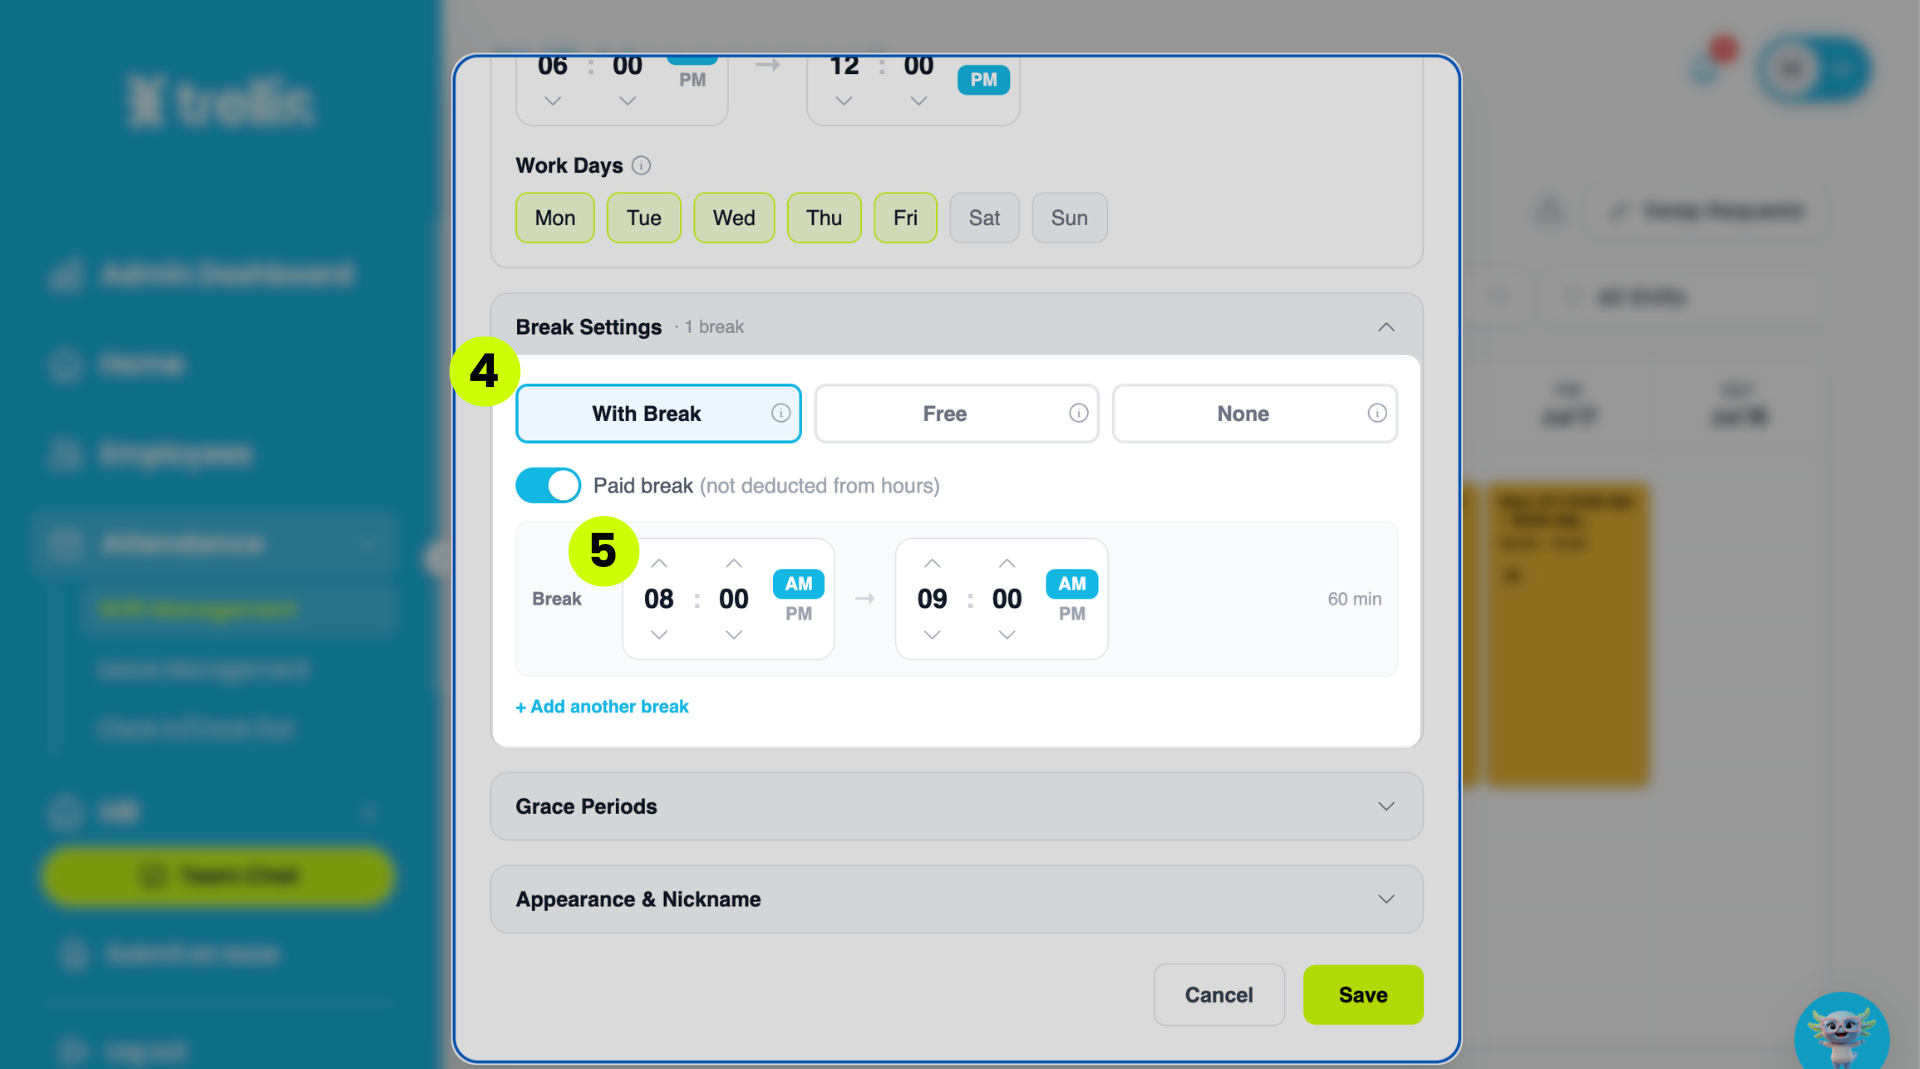
Break Settings — update the break type, start time, and end time
Grace Periods — update Early In and Late Out grace period minutes
Company Alias (optional) — update the internal name visible only within your company
Shift Color — change the color to identify this shift on the calendar
From the sidebar, click "HR" to expand the menu, then select "Clock In/Out Settings."
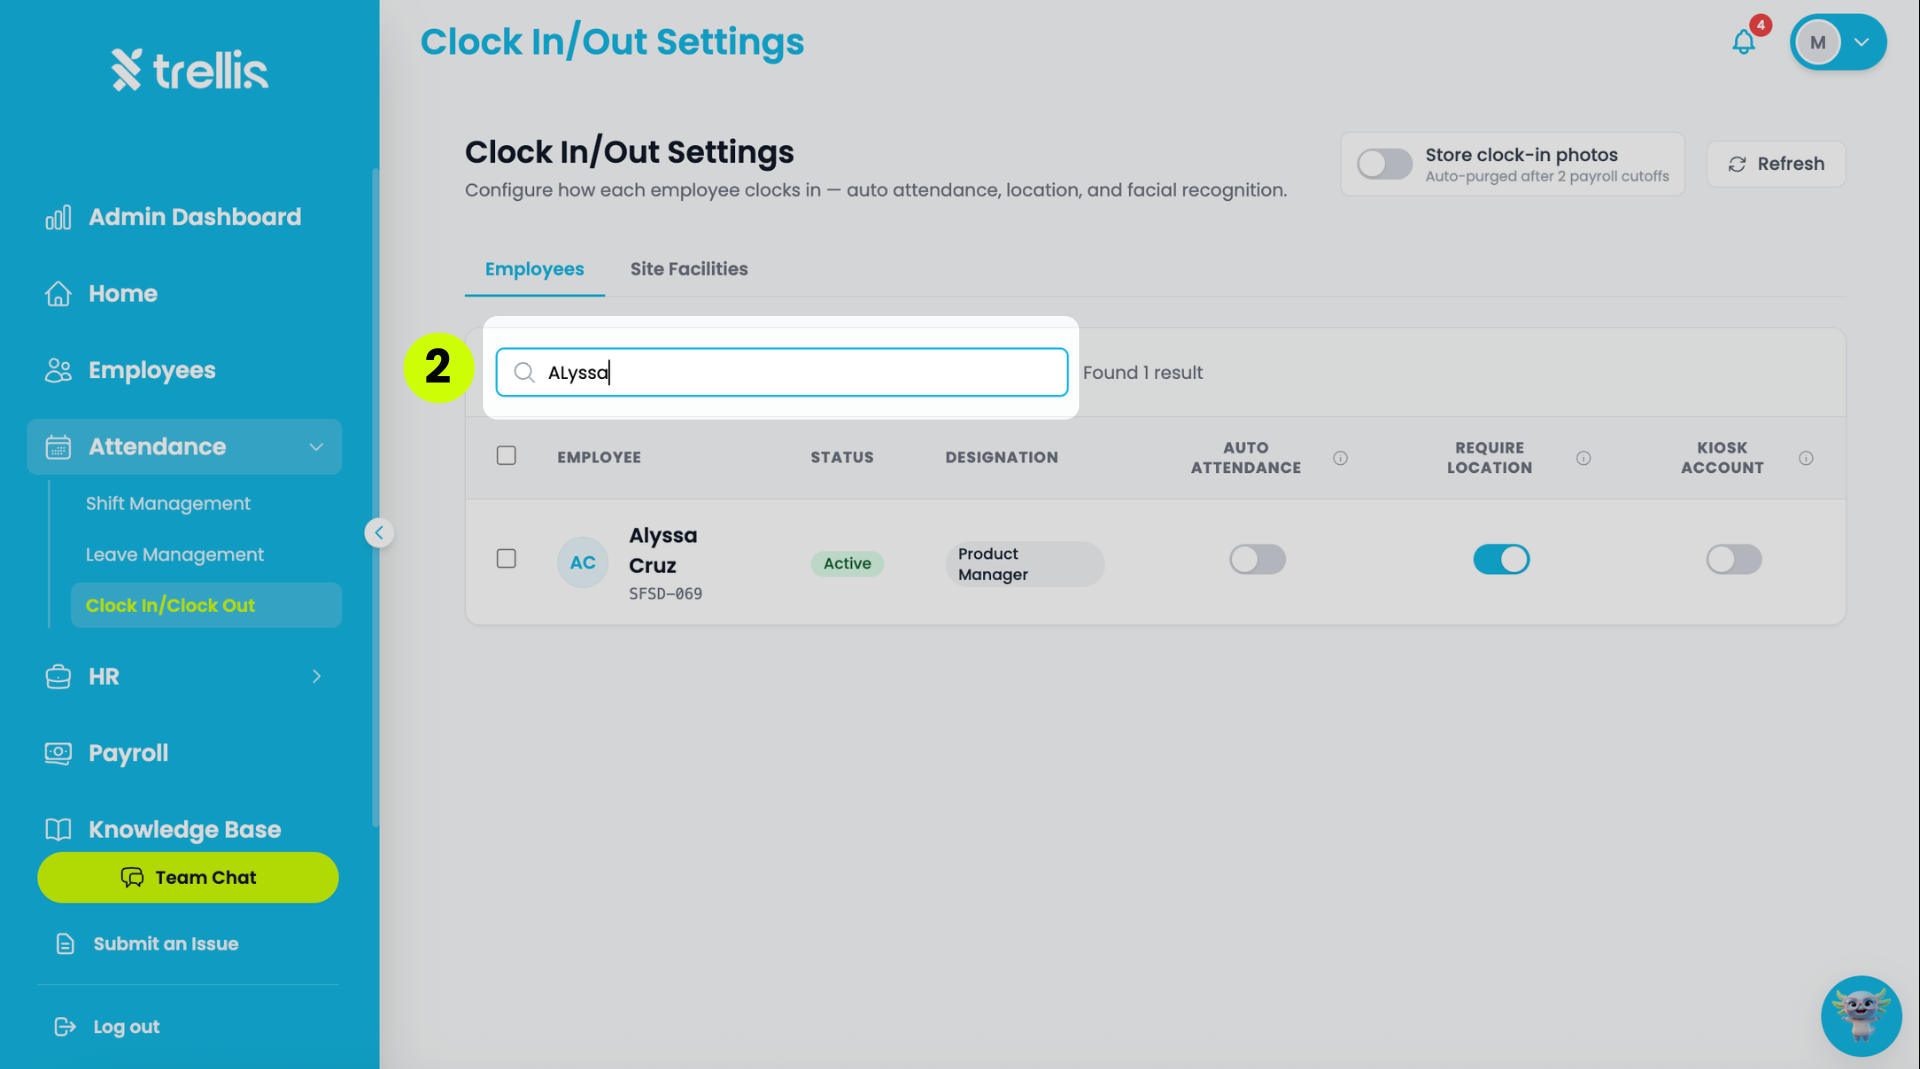
On the "Clock In/Out Settings" page, search for an employee by name using the search bar.
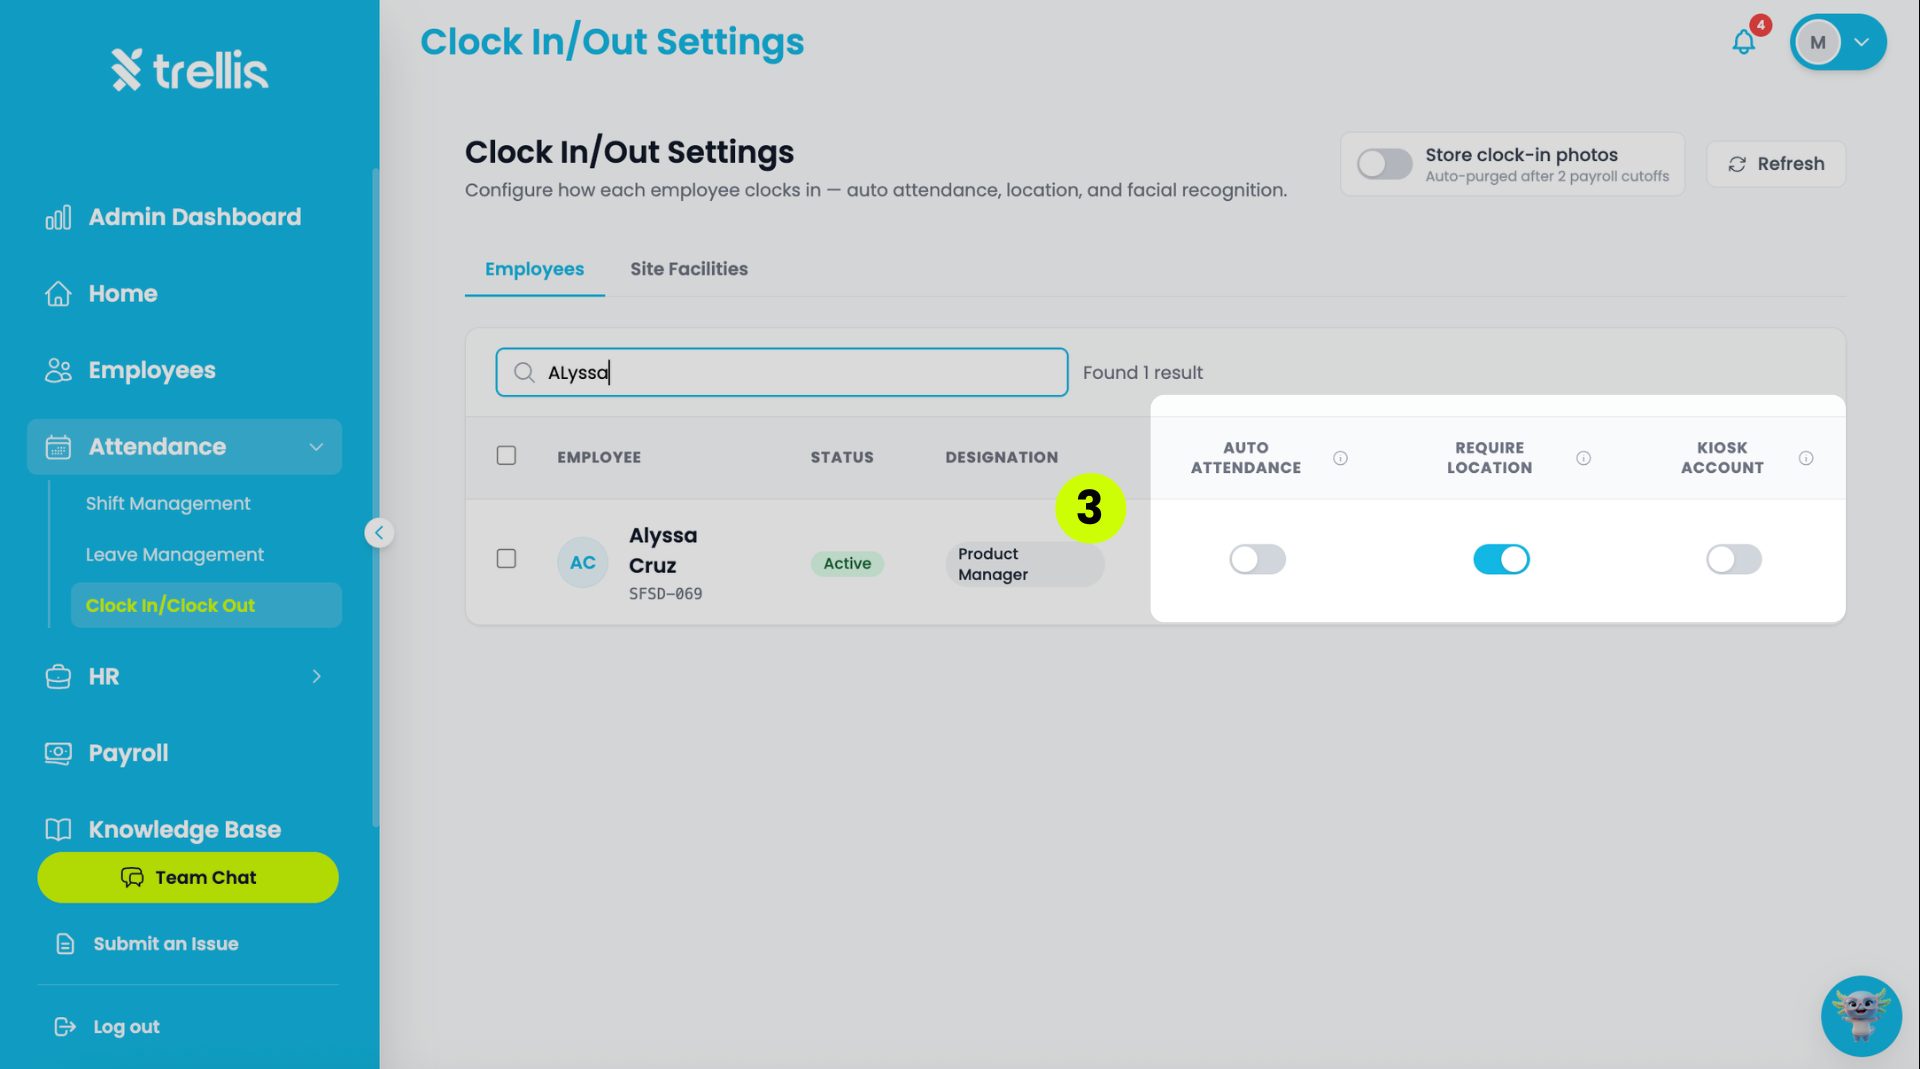
Toggle the switches to enable or disable the available settings.
Auto Attendance
Require Location
Kiosk Account
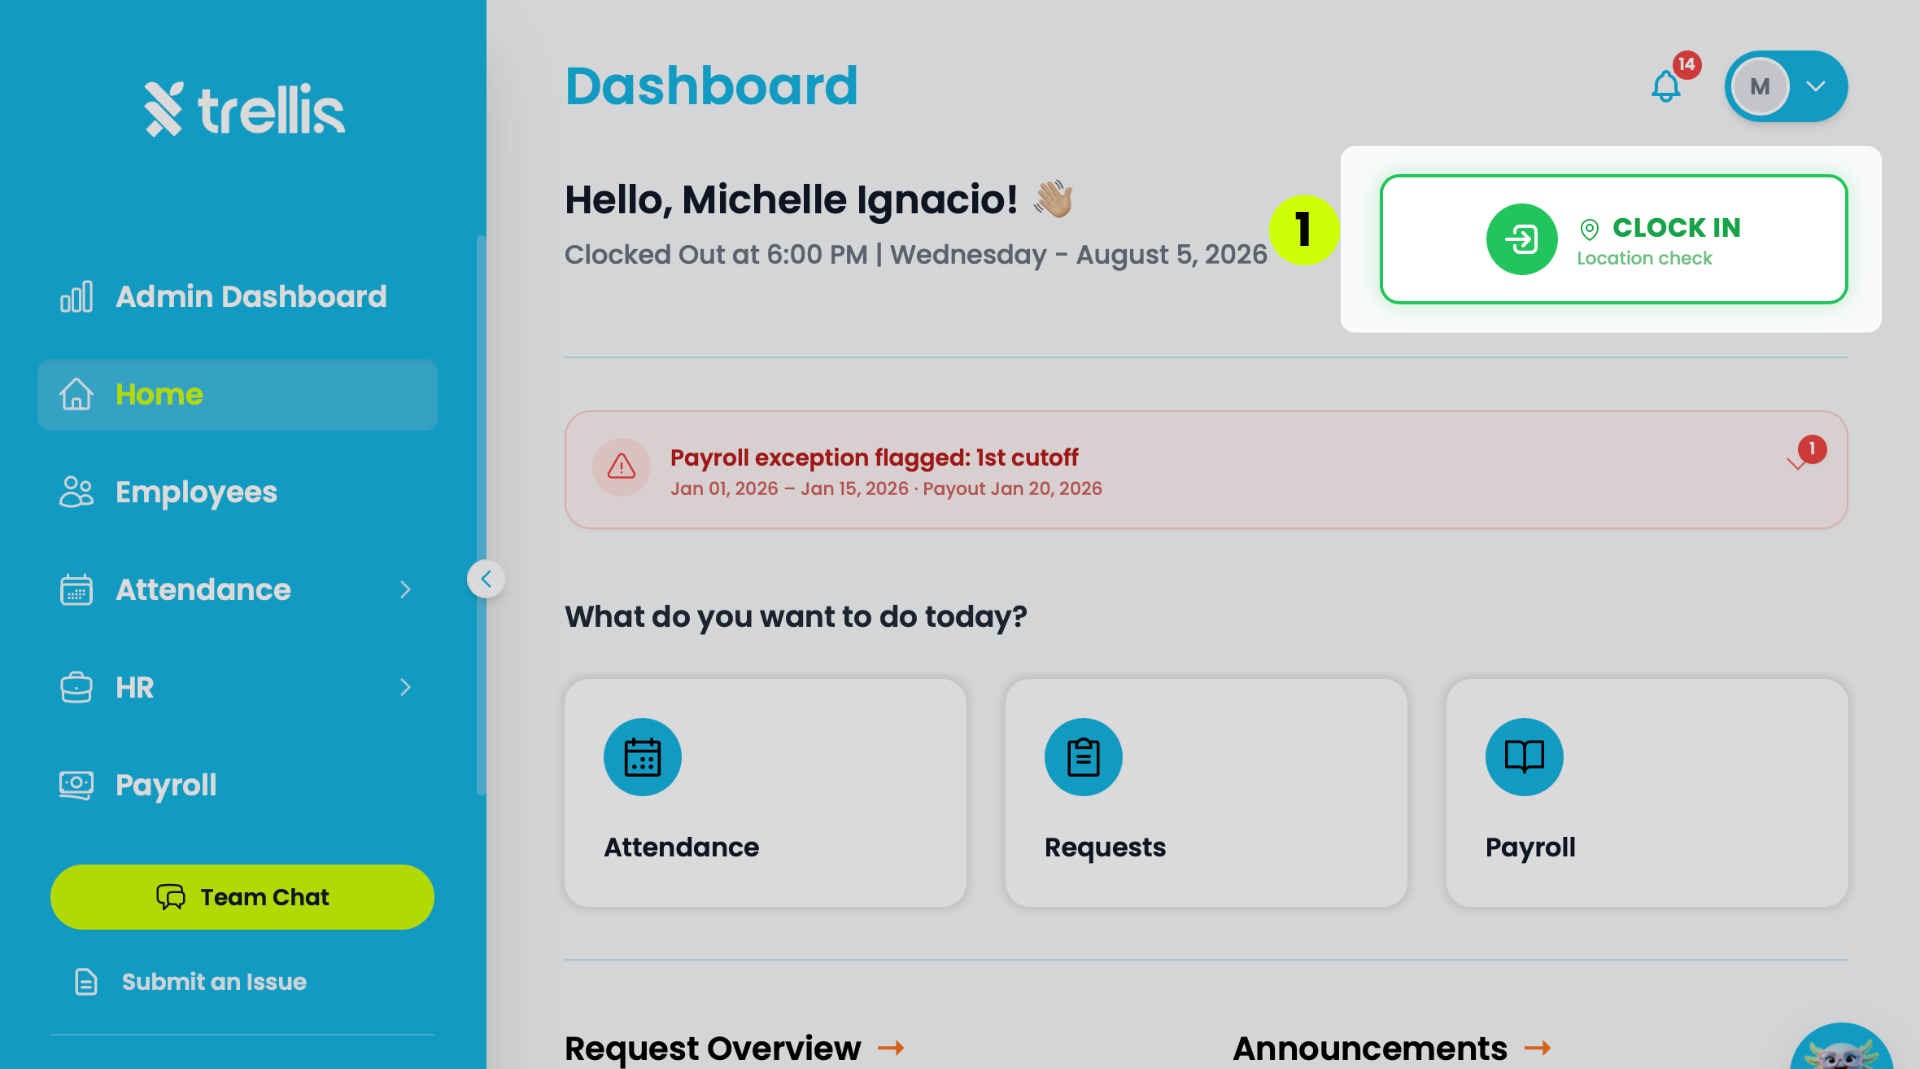
From the "Dashboard", click the "Clock-In" button in the top right corner.
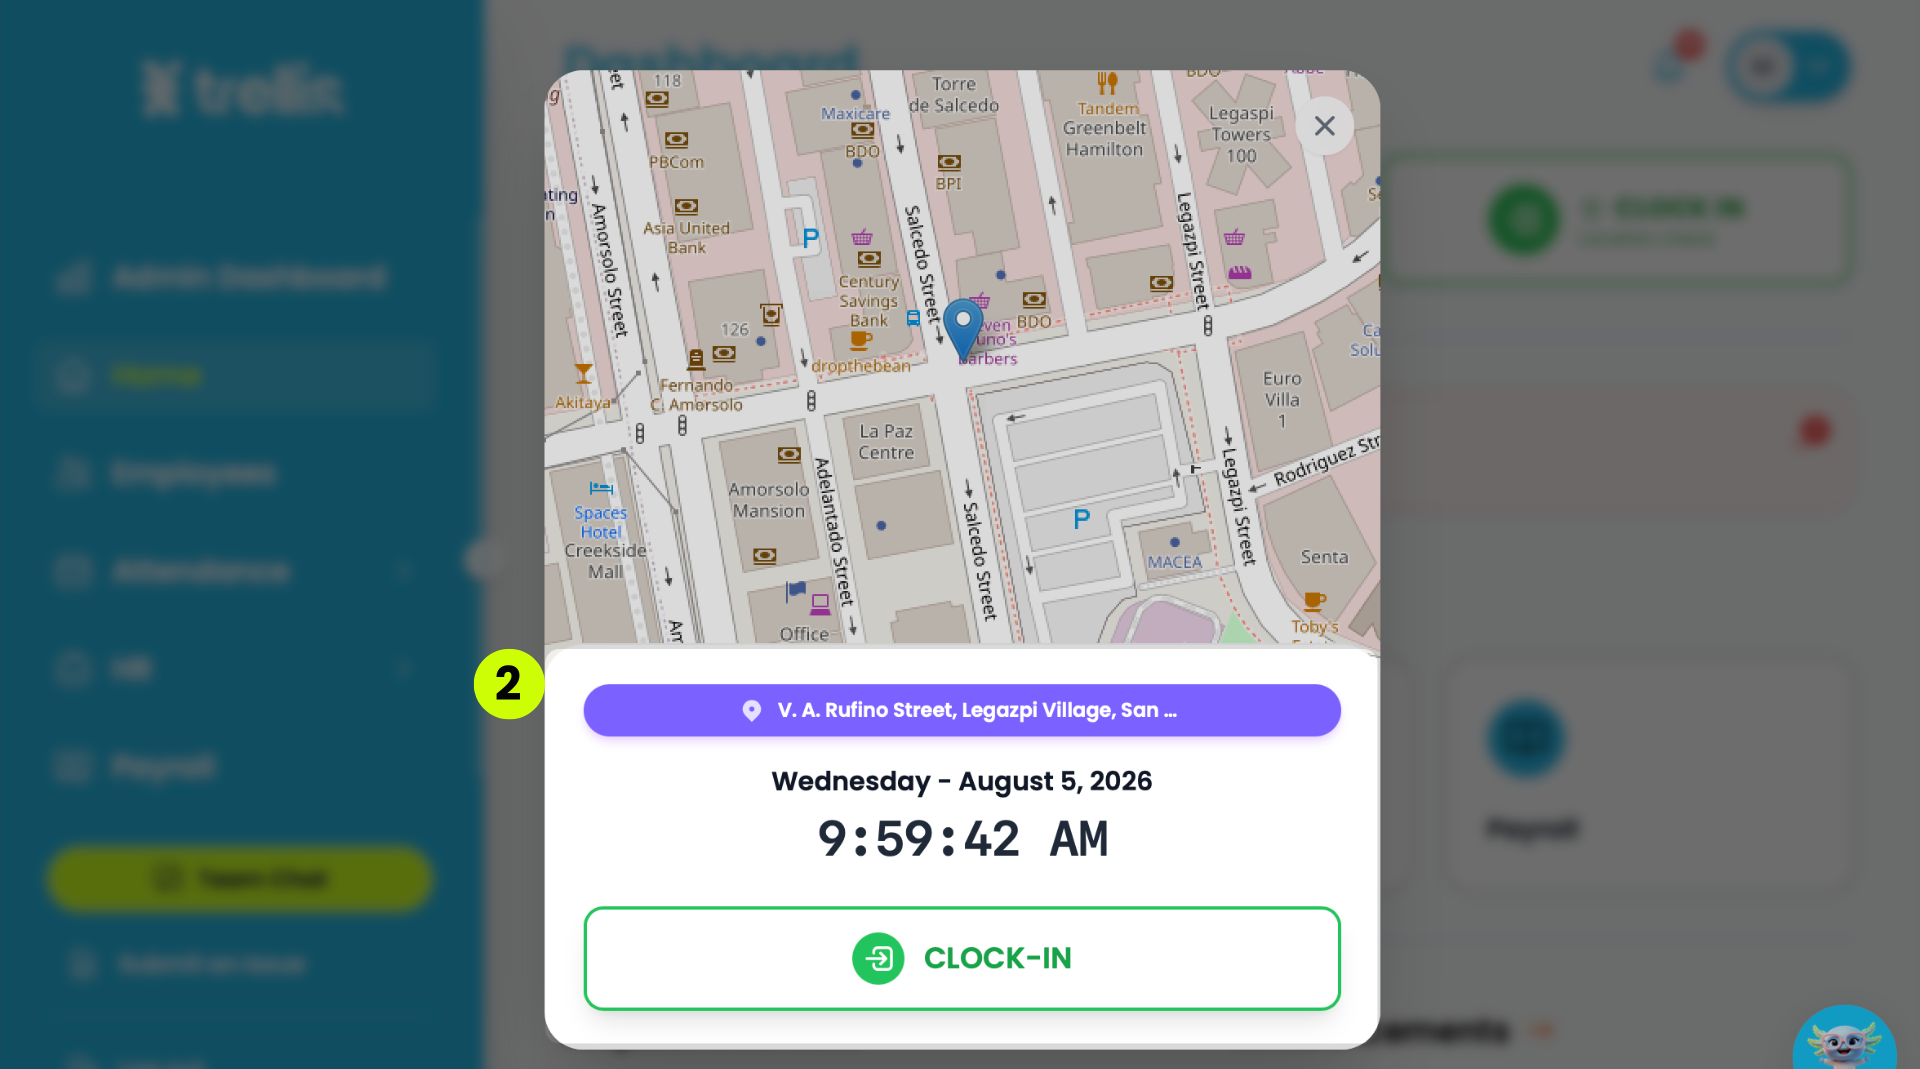
A dialog will appear showing your current location on the map and the time. Click "Clock-In" to confirm.
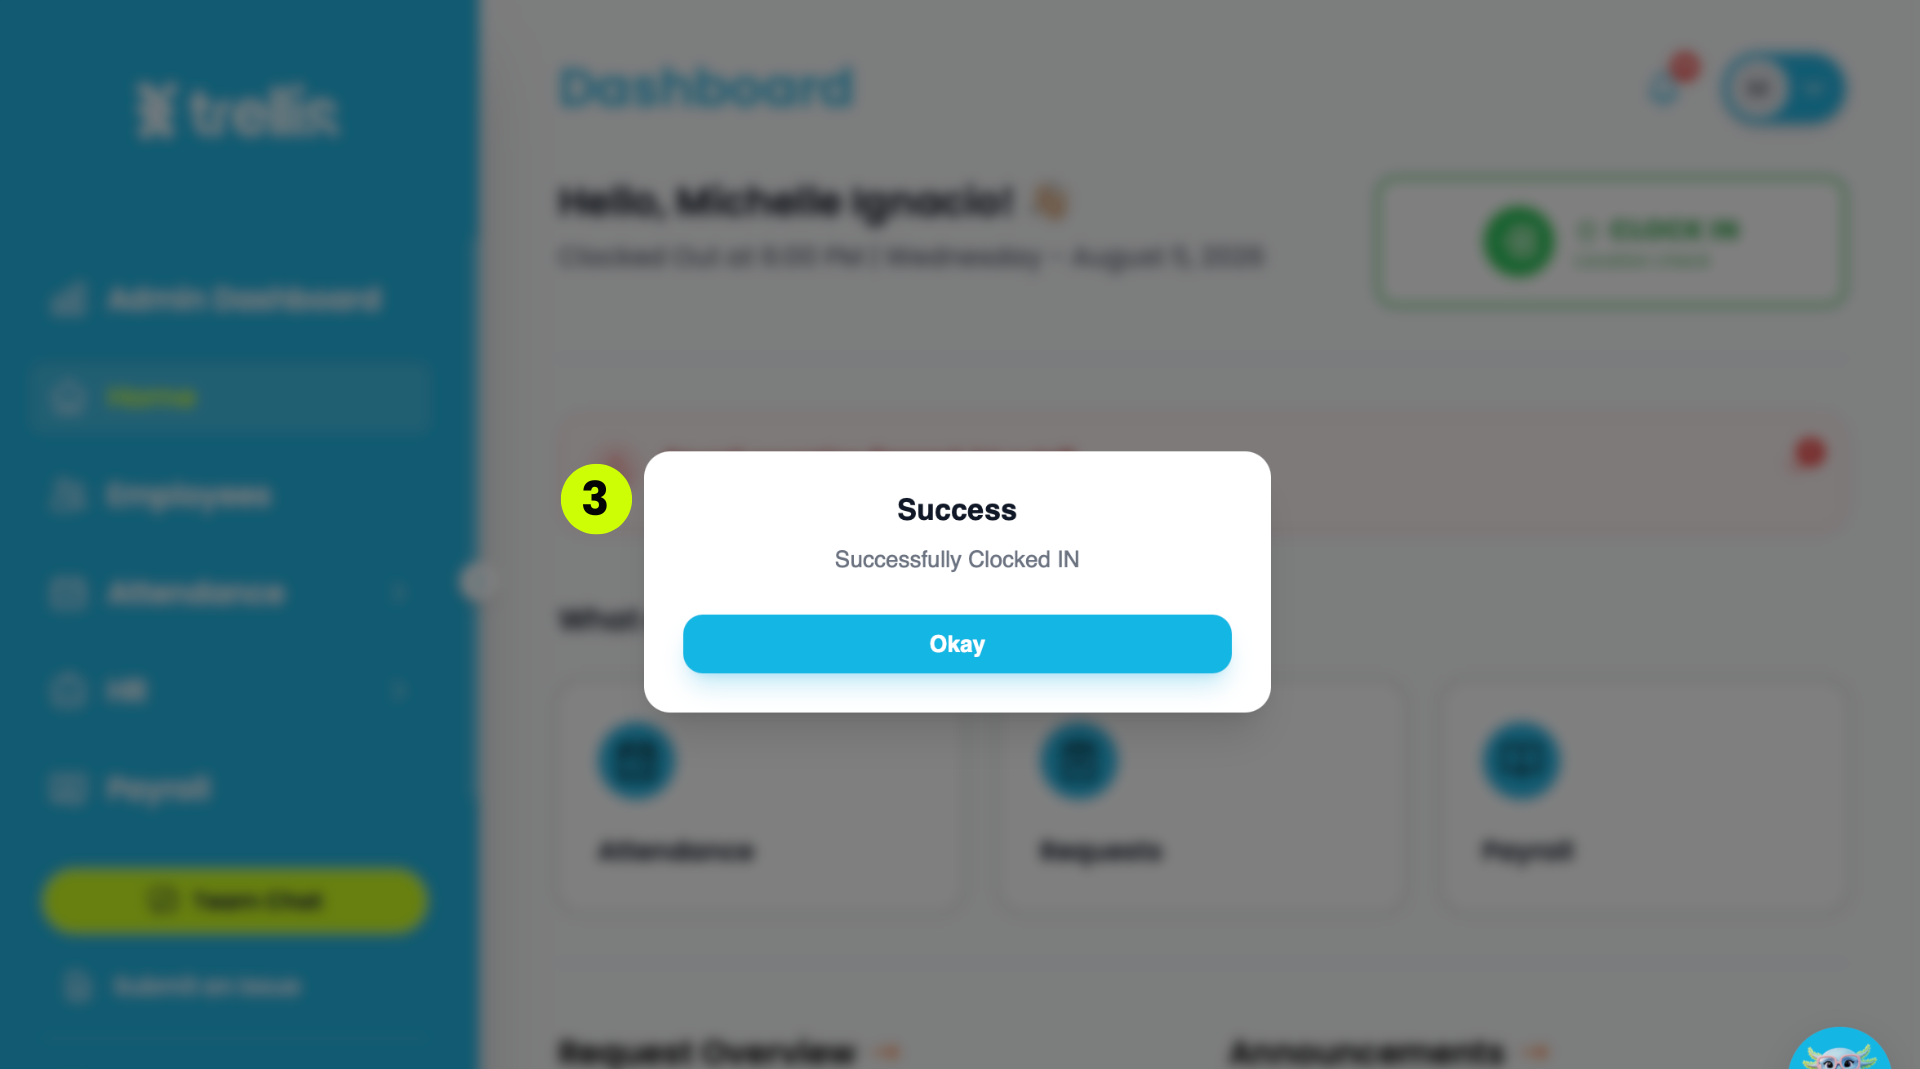
You are now clocked in. The dashboard will update to show your clock-in time, and the "Clock Out" and "No Break "buttons will appear in the top right corner. The "Break" button will only appear when you're close to your scheduled break time, depending on your assigned shift.
From the sidebar, click "Attendance", then select "Shift Management.”
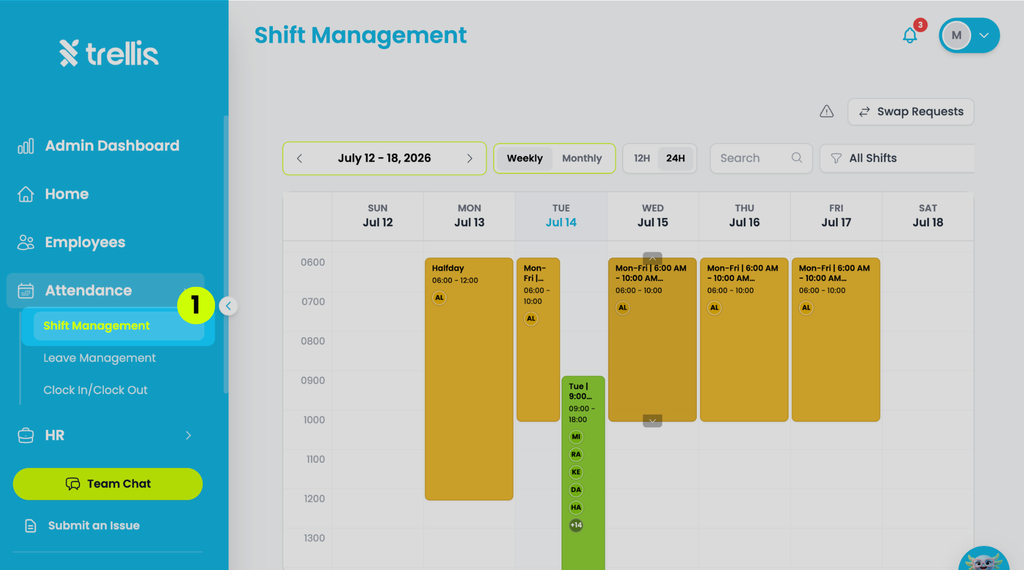
On the calendar, click the shift to edit.
On the popup screen, click the button “Edit Shift.”
Scroll down to break settings and press the “With Break” button to expand the break time menu.
Input the time you want for the break. Click “+Add another break” if you want to add multiple breaks in a shift.
Finally, click “Save.”
No articles match your search.
Reach out to our support team and we'll guide you through it.
Contact Support